
Homemade Toffee Pieces
Some of the links in this post might be affiliate links. As an Amazon Associate I earn from qualifying purchases. This means I earn a small amount of money if you purchase something through the link, at no cost to you. I promise I only recommend items I love! You can read our full disclosure here.
Why should I make toffee from scratch?
Because it it 1000000000000000x better than the storebought stuff!
Seriously, this stuff is addictive. I KNOW you can just go to the store and buy a bag of Skor bits, but once you try this recipe, I promise you that you will never ever want to do that ever again. Those storebought toffee pieces will be so disappointing once you know what it should really taste like.
Also, this recipe is EASY! You can double or triple it and have toffee on hand for all of your baking adventures for the next few months.
Also, did you know that Skor bits contain almonds? So if you have an allergy or are baking for somebody with an allergy to almonds you can’t use them! I’m not sure if there are other toffee bit brands out there, but Skor is the only one I’ve seen here in Canada. My recipe contains NO NUTS so anybody who has missed out on delightful toffee filled desserts in the past because of allergies - you don’t have to miss out anymore!
What can Toffee Pieces be Used For?
Put them in cookies (replace the sprinkles in my Vanilla Sprinkle Cookie recipe to make vanilla toffee cookies!!
Sprinkle them on ice cream
Eat them by the handful
Put them in cake or cupcakes (replace the sprinkles in my Funfetti Cake recipe for a toffee cake, and fill it with some salted caramel buttercream!)
How to Make Toffee Pieces:
Here’s what you’ll need:
-A baking sheet with a silicone mat
-A pot
-A food processor (the food processor linked is the one I use at home almost daily and I looooooove it!!!)
-Salted butter
-Granulated sugar
-Water
First, lay your silicone mat on your baking tray and set aside.
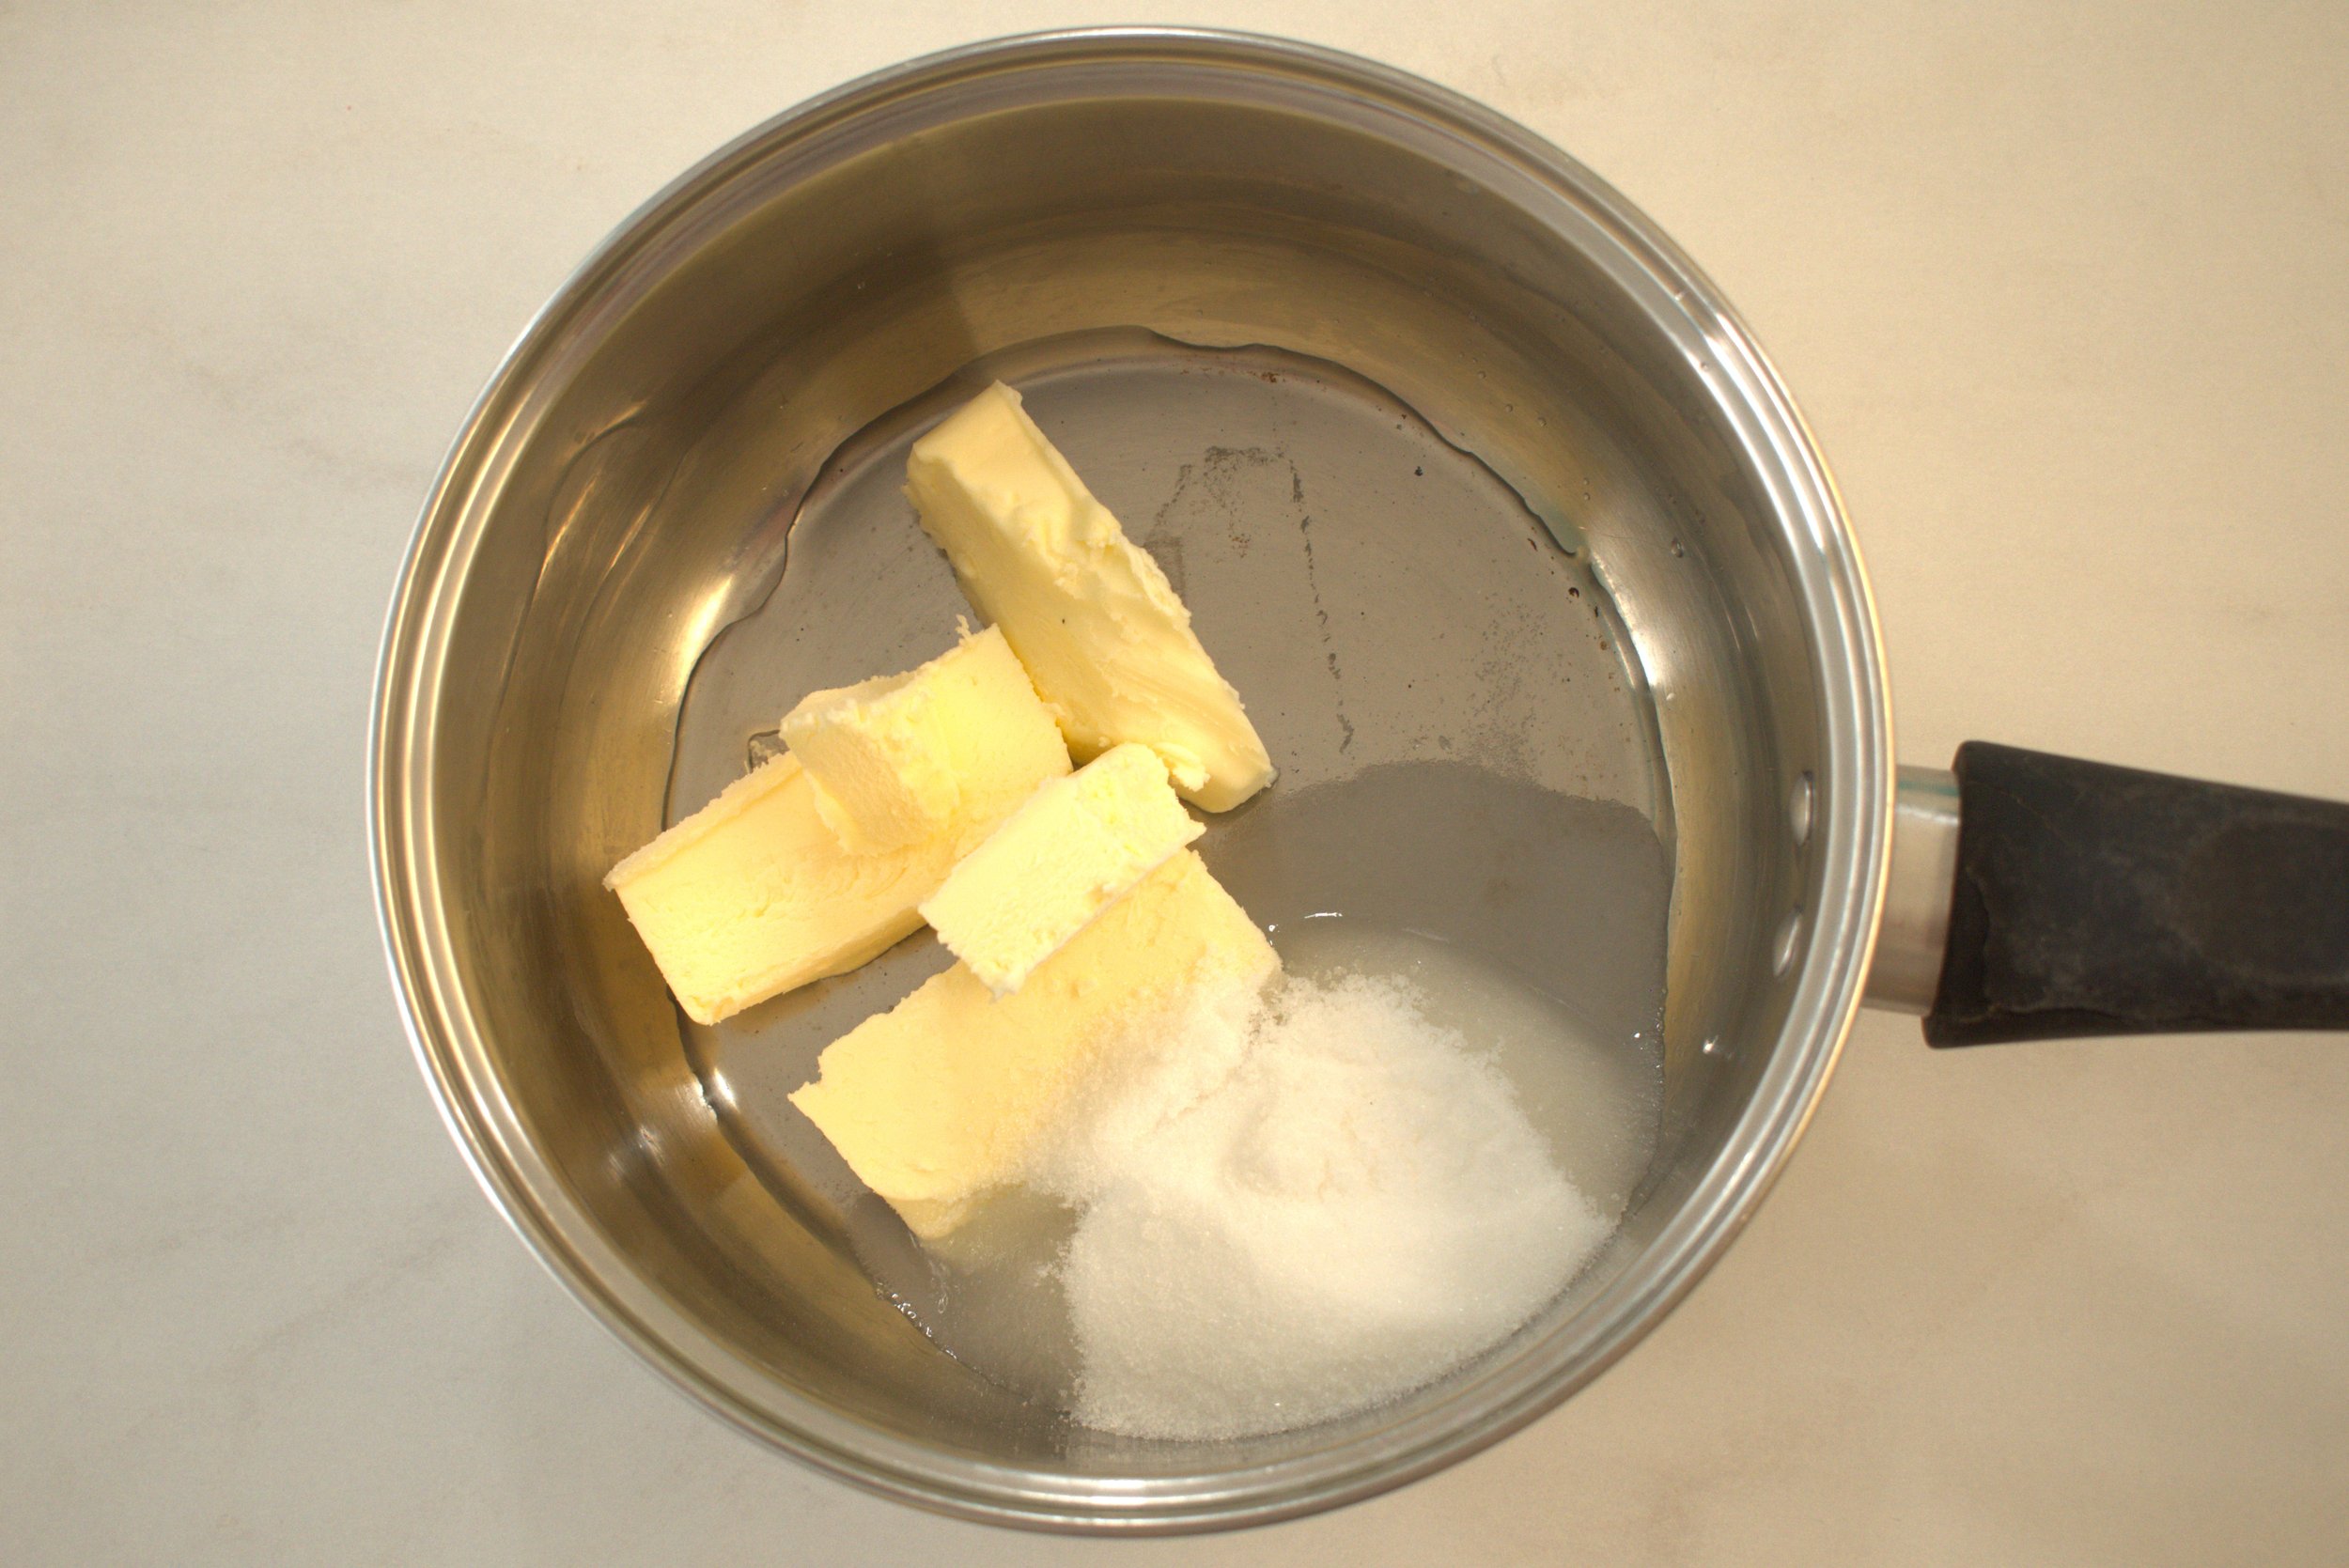
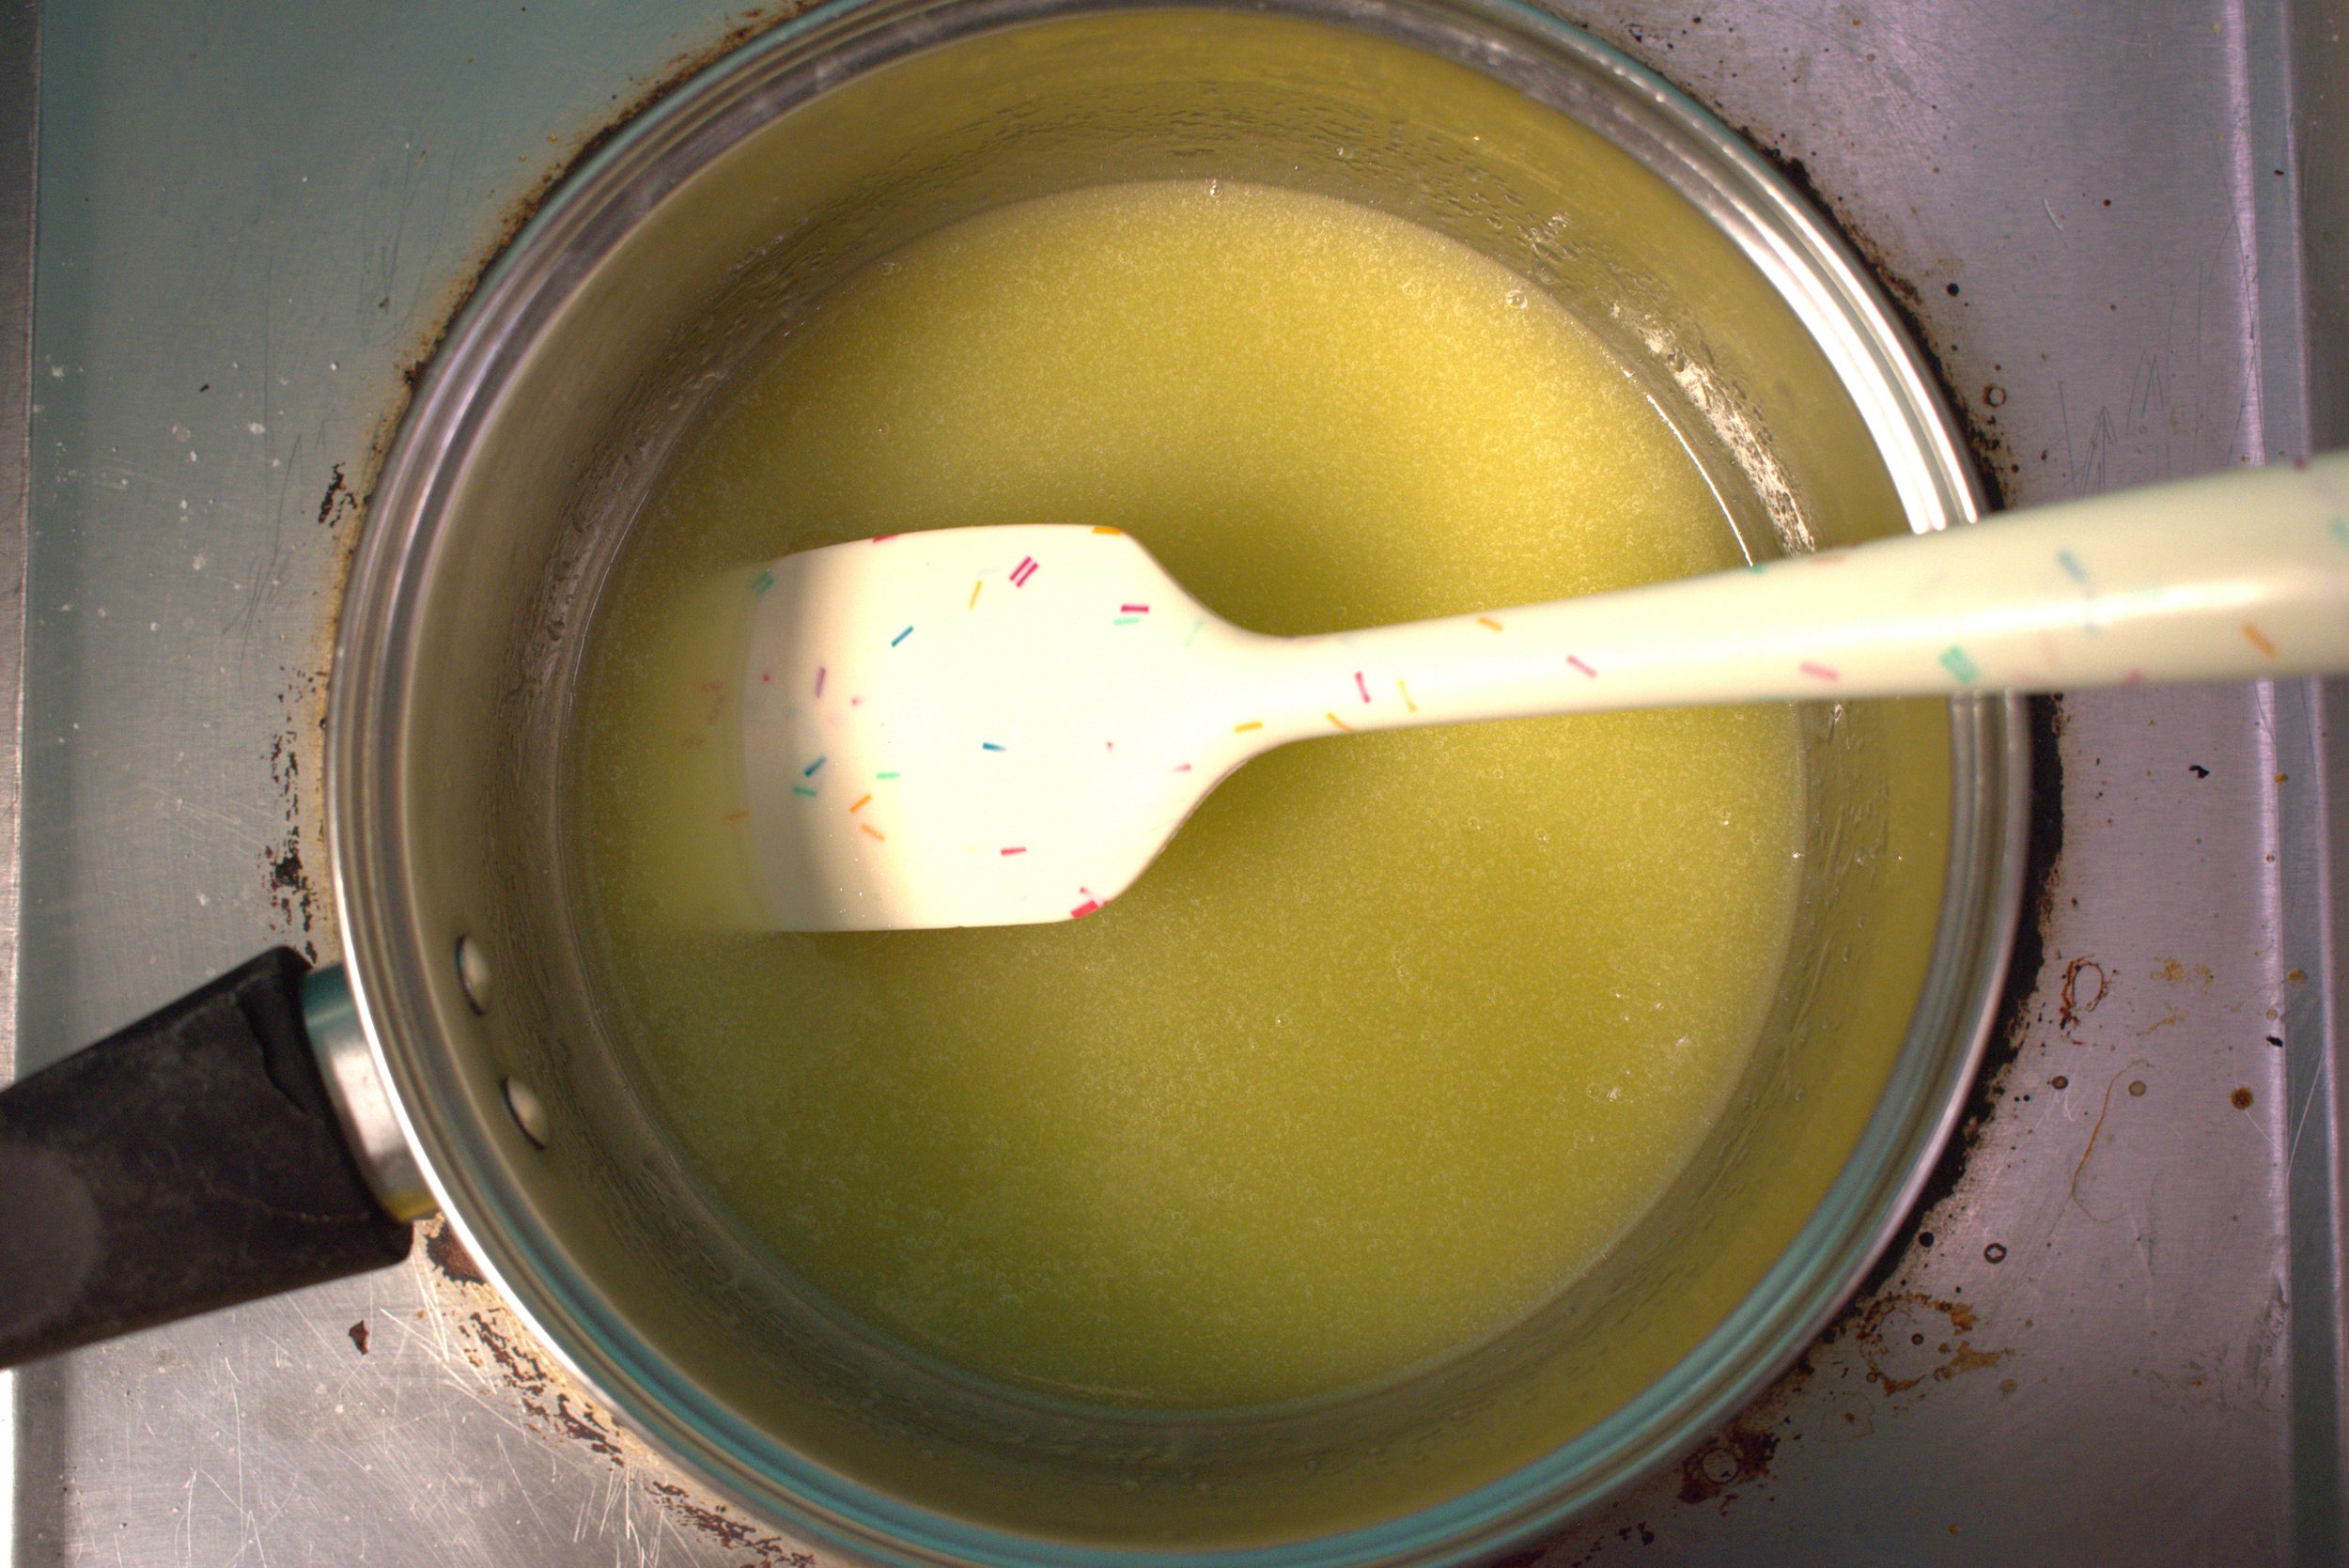
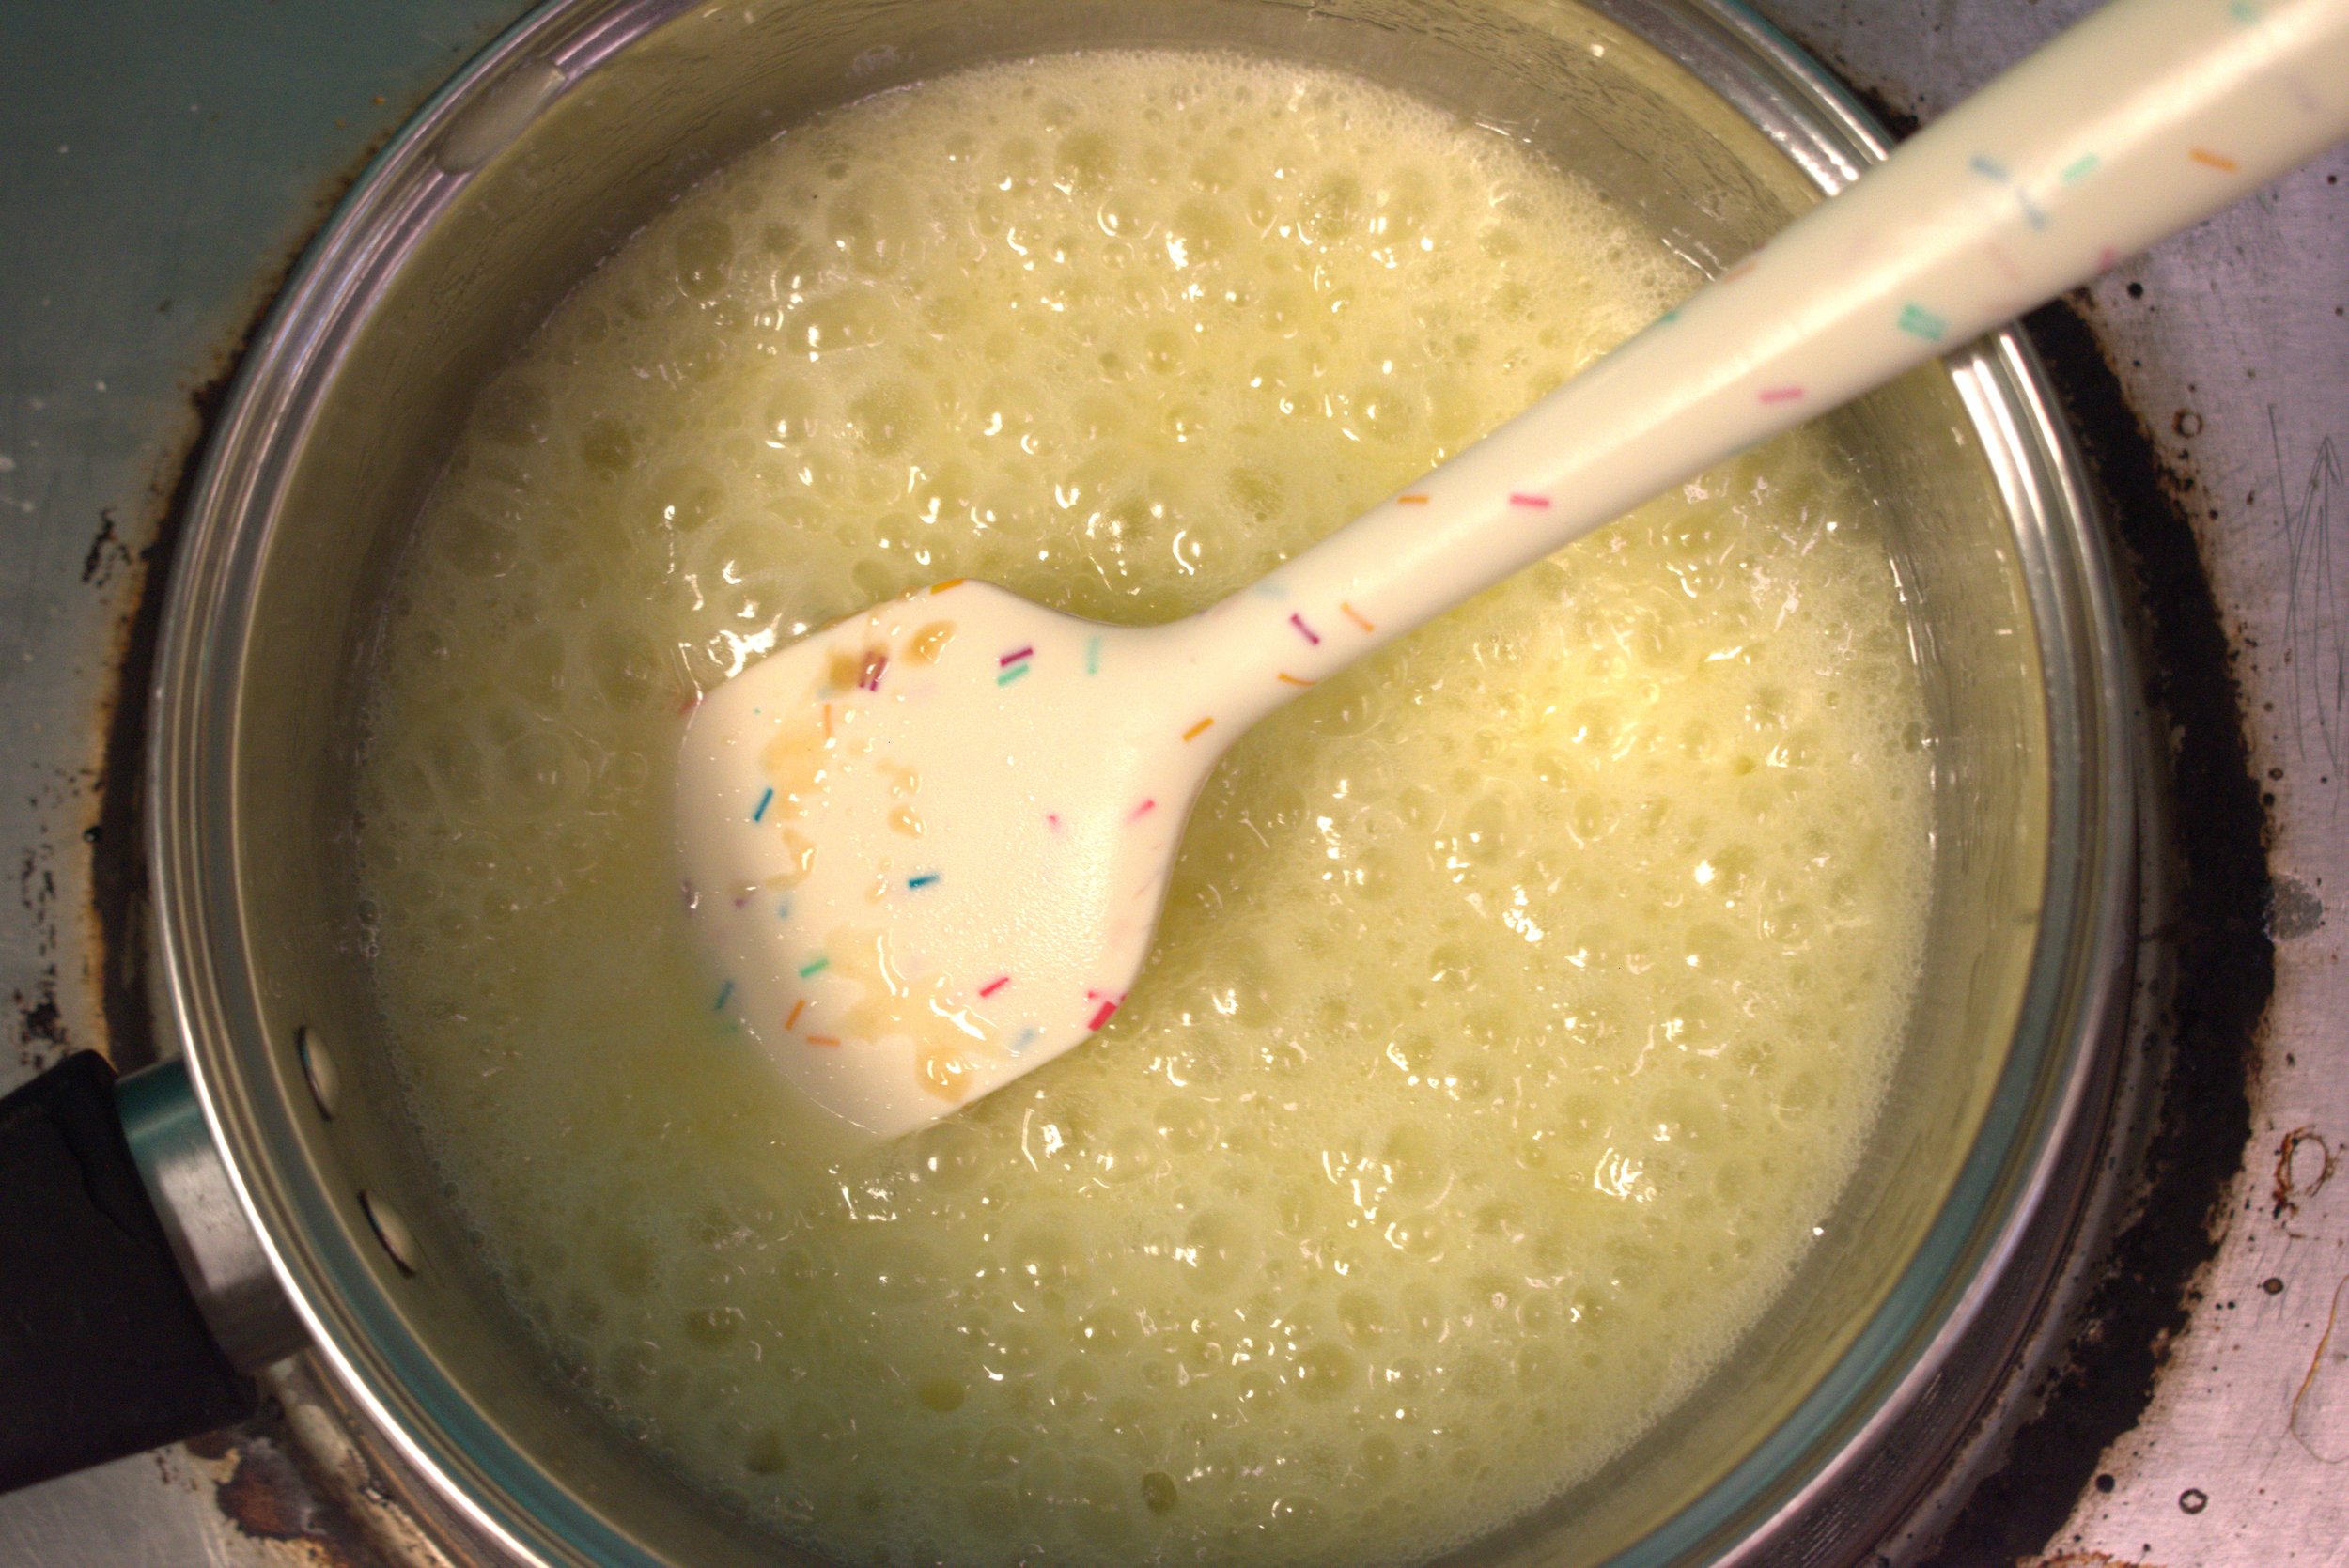
Put your butter, sugar, and water in your pot and place on the stove on low heat, stirring occasionally until the butter is completely melted.
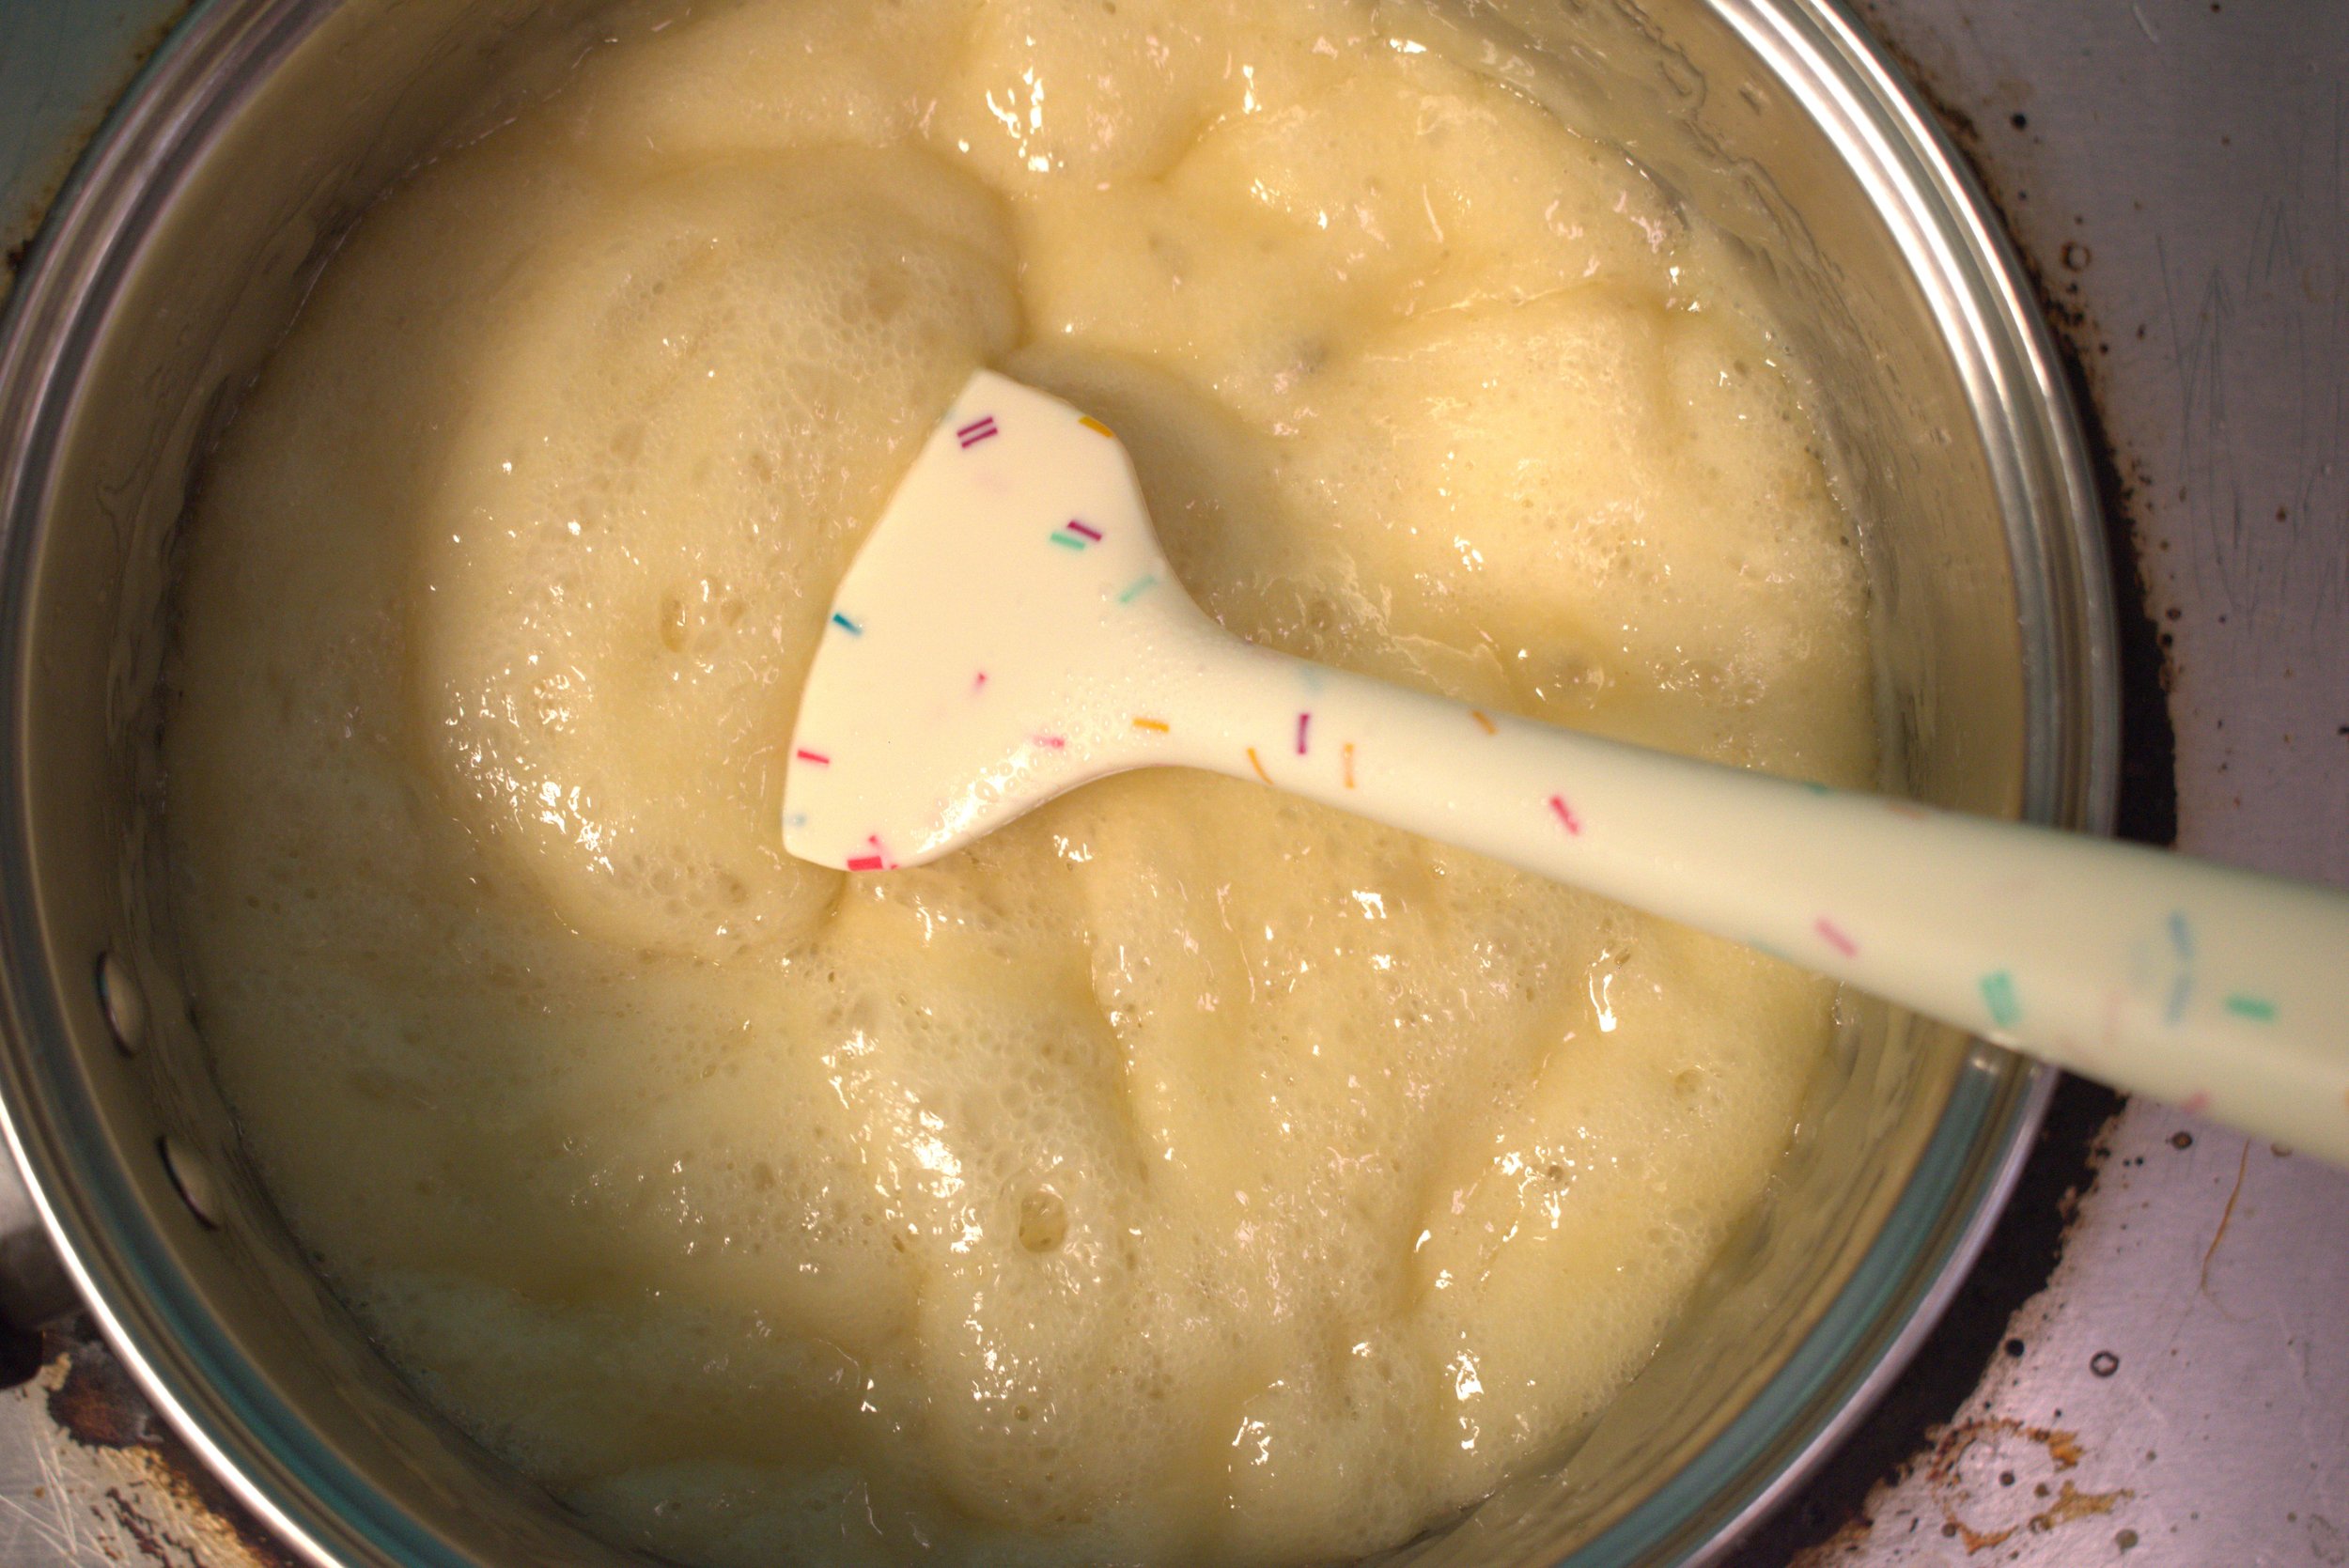
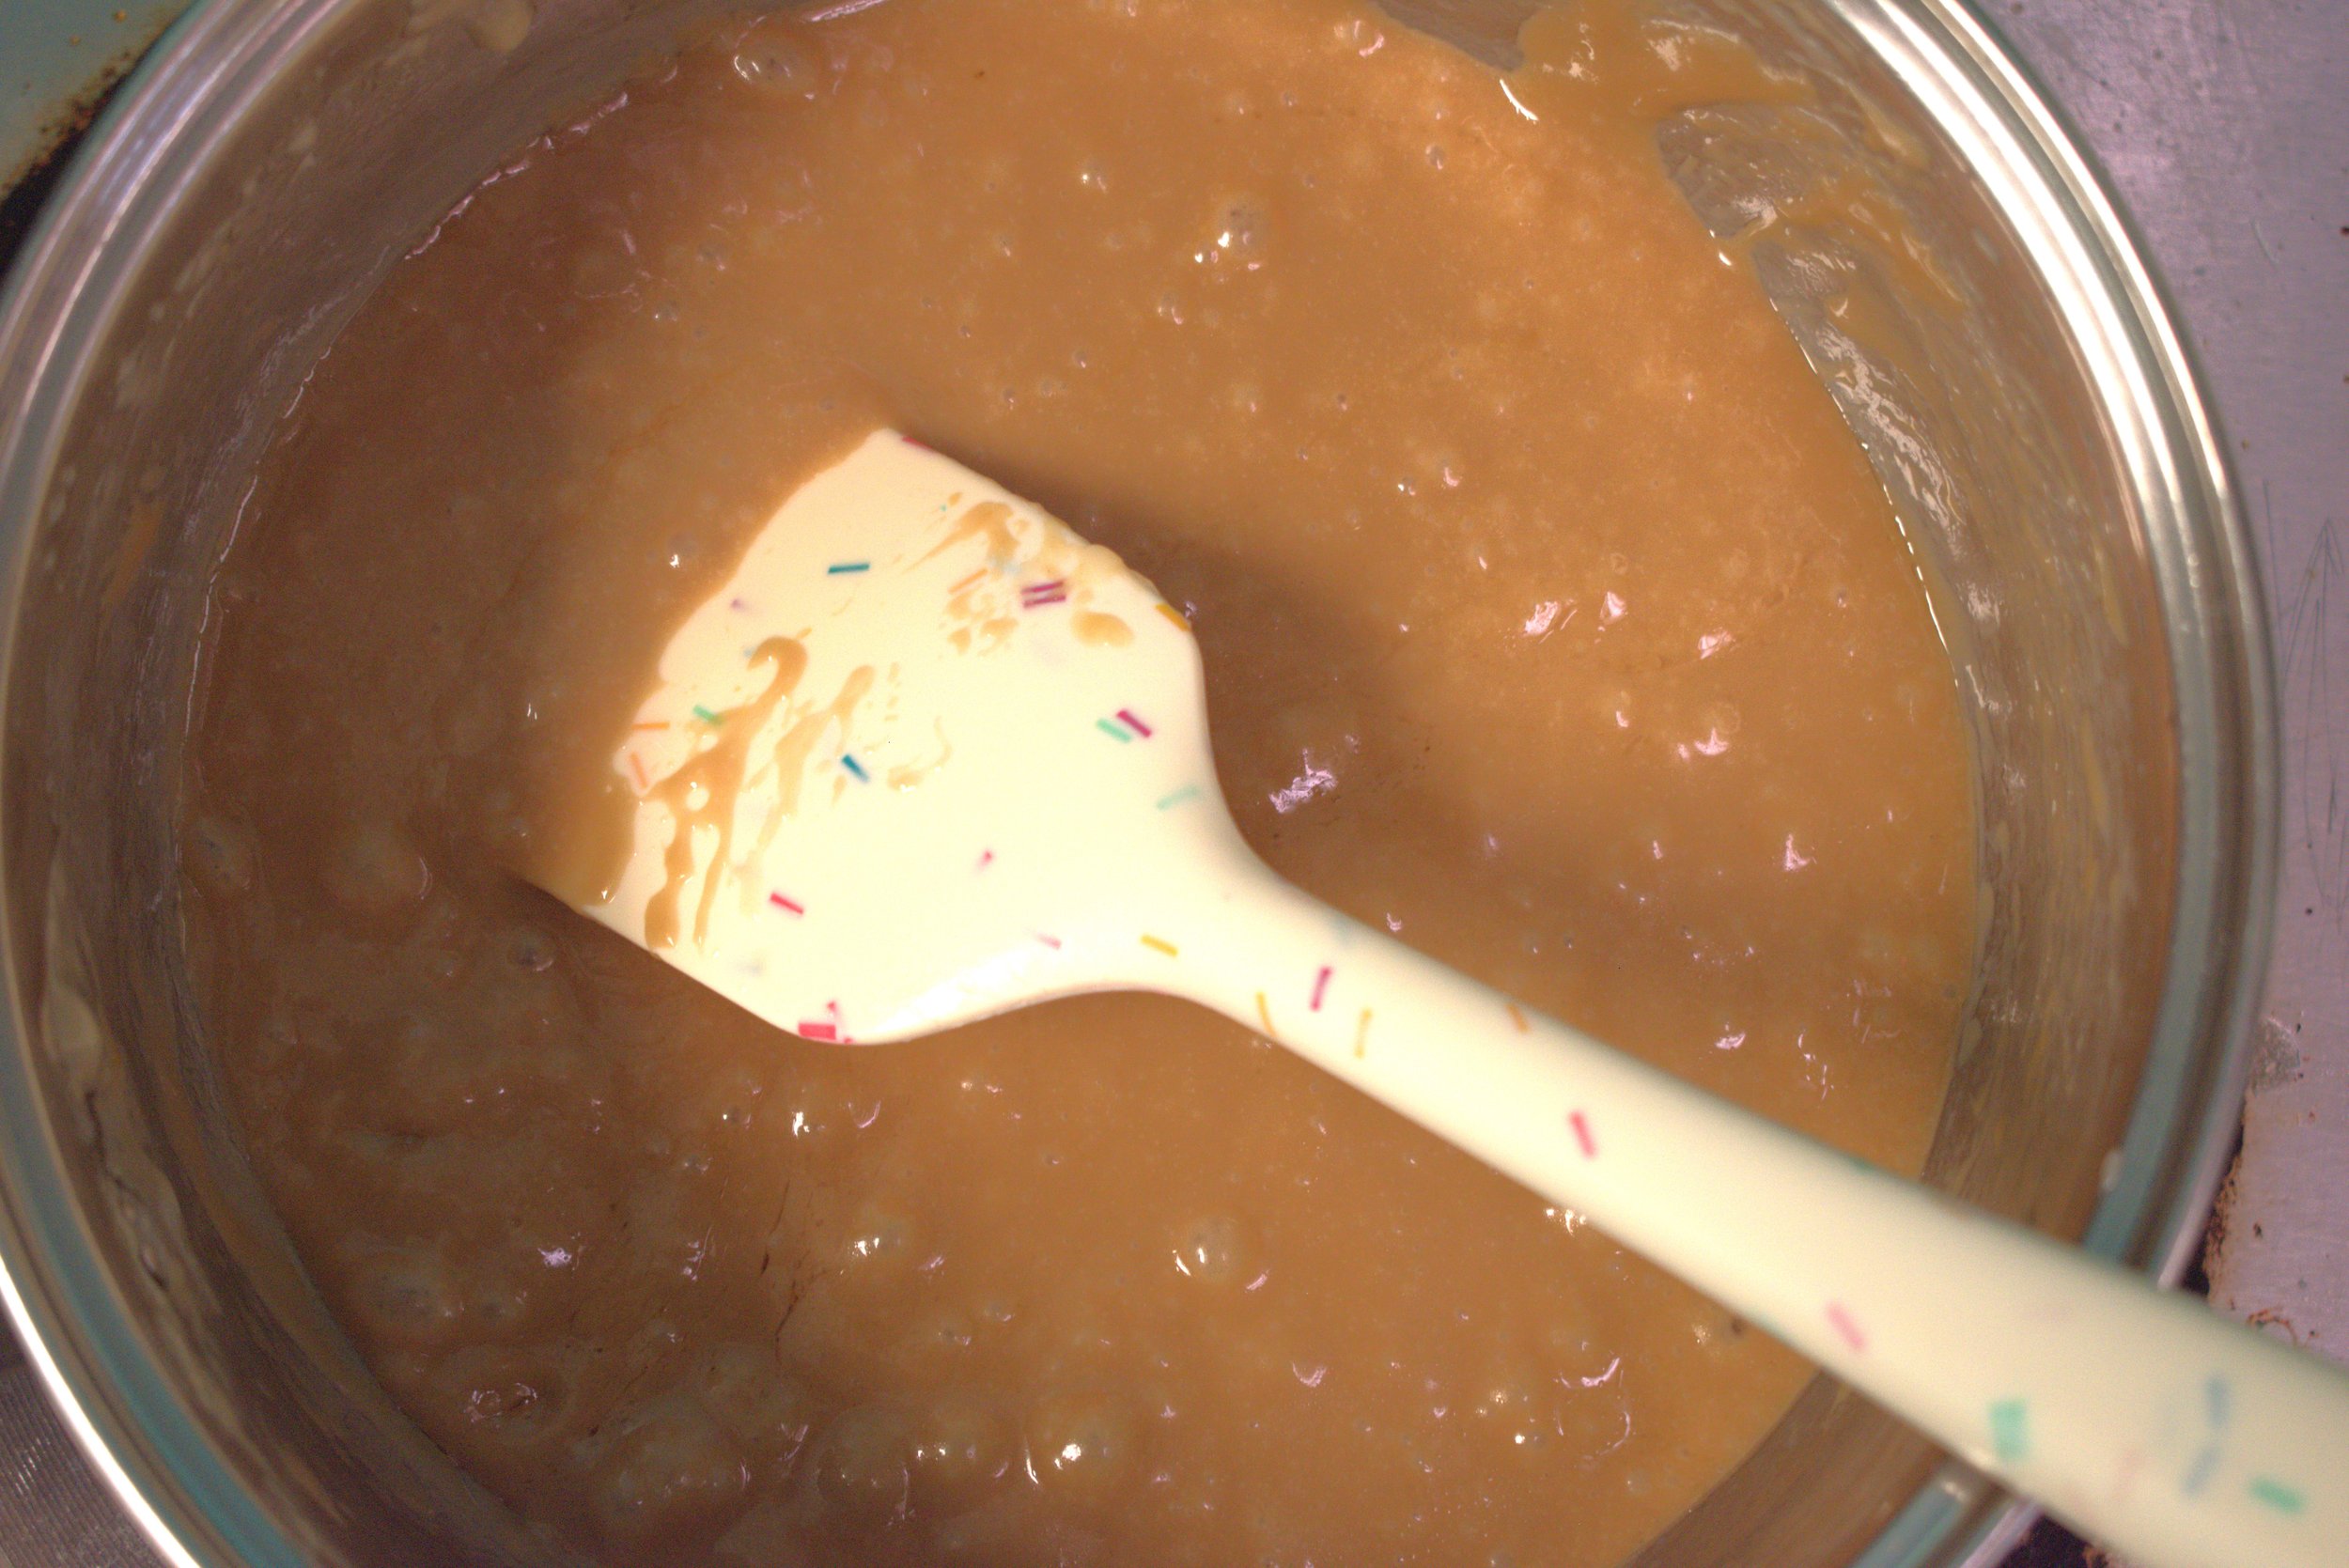
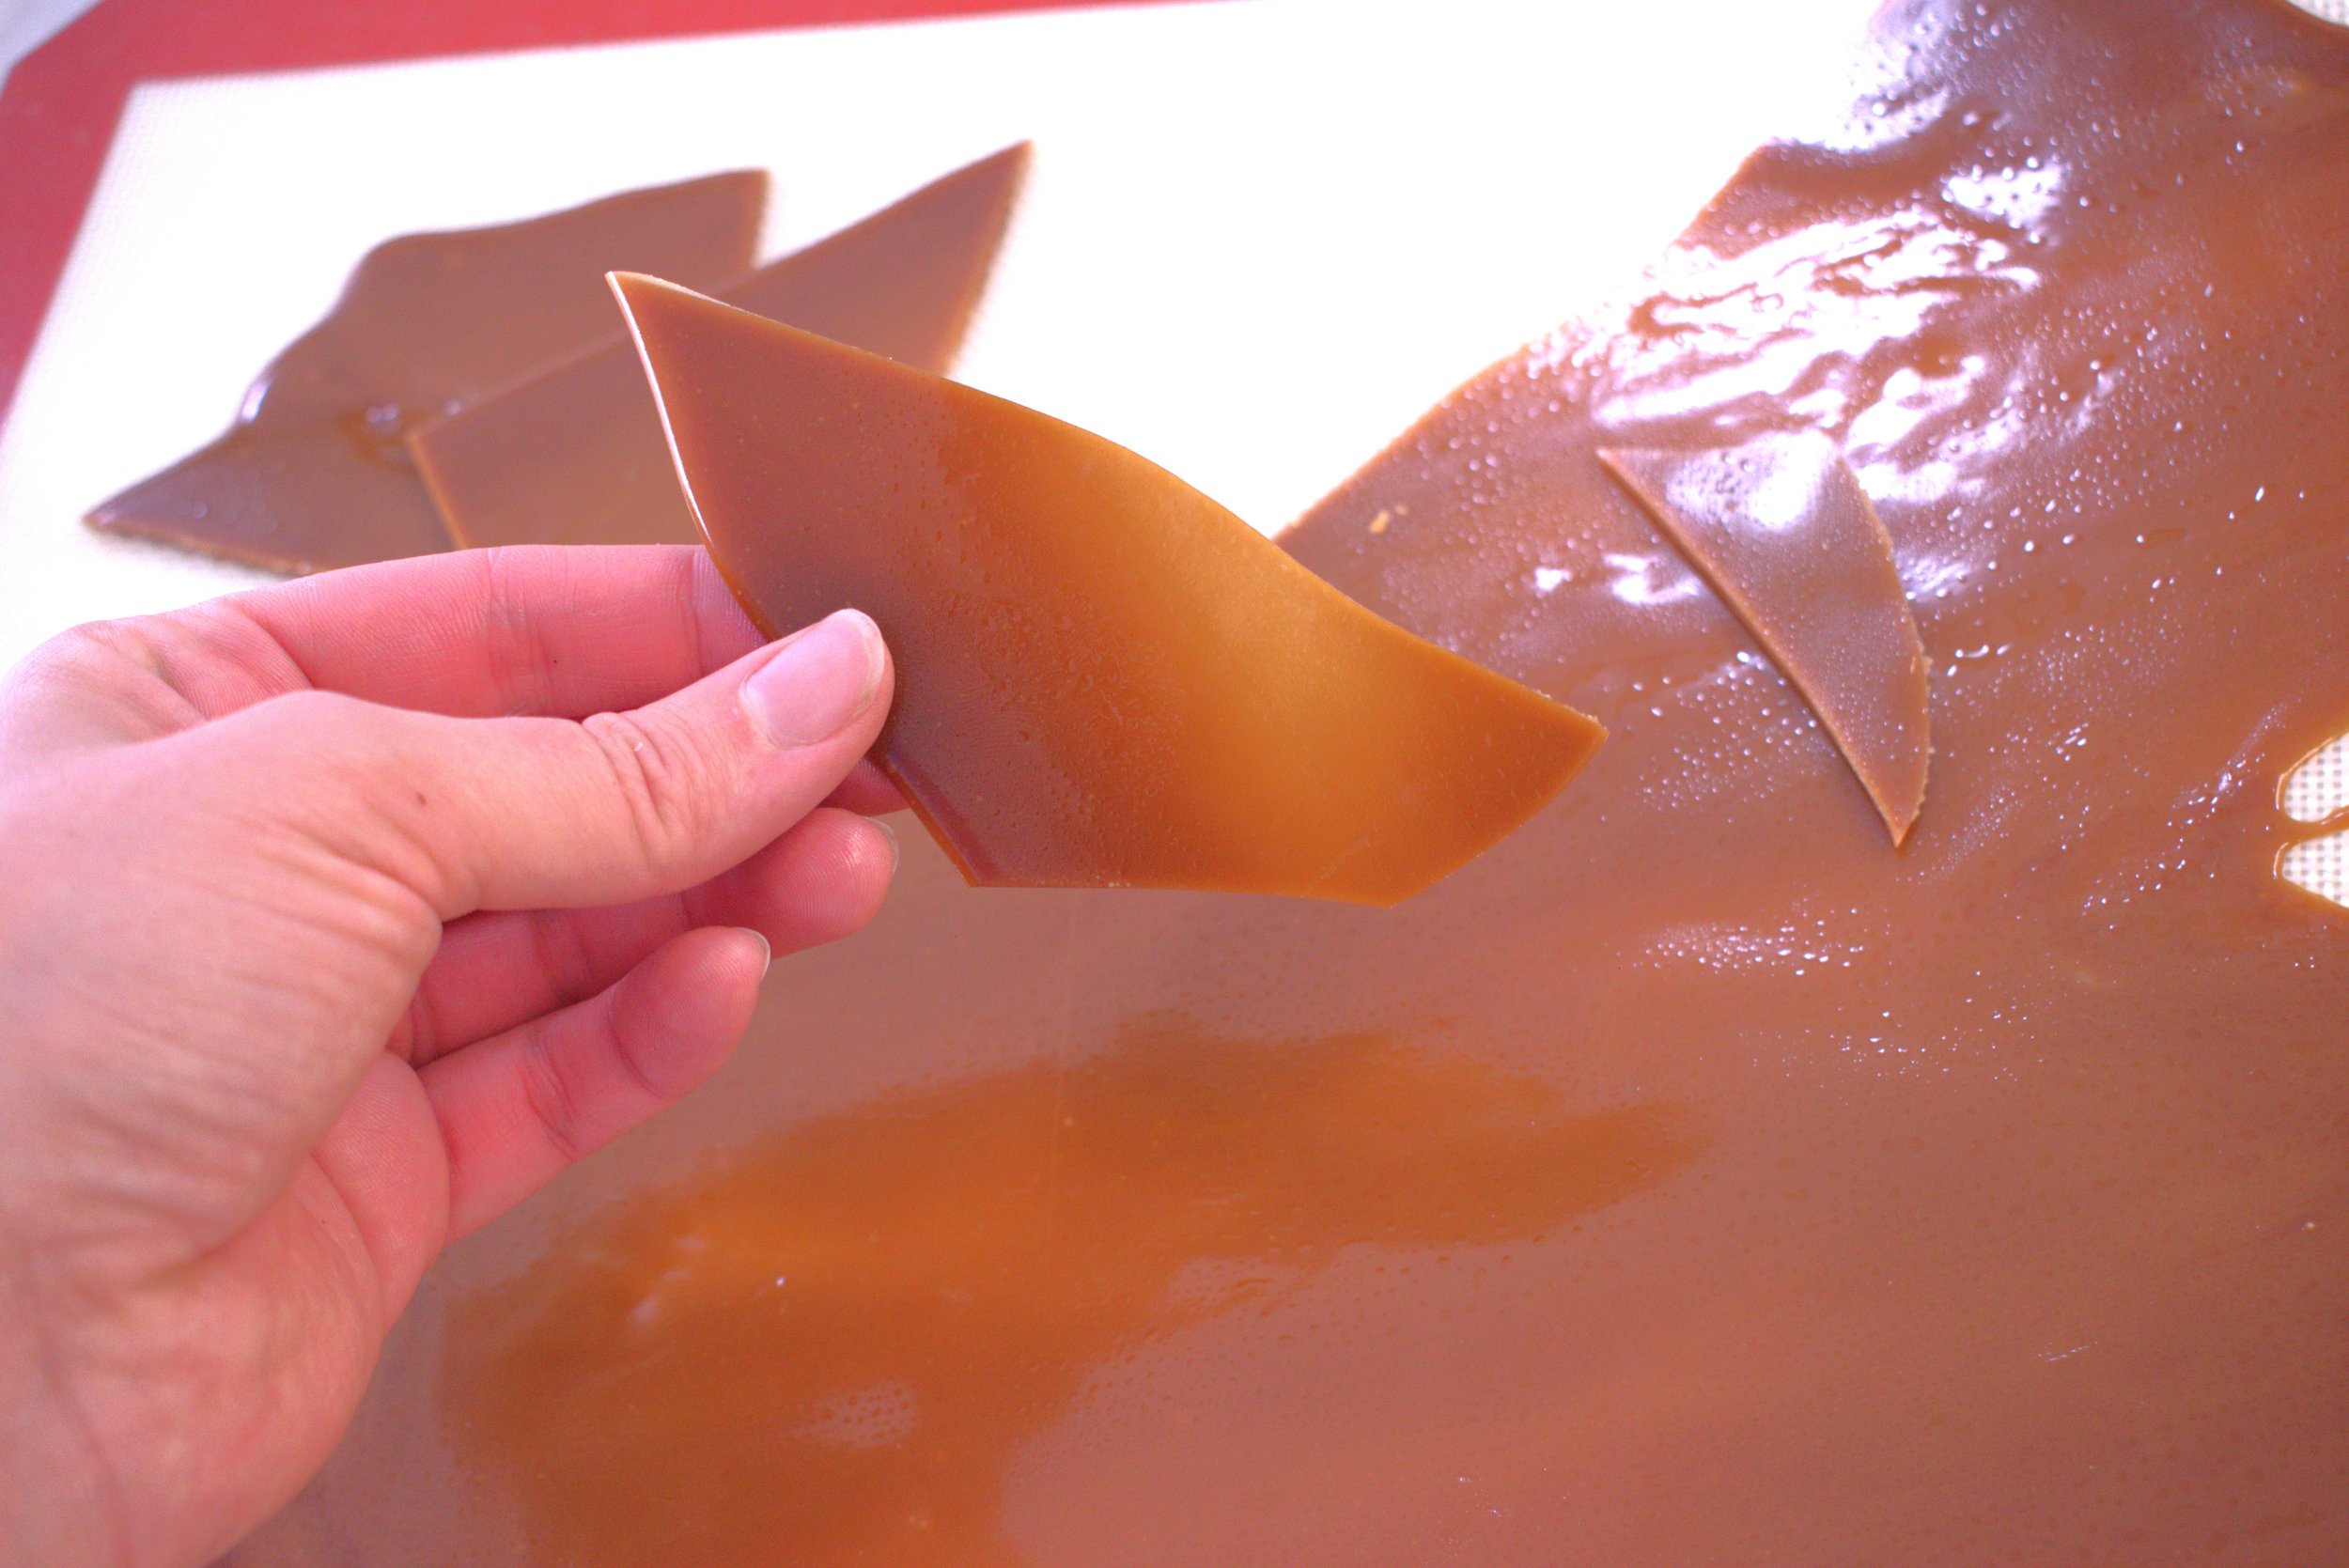
Turn your heat up to medium-high and cook mixture until it turns toffee-coloured. You want the colour to be a quite dark before you take it off - see the picture below for reference. If you undercook it, your toffee will be bendy and won’t break into pieces. During this stage, make sure to stir your toffee almost constantly. If you don’t stir your toffee enough, your butter and sugar can separate and your toffee will be greasy.
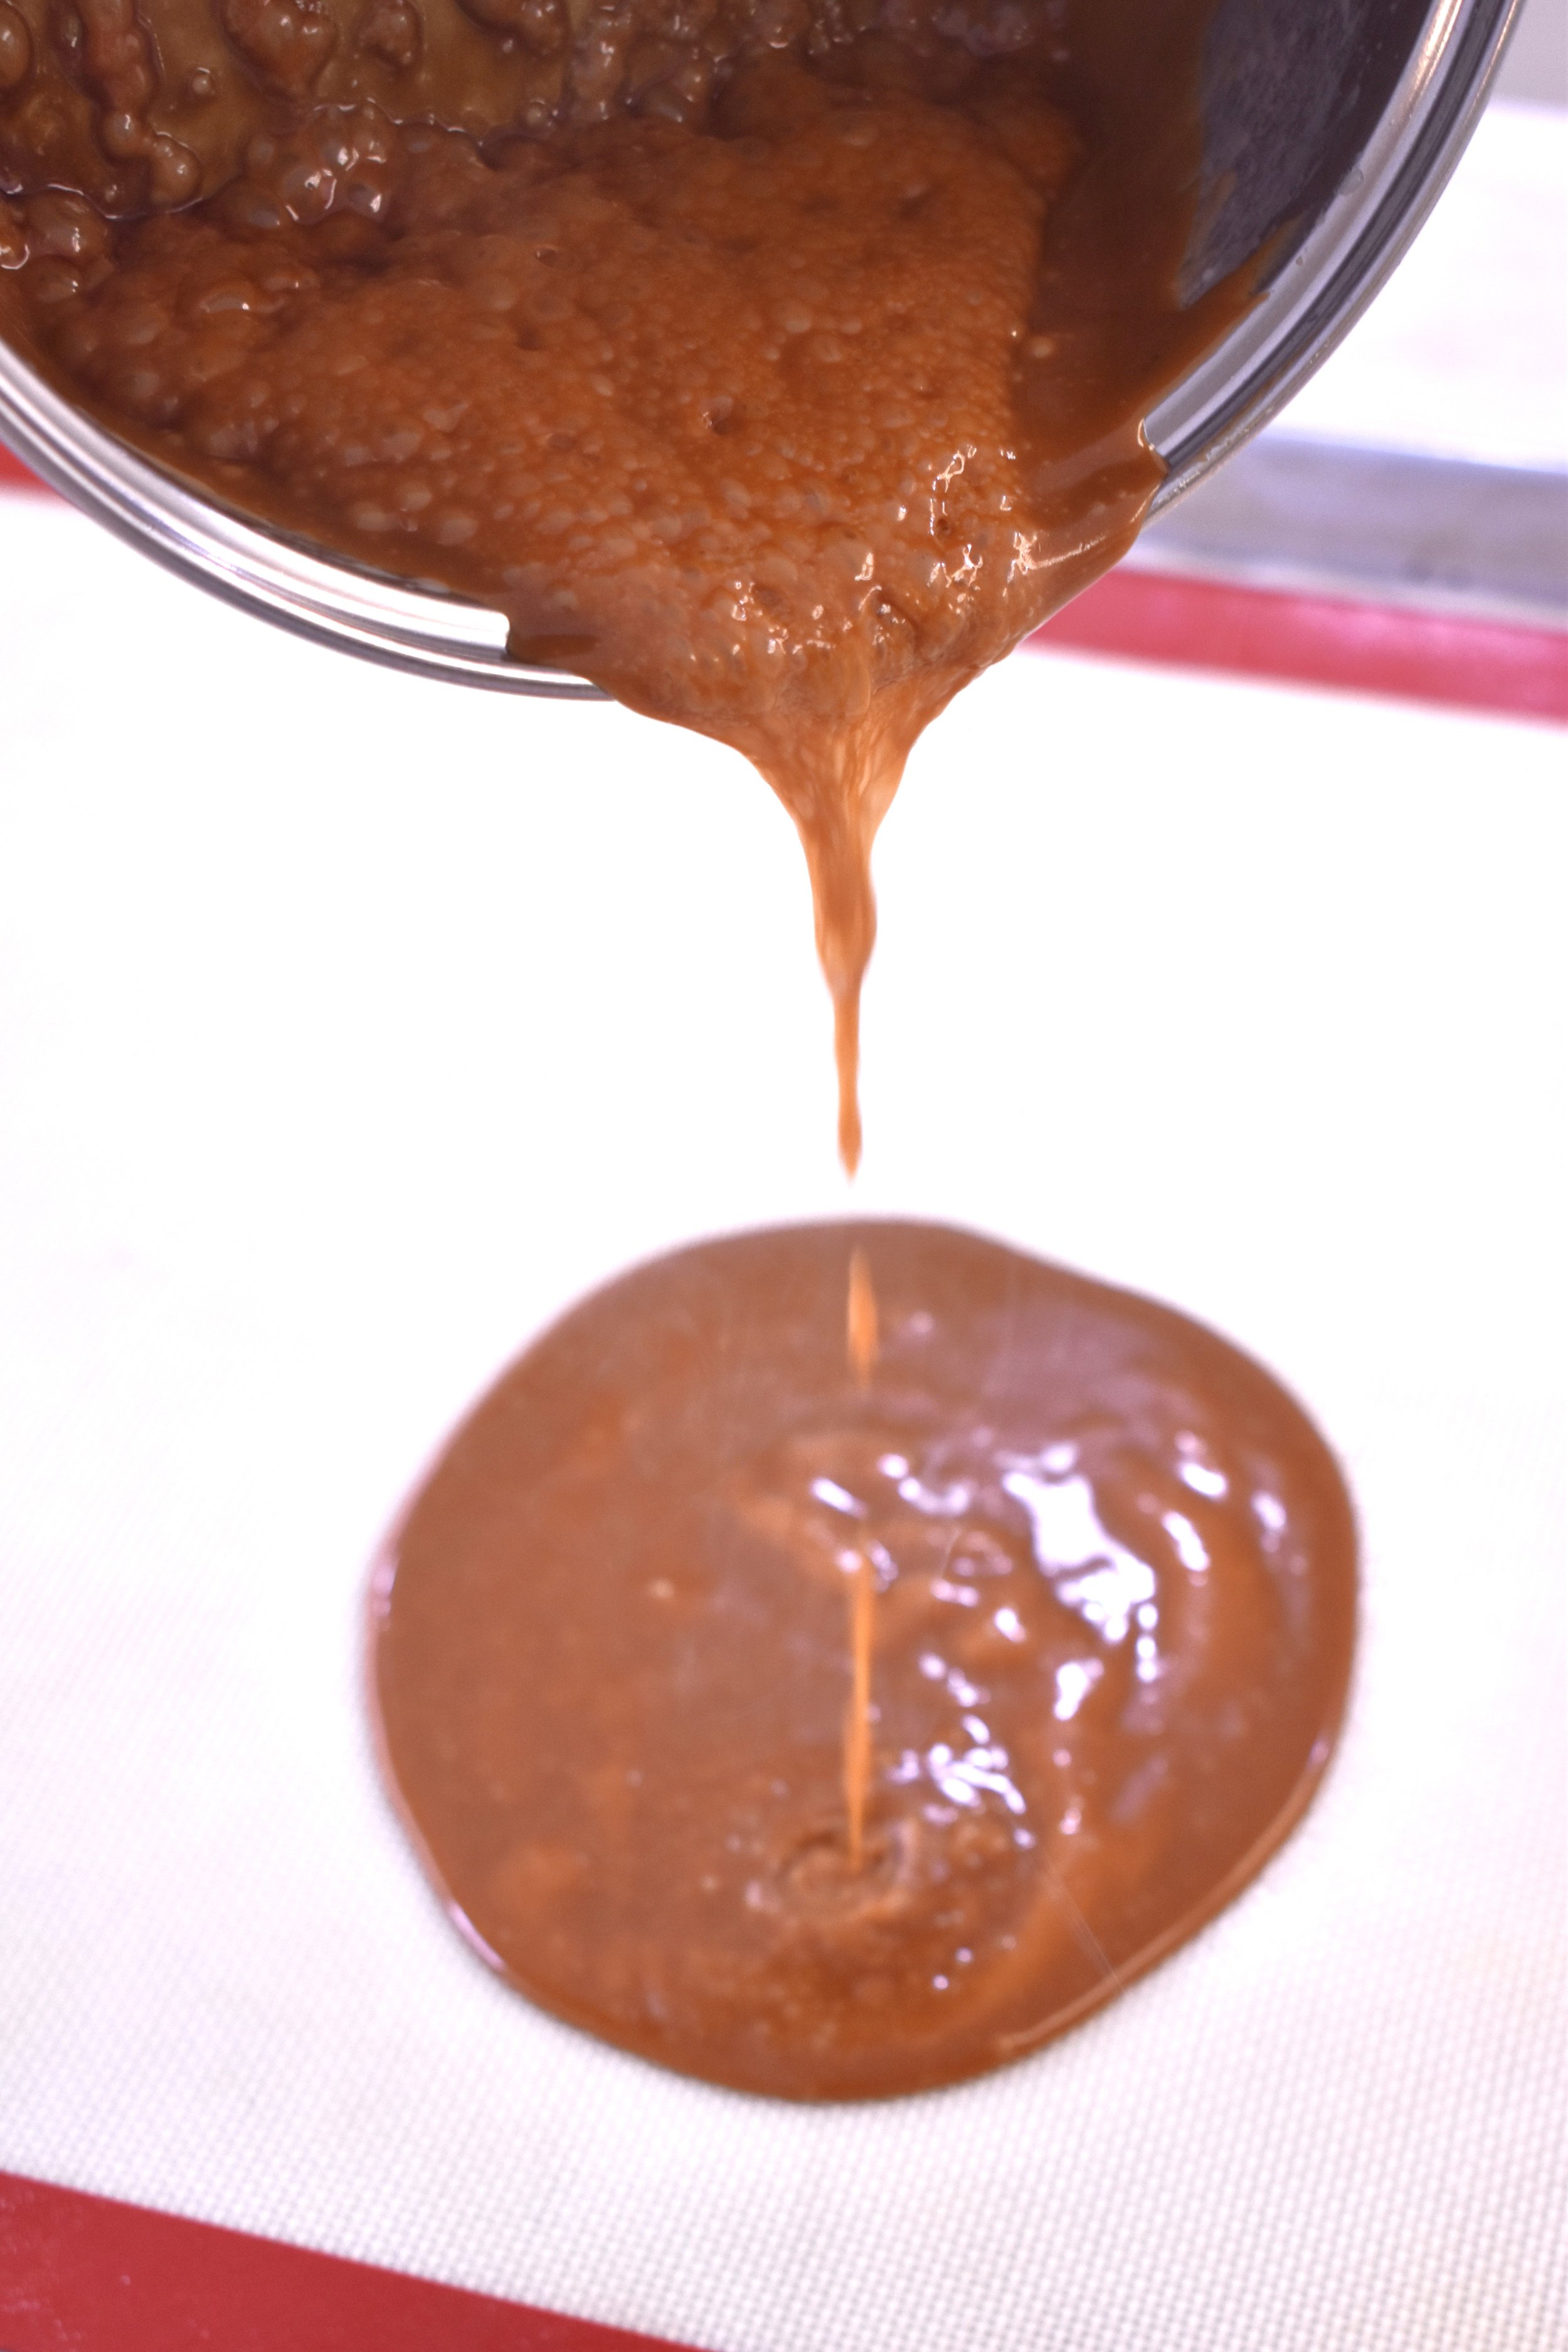
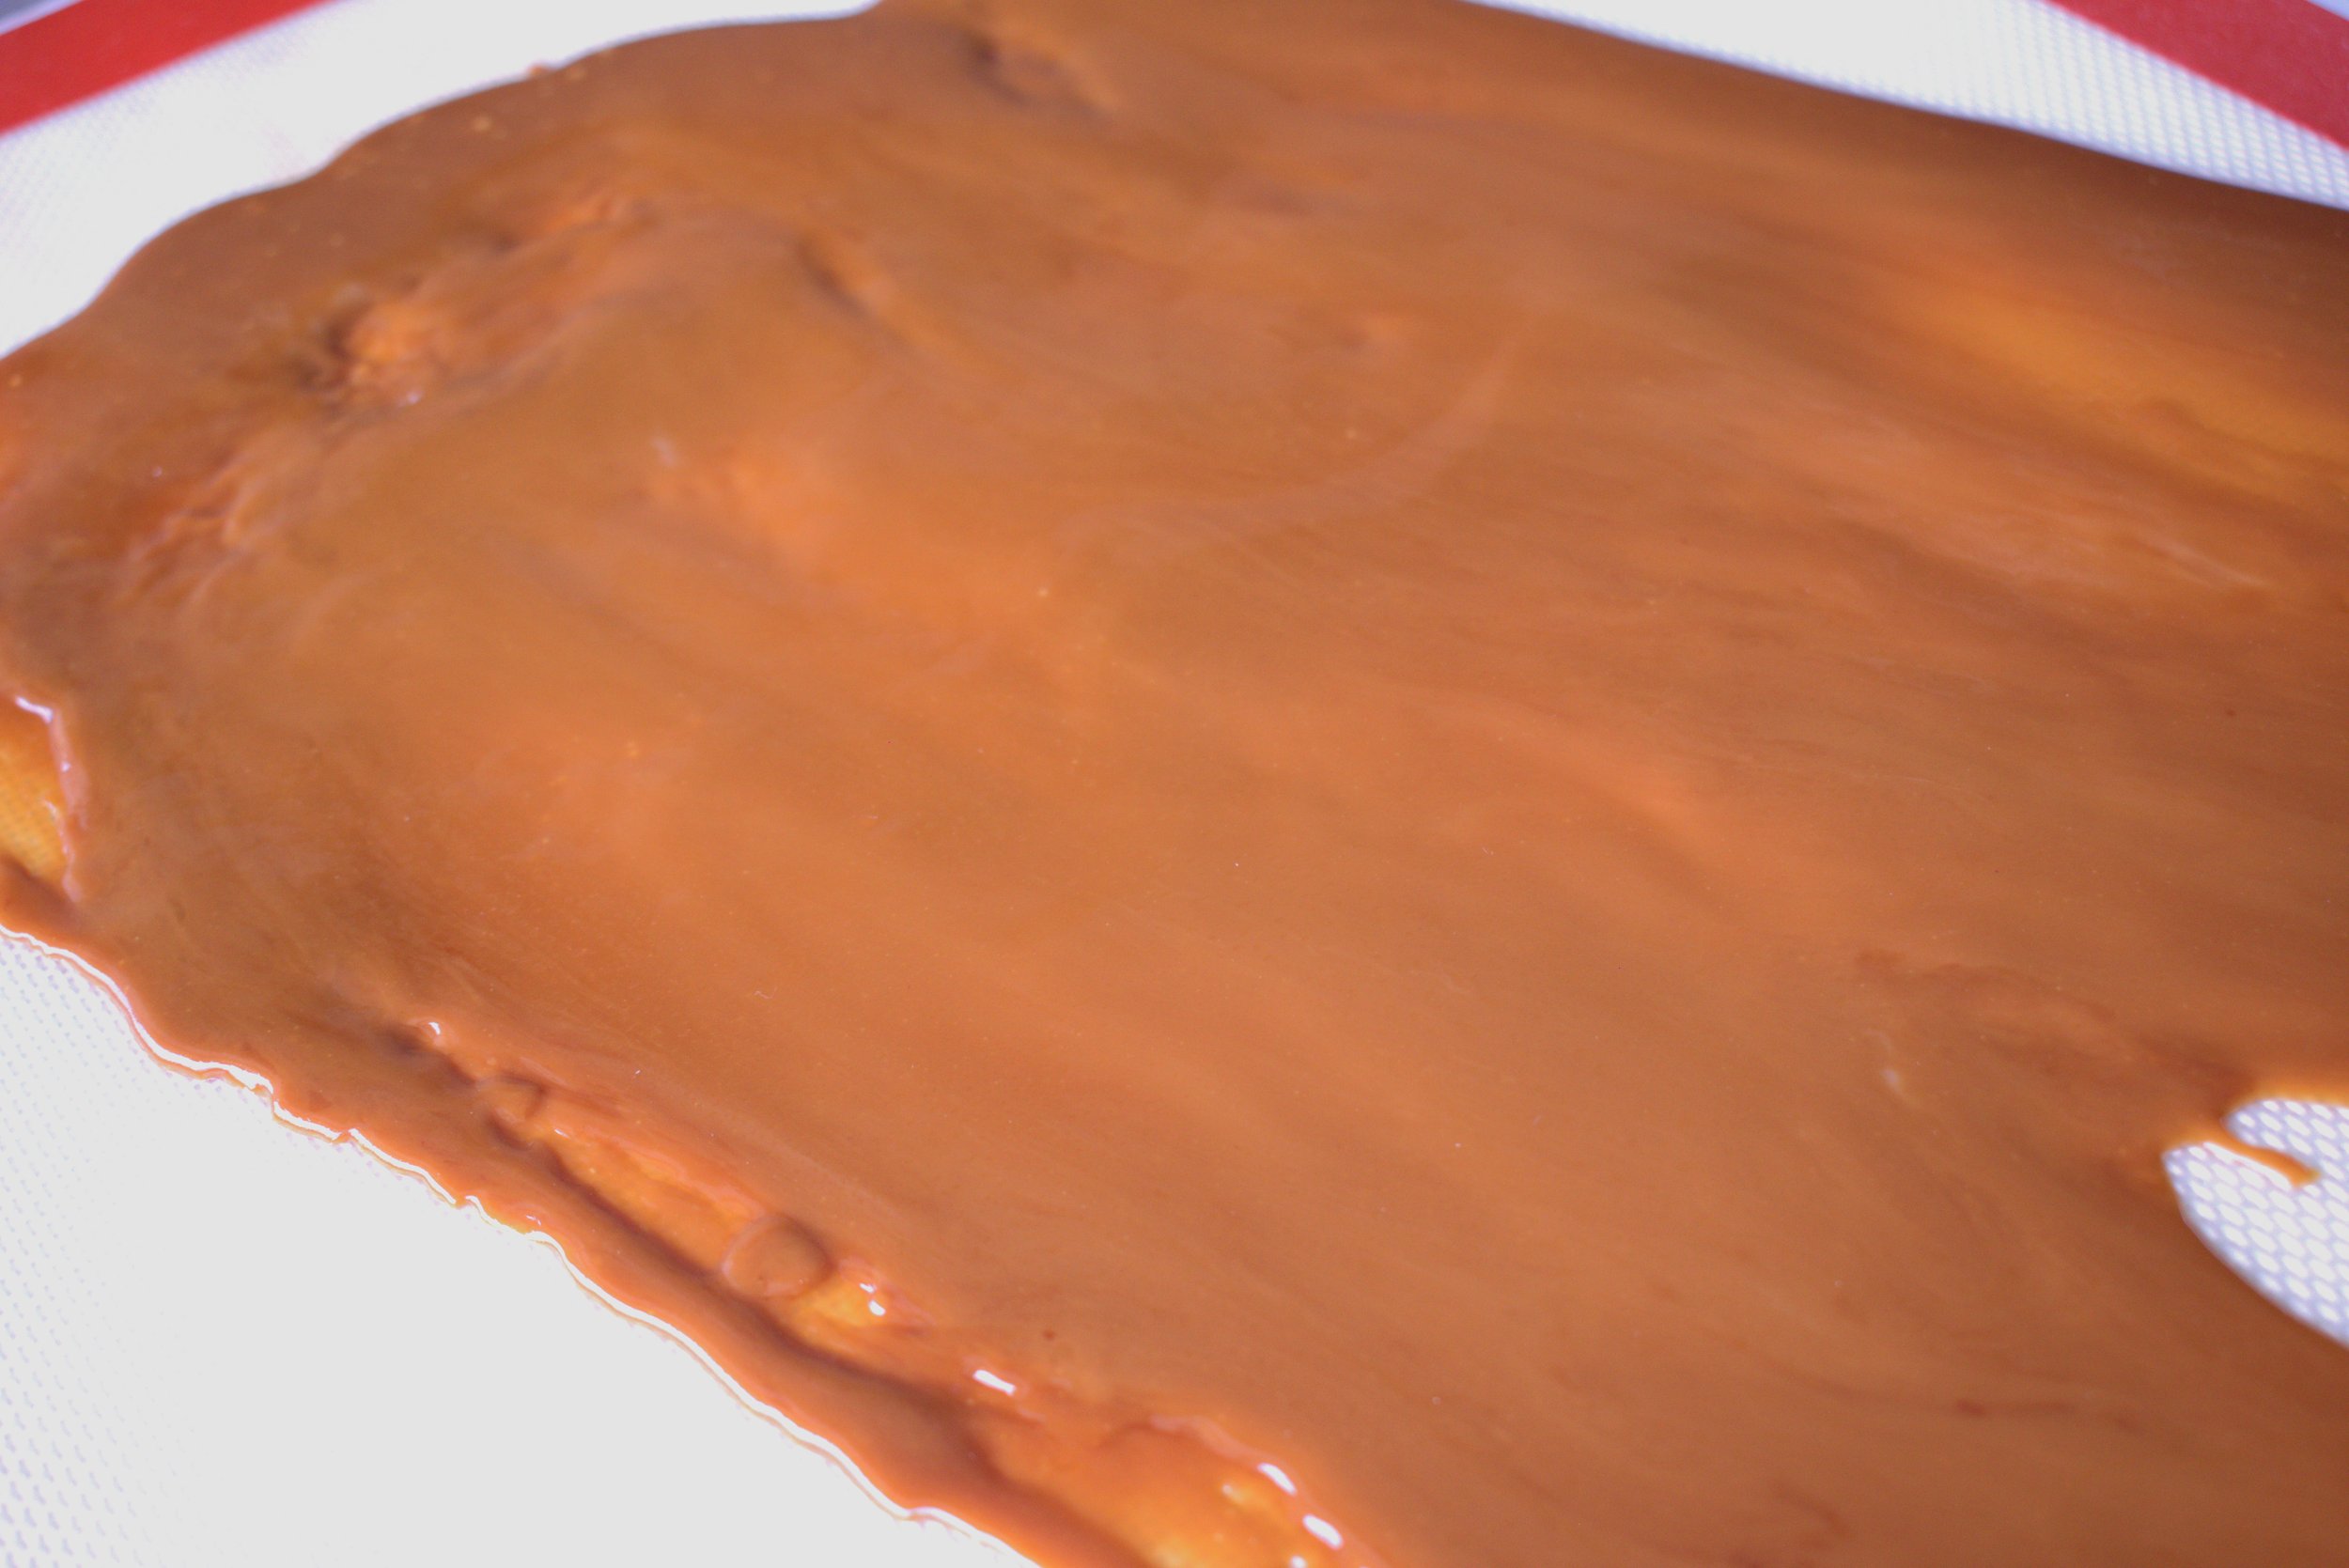
Once your toffee reaches the right colour, take it off the stove, give it a really good stir, and pour it onto your silicone mat. Spread it out thin with your spatula and leave it to cool. If you want to speed up the cooling, you can place it in the fridge.
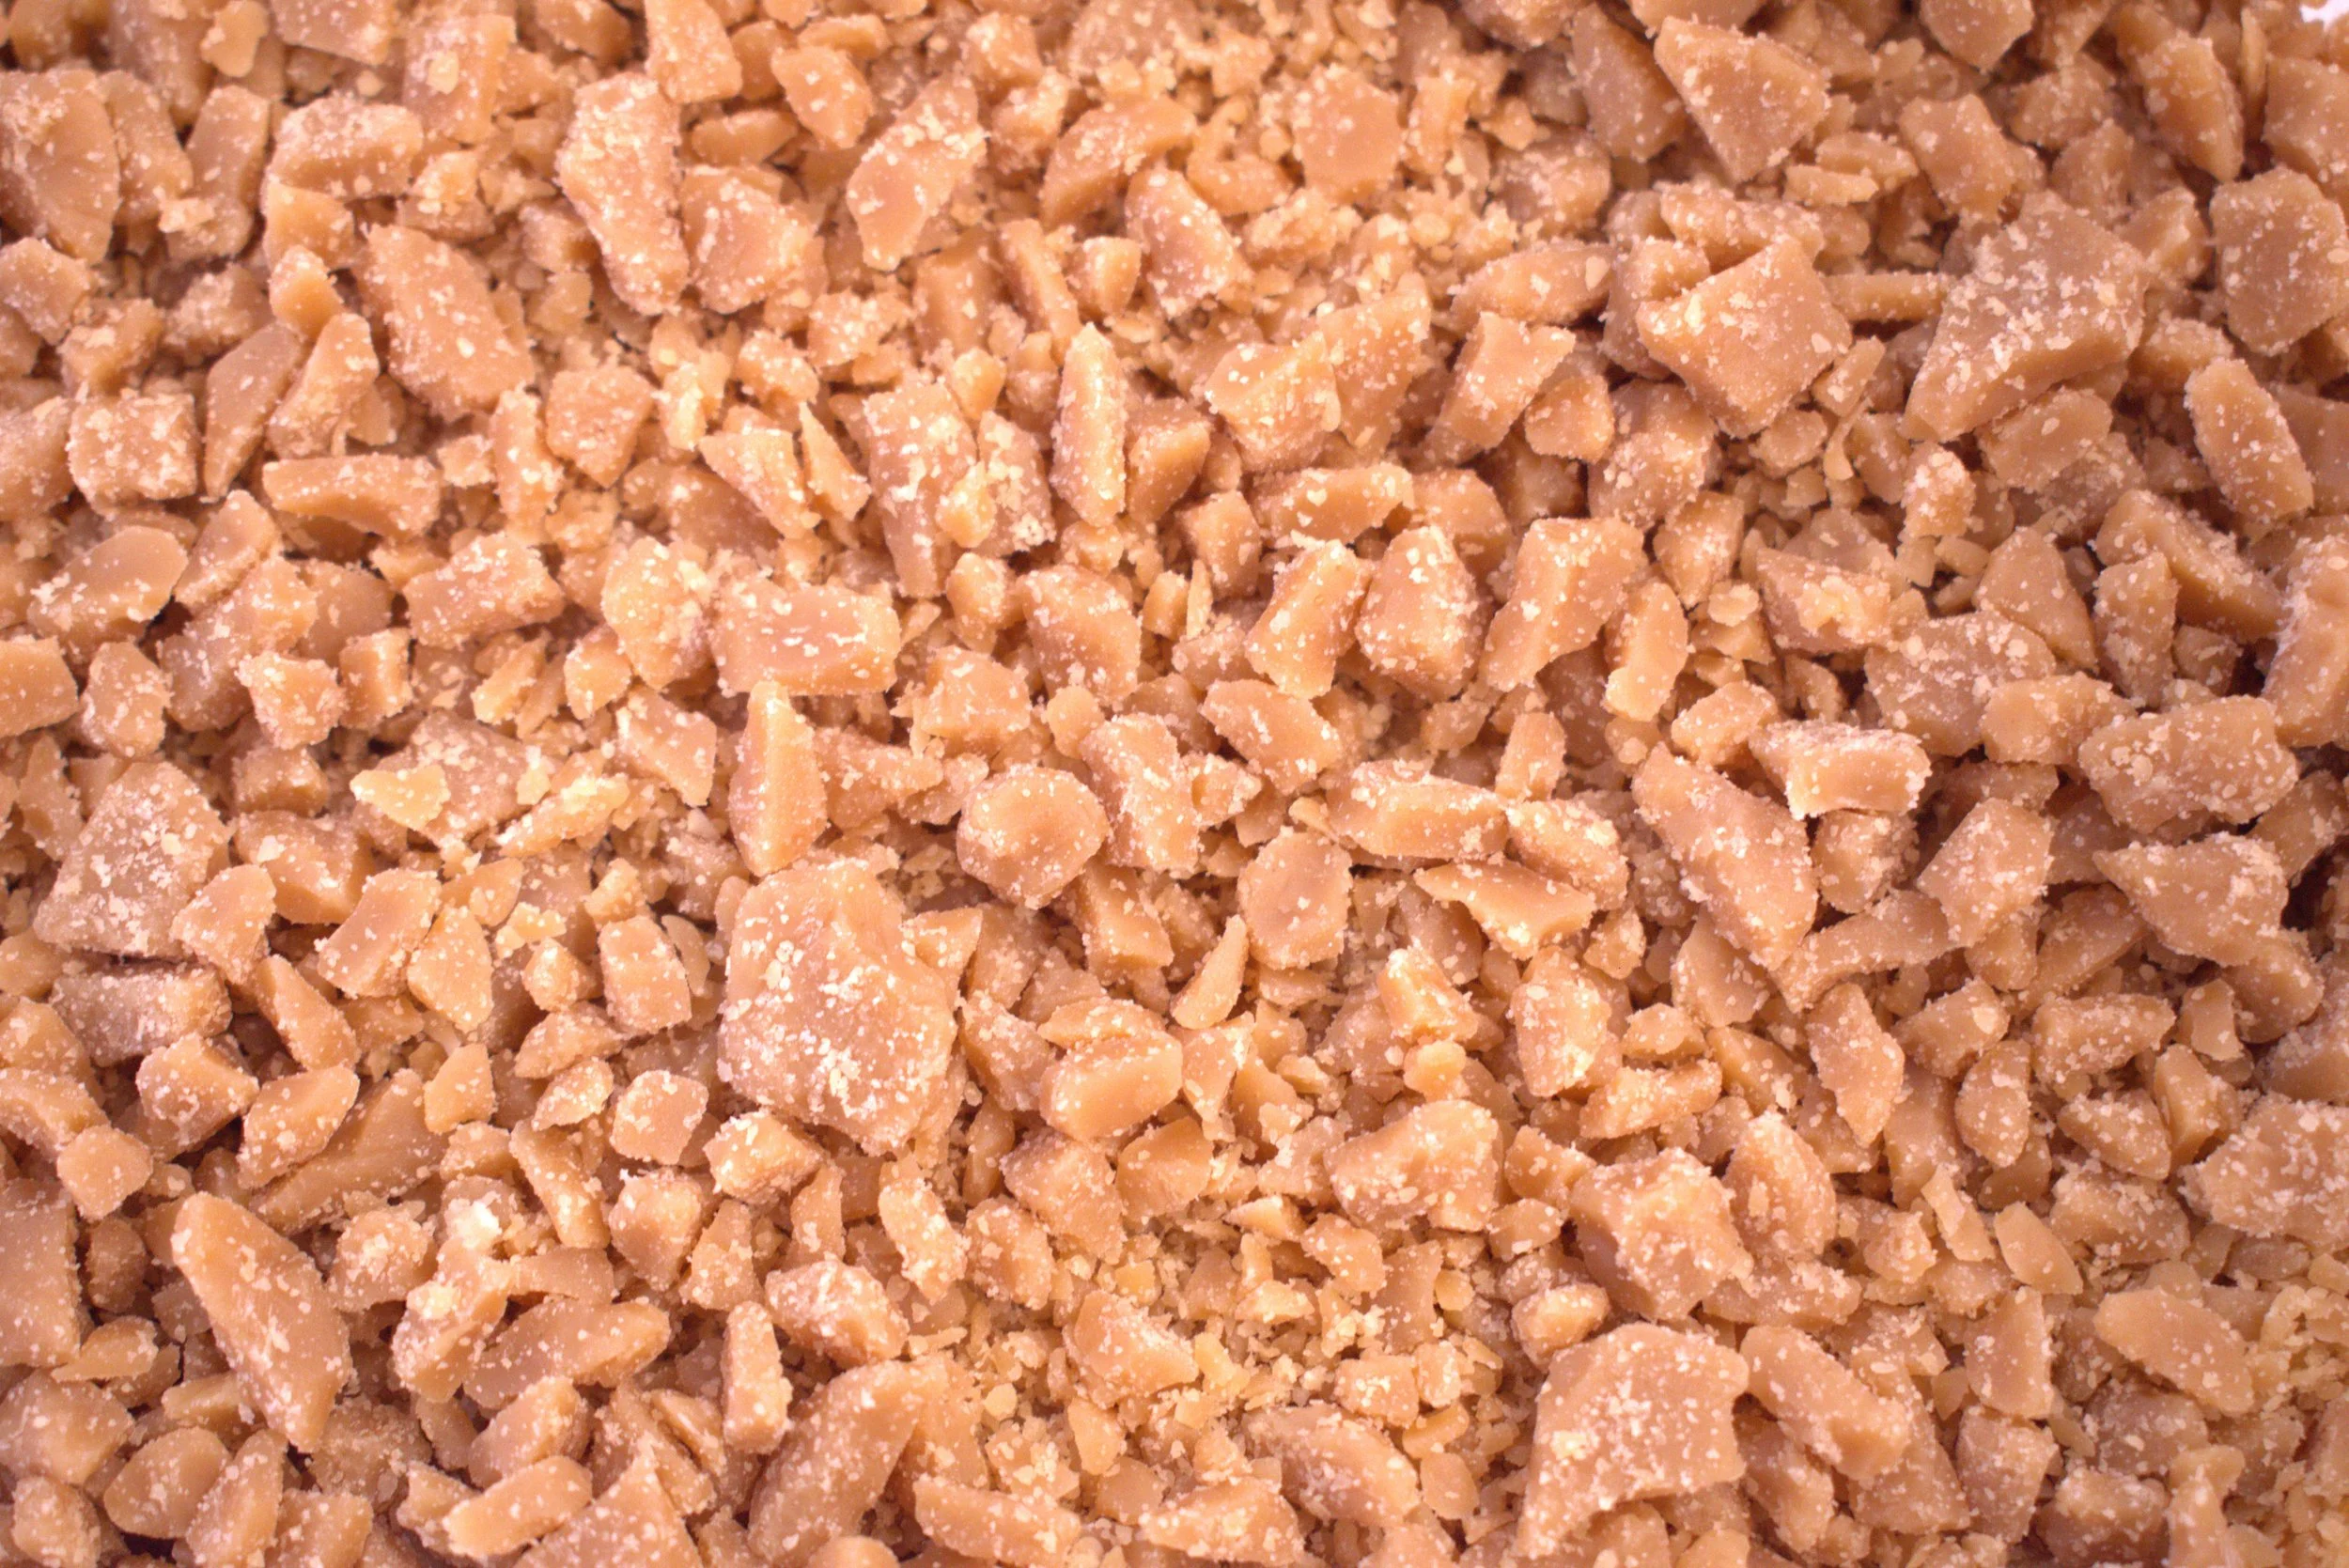
Once your toffee is completely cooled, break it into large chunks and put the chunks into a food processor. If you doubled or tripled your batch you might want to do this is batches. If you overload the food processor it will be hard to get pieces the right size and you will probably end up with a bunch of toffee dust at the bottom. Use the PULSE function on your food processor to process the toffee in small bursts, or if you don’t have a pulse function, turn it on then off really quickly several times until your toffee is in small pieces about the size of peas.
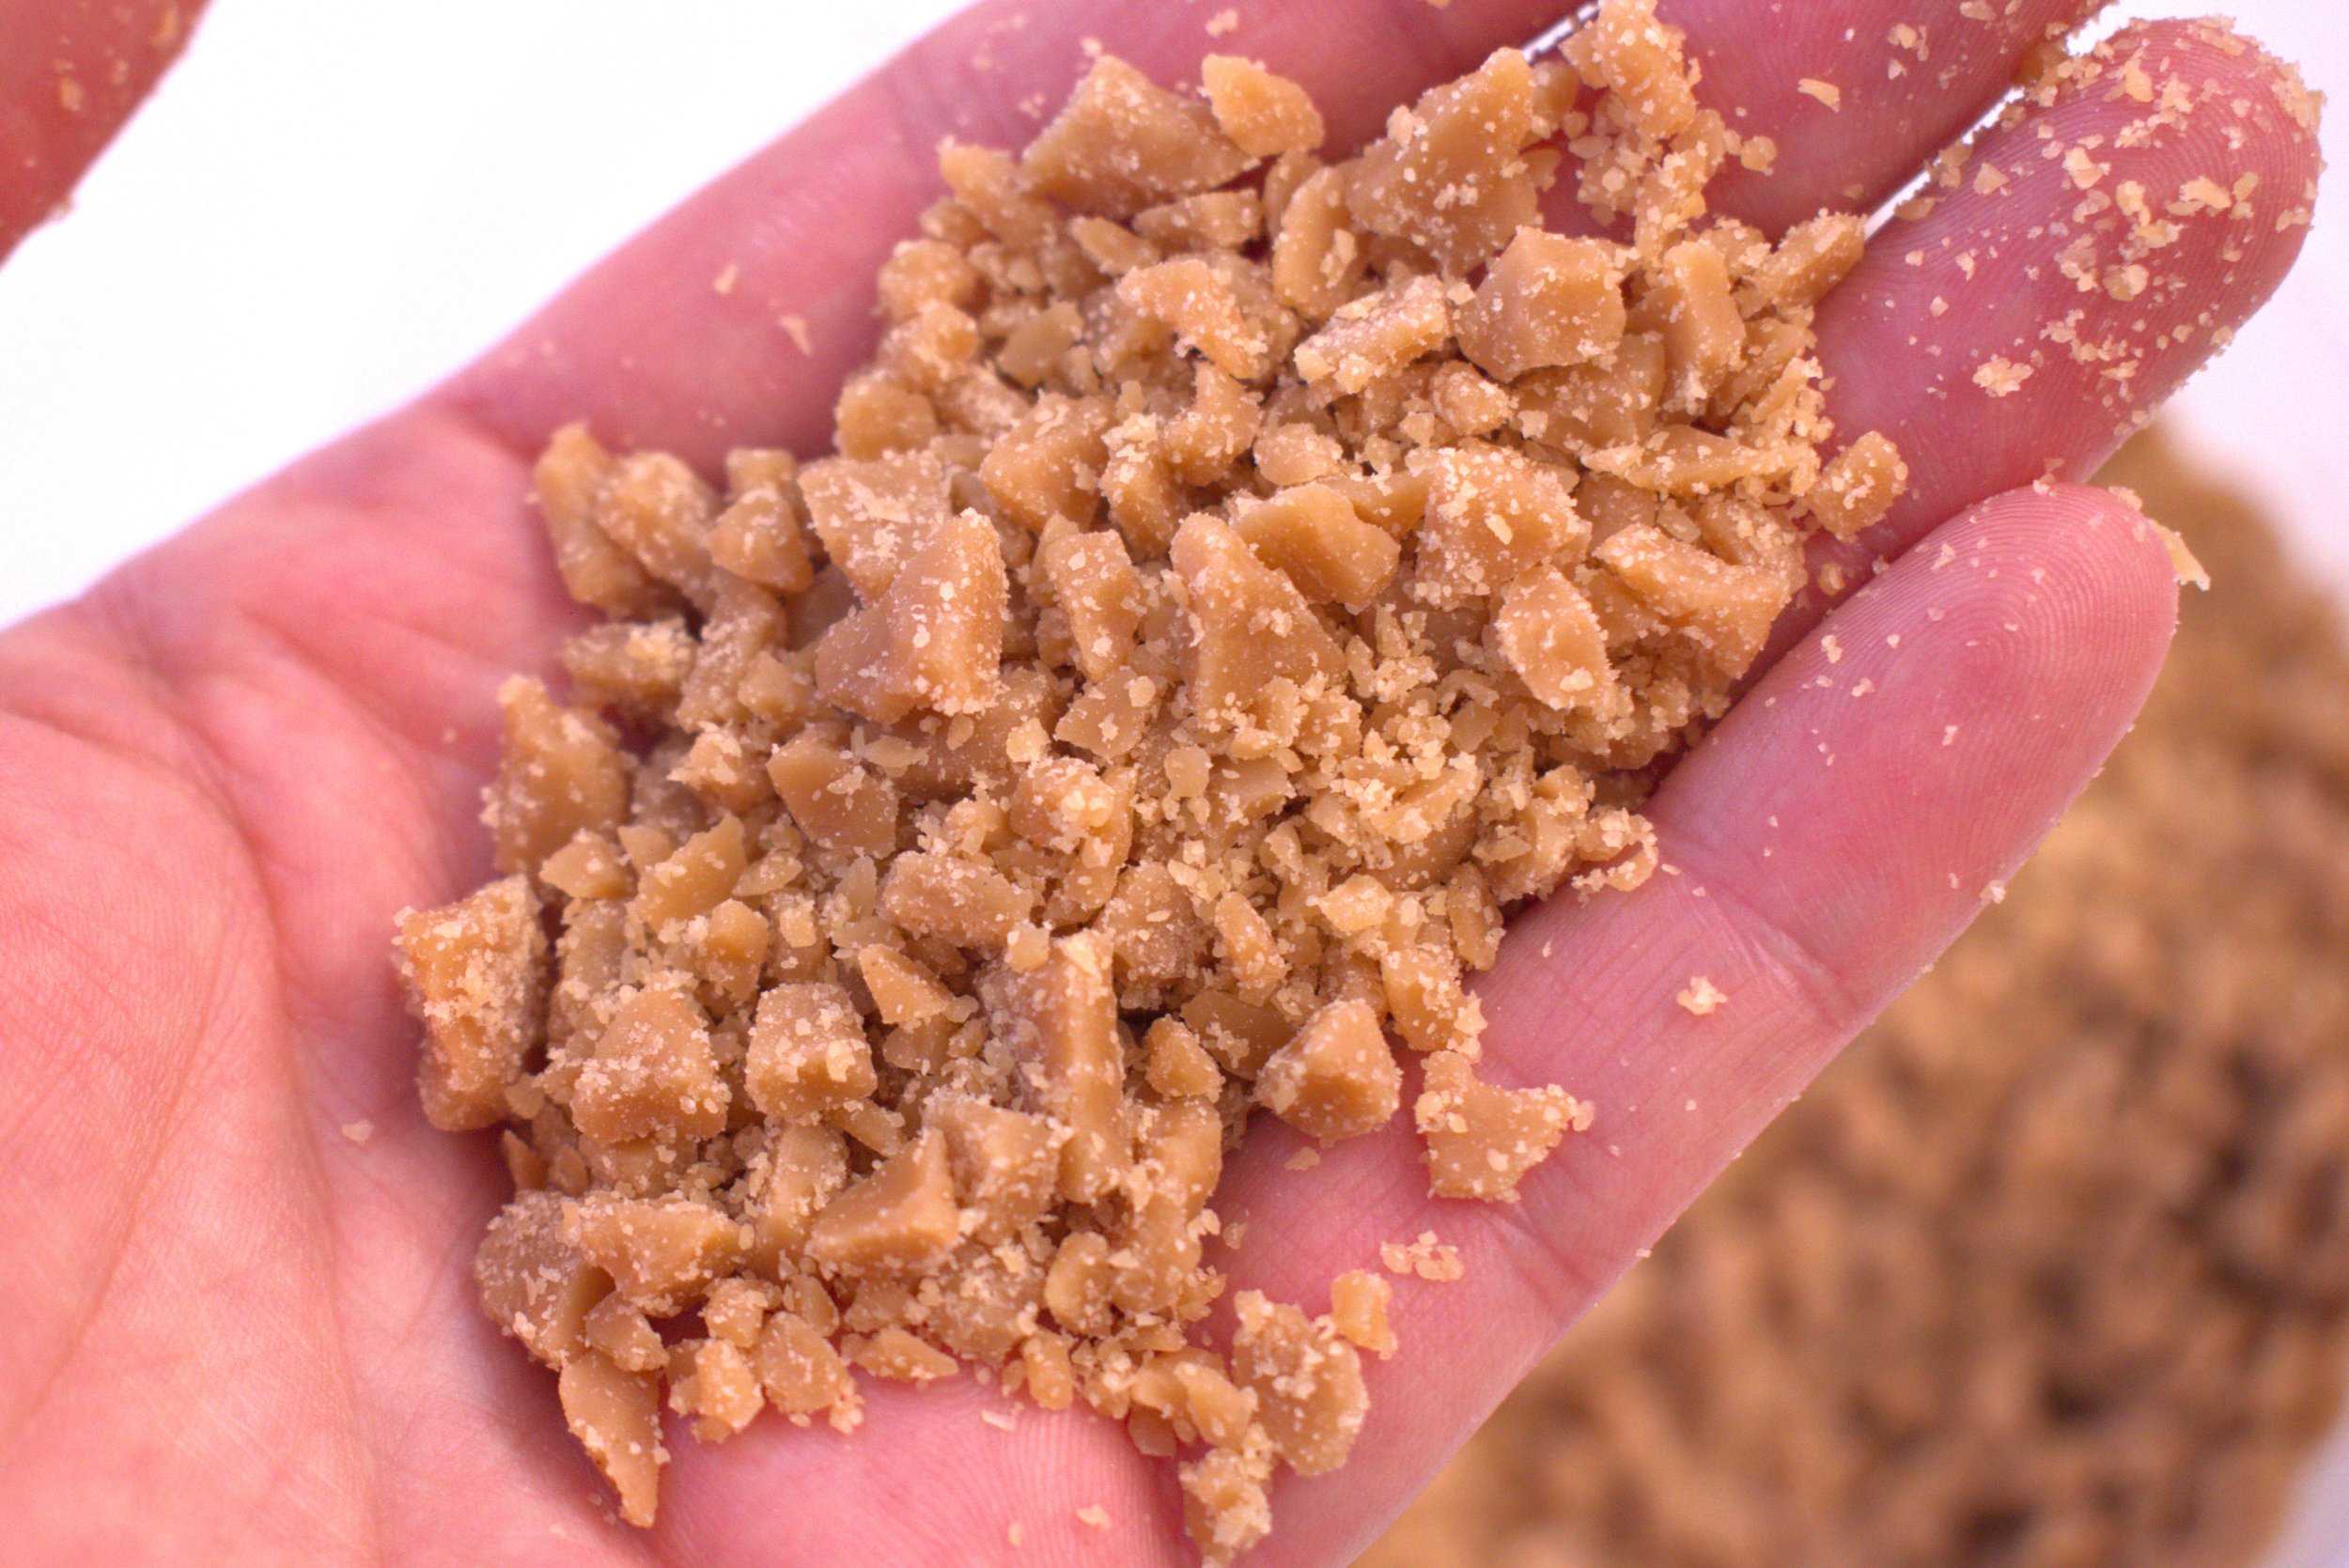
Ta-dah! Now you have delicious homemade toffee pieces for baking adventures and snacking. :)
Store your toffee in an airtight container at room temperature for up to 2 months.
Here's the full recipe!

Homemade Toffee Pieces
Ingredients
- 112g (1/2 cup) Salted Butter
- 100g (1/2 cup) Granulated Sugar
- 25g (5 1/4 tsp) Water
Instructions
- Place all ingredients in a medium sized pot and place on stove on low heat. Stir occasionally with a silicone spatula. While waiting for your butter to melt, prepare a baking tray by lining it with a silicone mat.
- Once all the butter is melted, turn heat up to medium-high.
- Cook, stirring often, until mixture is a caramel colour (see photo in blog post)
- Remove from heat quickly and give it one more good stir, then pour onto a baking tray lined with silicone mat. Spread out as thin as possible with your spatula then let it cool completely. You can place it in the fridge to cool it faster if you want.
- Once cool, break up into large pieces and place in a food processor. Pulse a few times until toffee pieces are about the size of a pea. There will be some smaller and some bigger, but make sure there are no very large chunks.
- Store in an airtight container at room temperature.


