
EASY Easter Egg Sugar Cookies 3 Ways!

Some of the links in this post might be affiliate links. Some of the links in this post might be affiliate links. As an Amazon Associate I earn from qualifying purchases. This means I earn a small amount of money if you purchase something through the link, at no cost to you. I promise I only recommend items I love! You can read our full disclosure here.
Easter is just around the corner, so today I’m going to teach you 3 EASY ways to decorate Easter Egg sugar cookies!
These techniques are all beginner friendly and FUN! And you’ll have some adorable cookies to take to any Easter celebrations you may be going to.
Whenever you’re decorating sugar cookies, always remember to start a day before you need them because the icing needs to dry overnight.
Here’s a list of things you’re going to need:
-Egg shaped sugar cookies (use my sugar cookie recipe to make your own or buy pre-made dough if you prefer! I used the egg cookie cutter from this set!.)
-A batch of my glaze sugar cookie icing
-Some cute sprinkles (my favourite brand is Sweetapolita, but any cute sprinkles will do!)
-Gel food colouring (Wilton and Americolor are my go-to brands)
-A few piping bags (re-useable or disposable. If you’re using a piping tip with your bag, go with a #3 or #4)
-Some small bowls (make sure at least one of your bowls is wider than your cookies)
-A few spoons
-Toothpicks or a scribe tool
-A couple chopsticks (the chopsticks are optional but very useful!)
-Metallic Lustre Dust (I used Rose Gold from Sunflower Sugar Art) or black or brown powder food colouring or petal dust and a small amount of vodka or vanilla extract
-A small paintbrush
Ready? Ok, here we go!
Technique #1: Speckled Easter Egg Cookies

Put a few spoonfuls of glaze in a small bowl and tint it whatever colour you’d like using your gel food colours. I used a tiny amount of Teal Americolor gel to make mine a pastel turquoise colour.
Transfer a spoonful of your glaze to a small piping bag (use a #3 or #4 tip if using a piping bag that needs a tip, or cut off a tiiiiiiiny bit of the end of a tipless disposable piping bag) and set aside.
Thin out the rest of the icing in the bowl with a few drops of water. Don’t make it too thin! You’re aiming for about the consistency of honey. Start with 1/4 tsp of water and add more as needed.
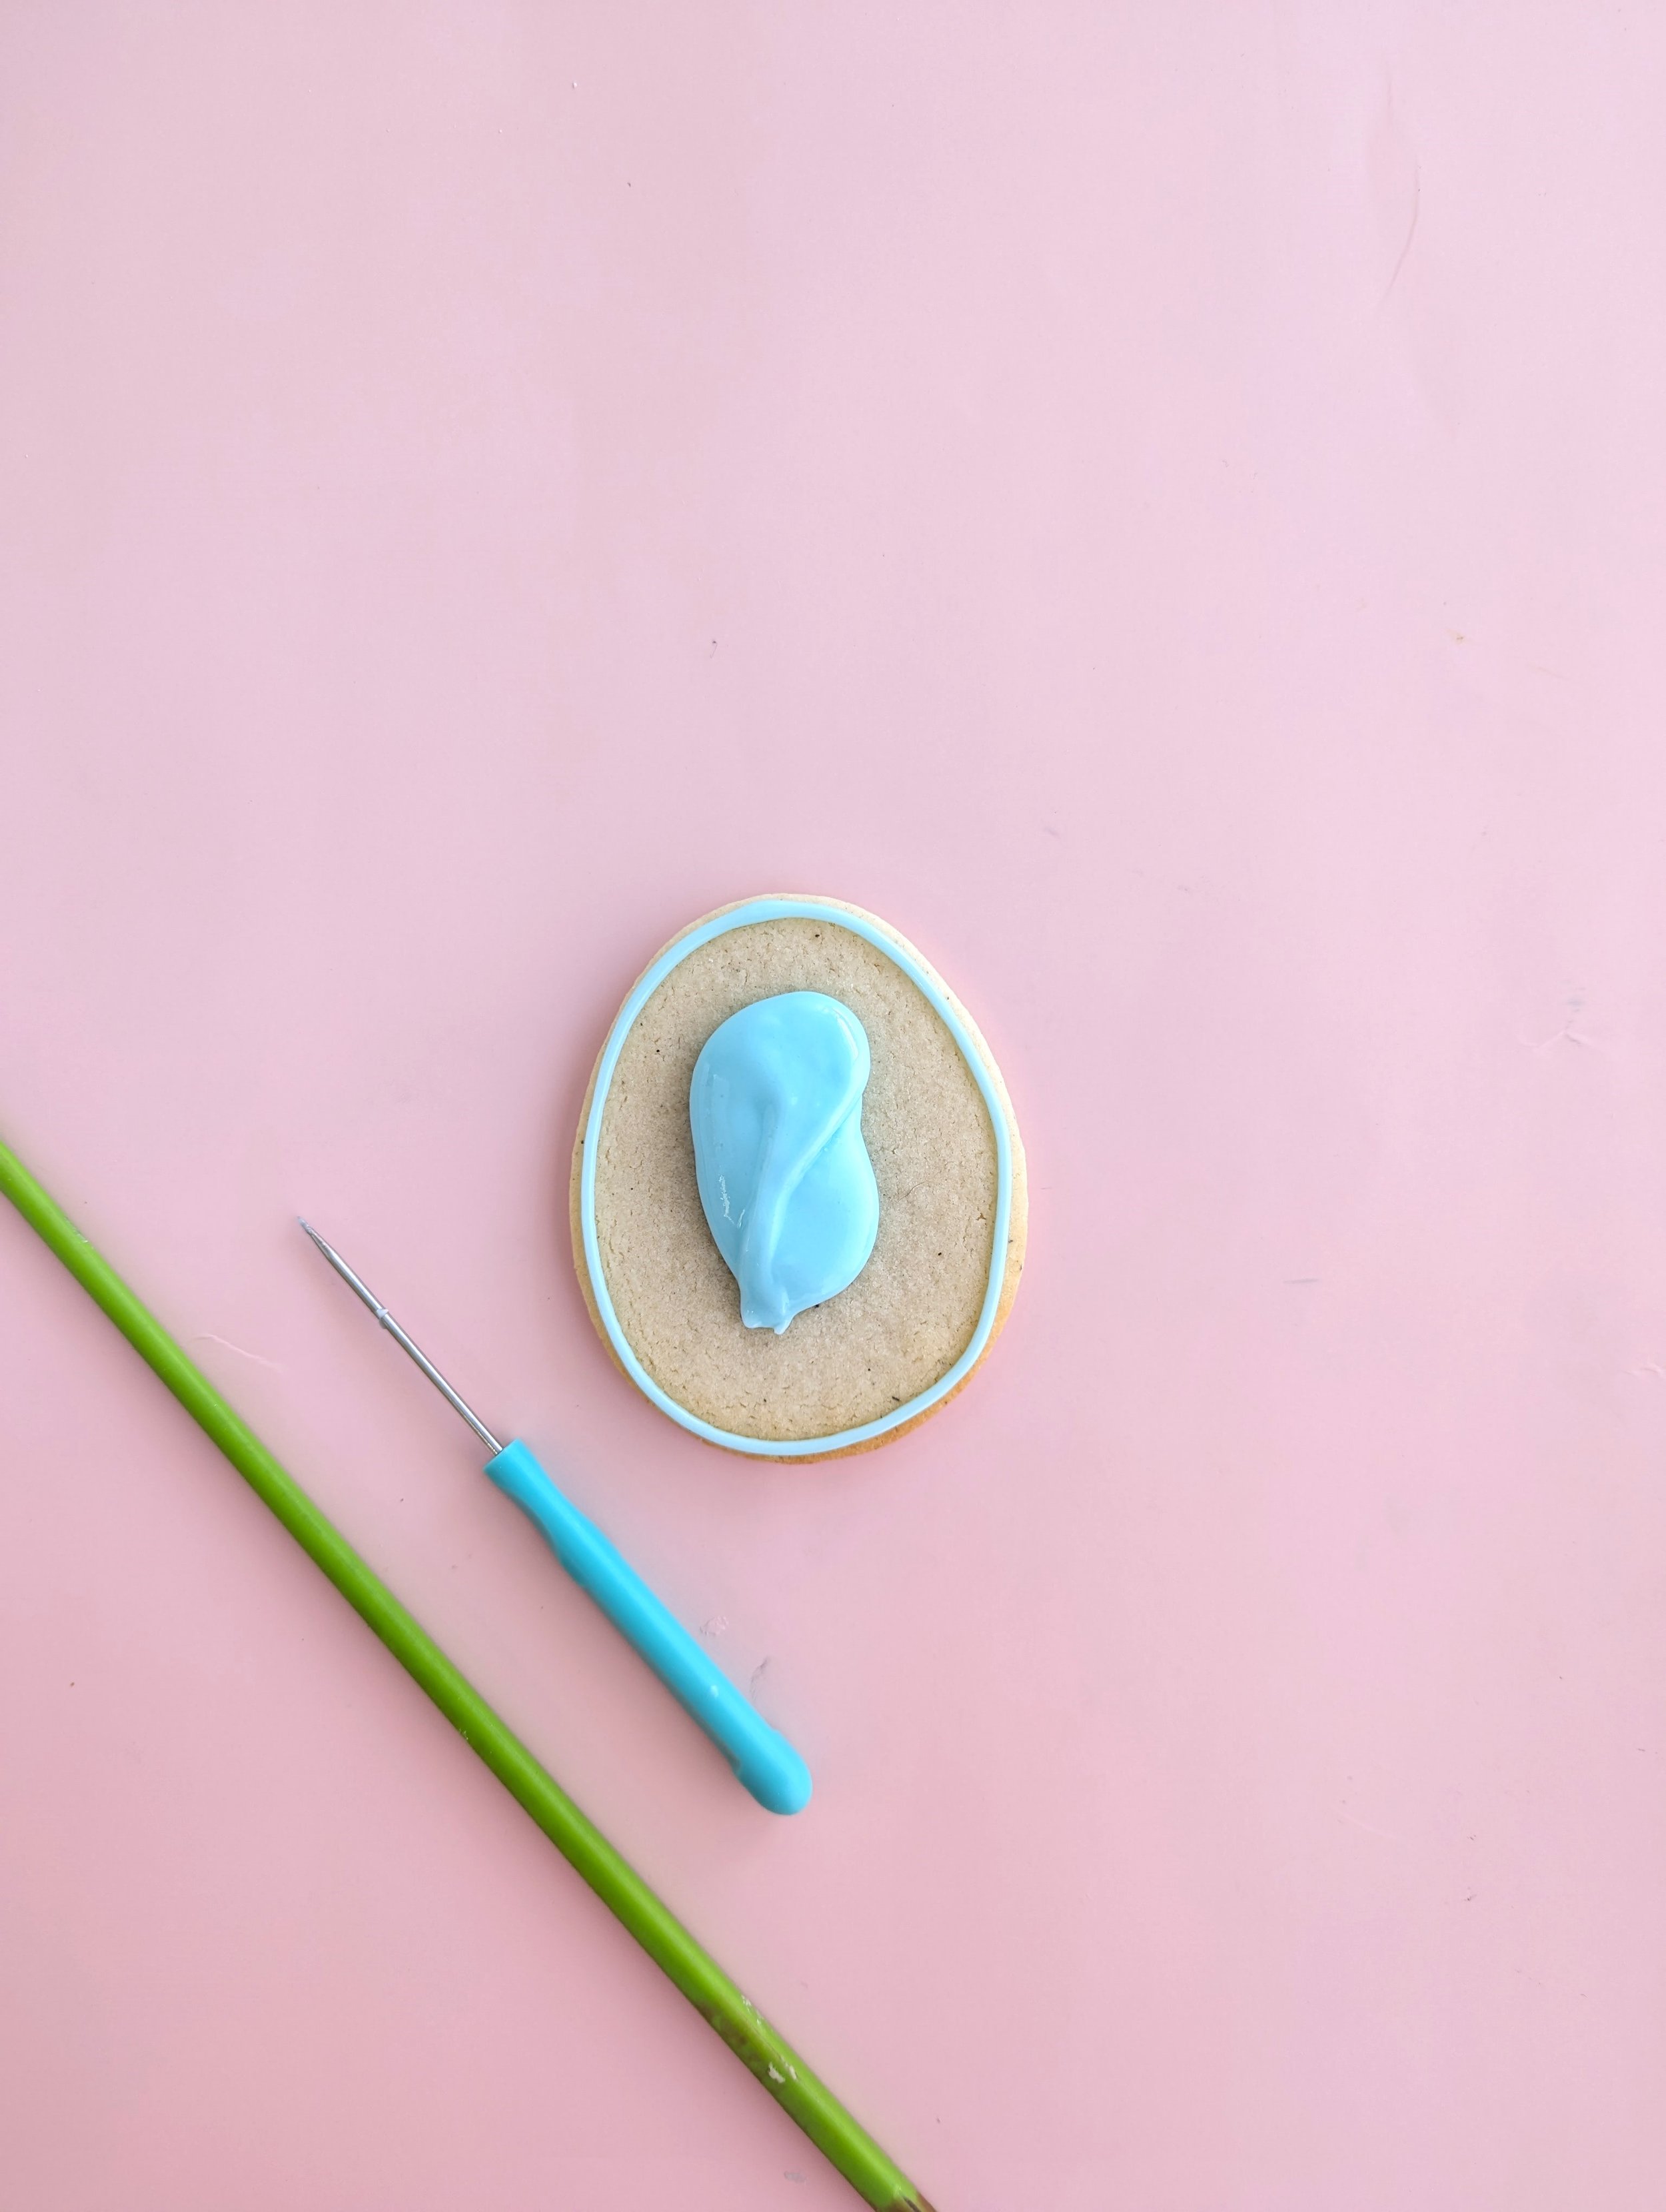
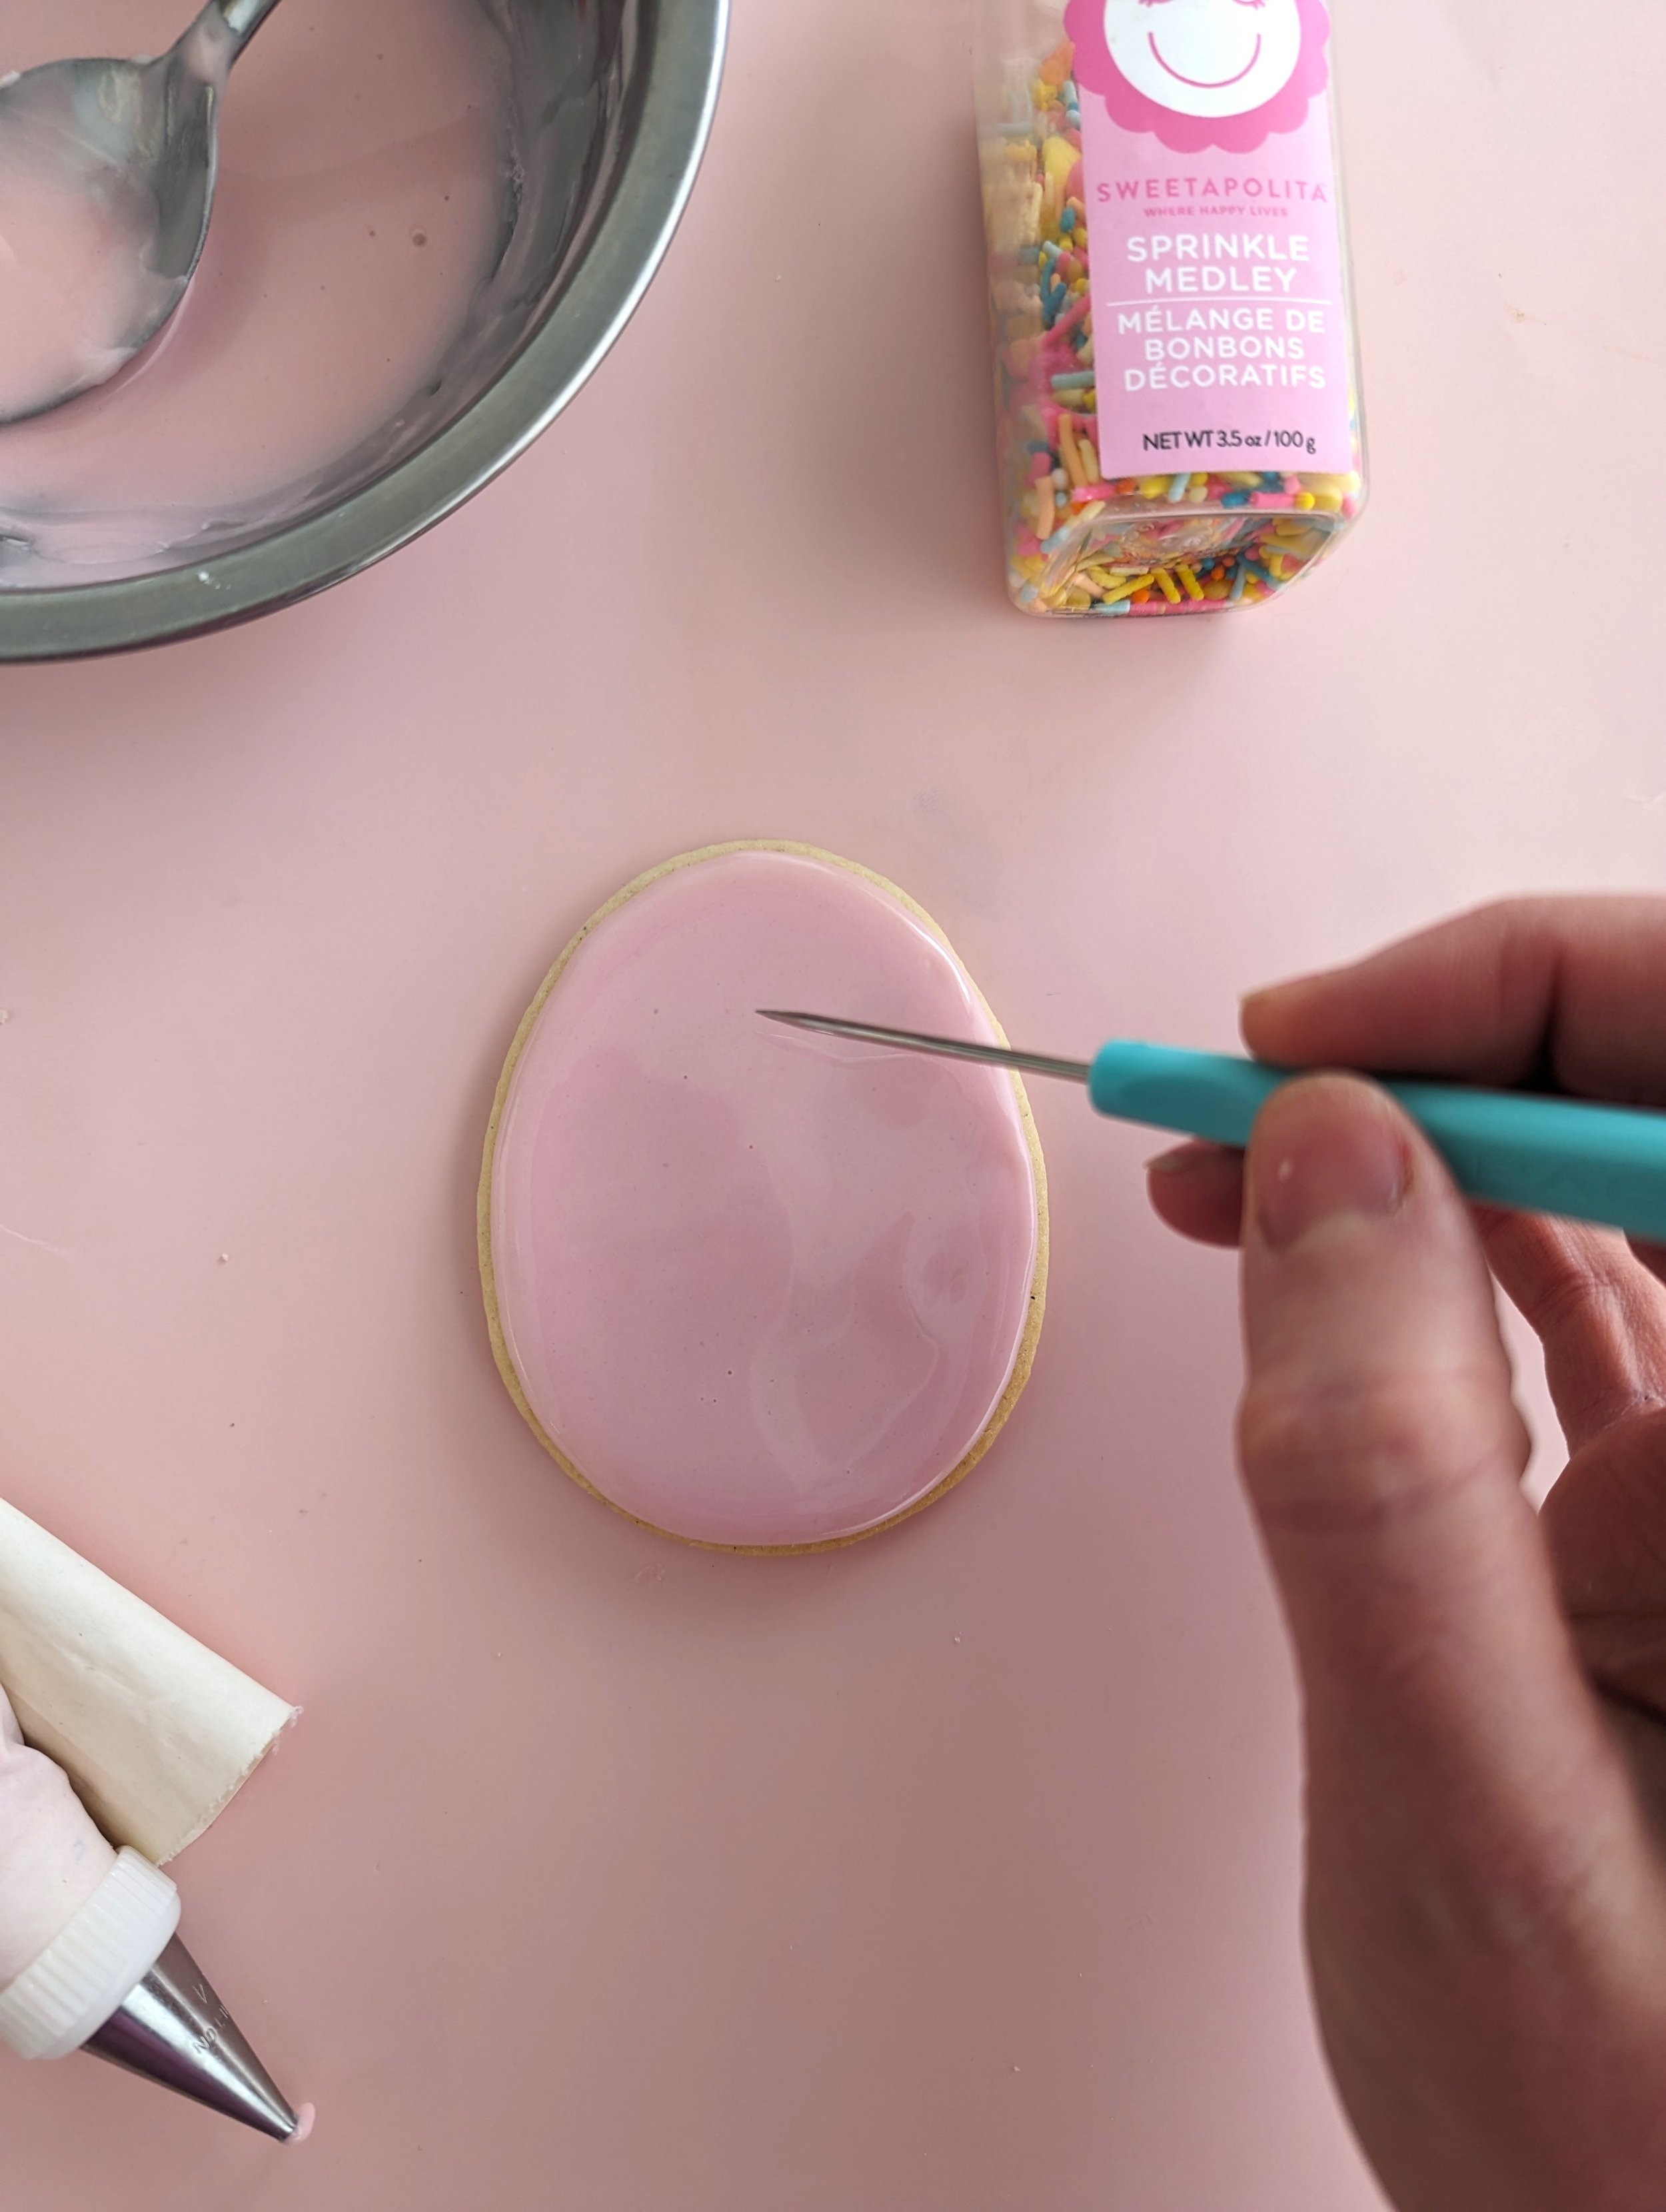
Now, take an Easter egg cookie and pipe an outline around the outside. Don’t go too close to the edge or your icing may bloop over the edge of your cookie.
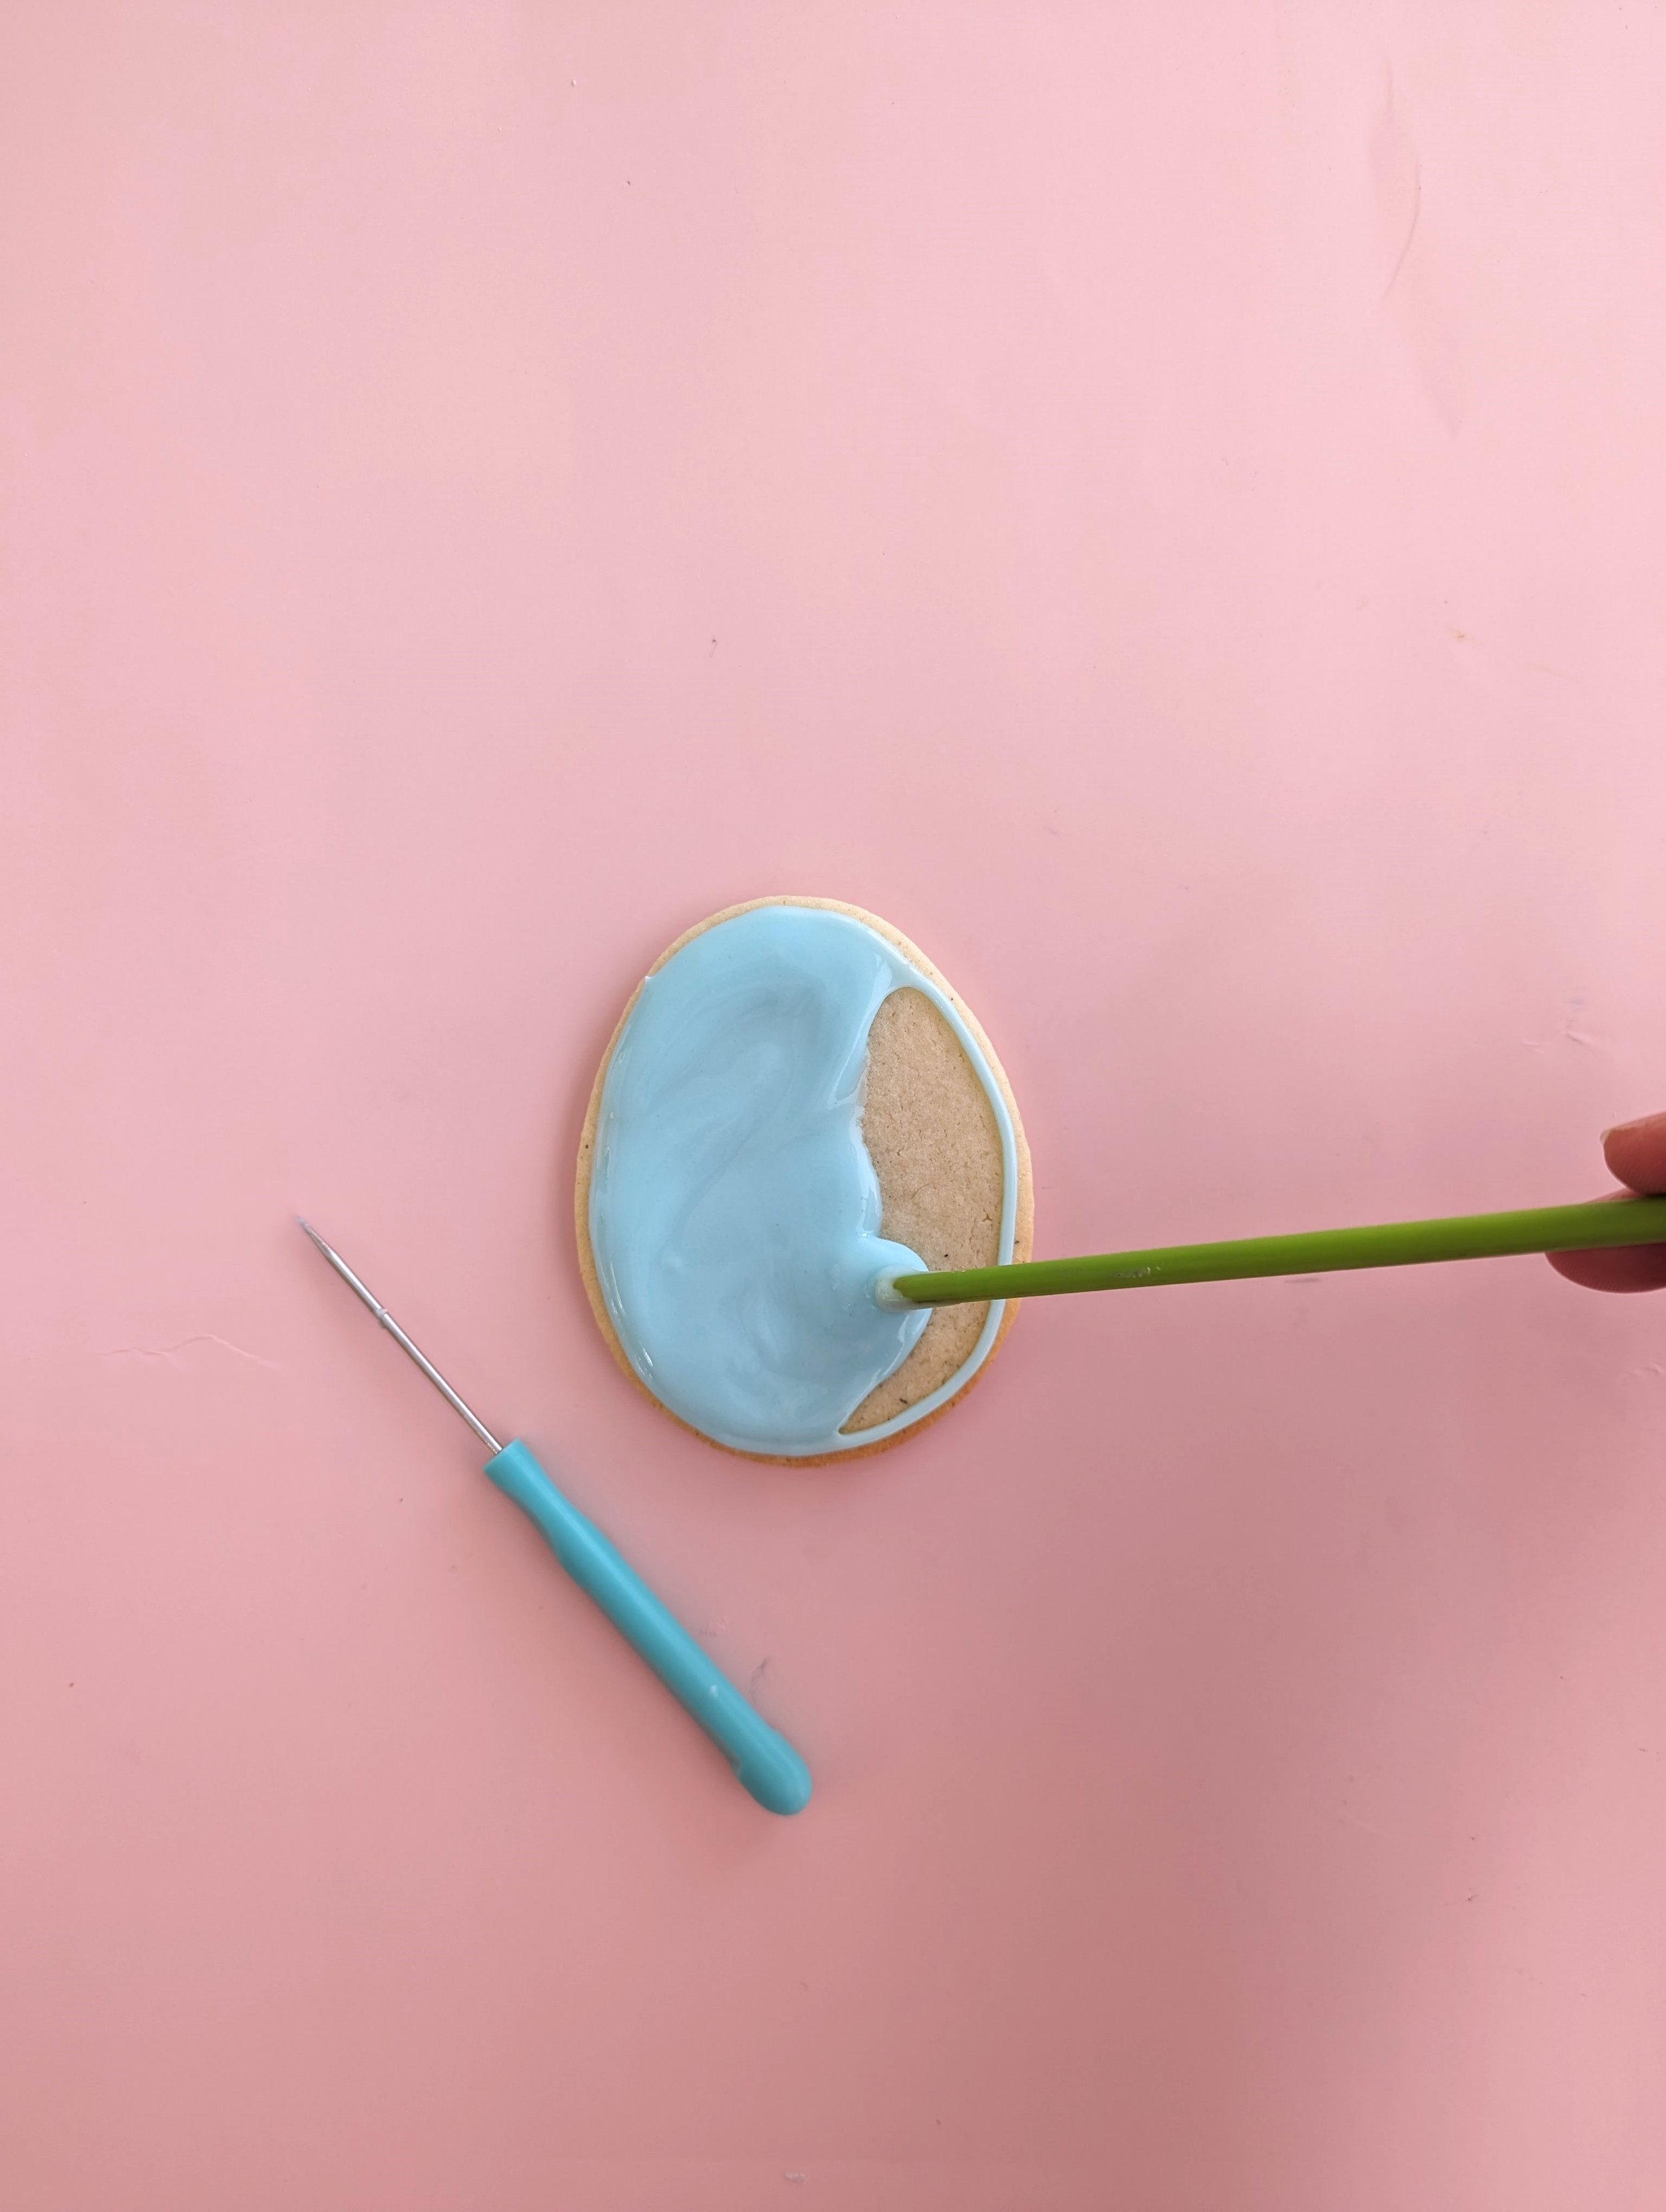
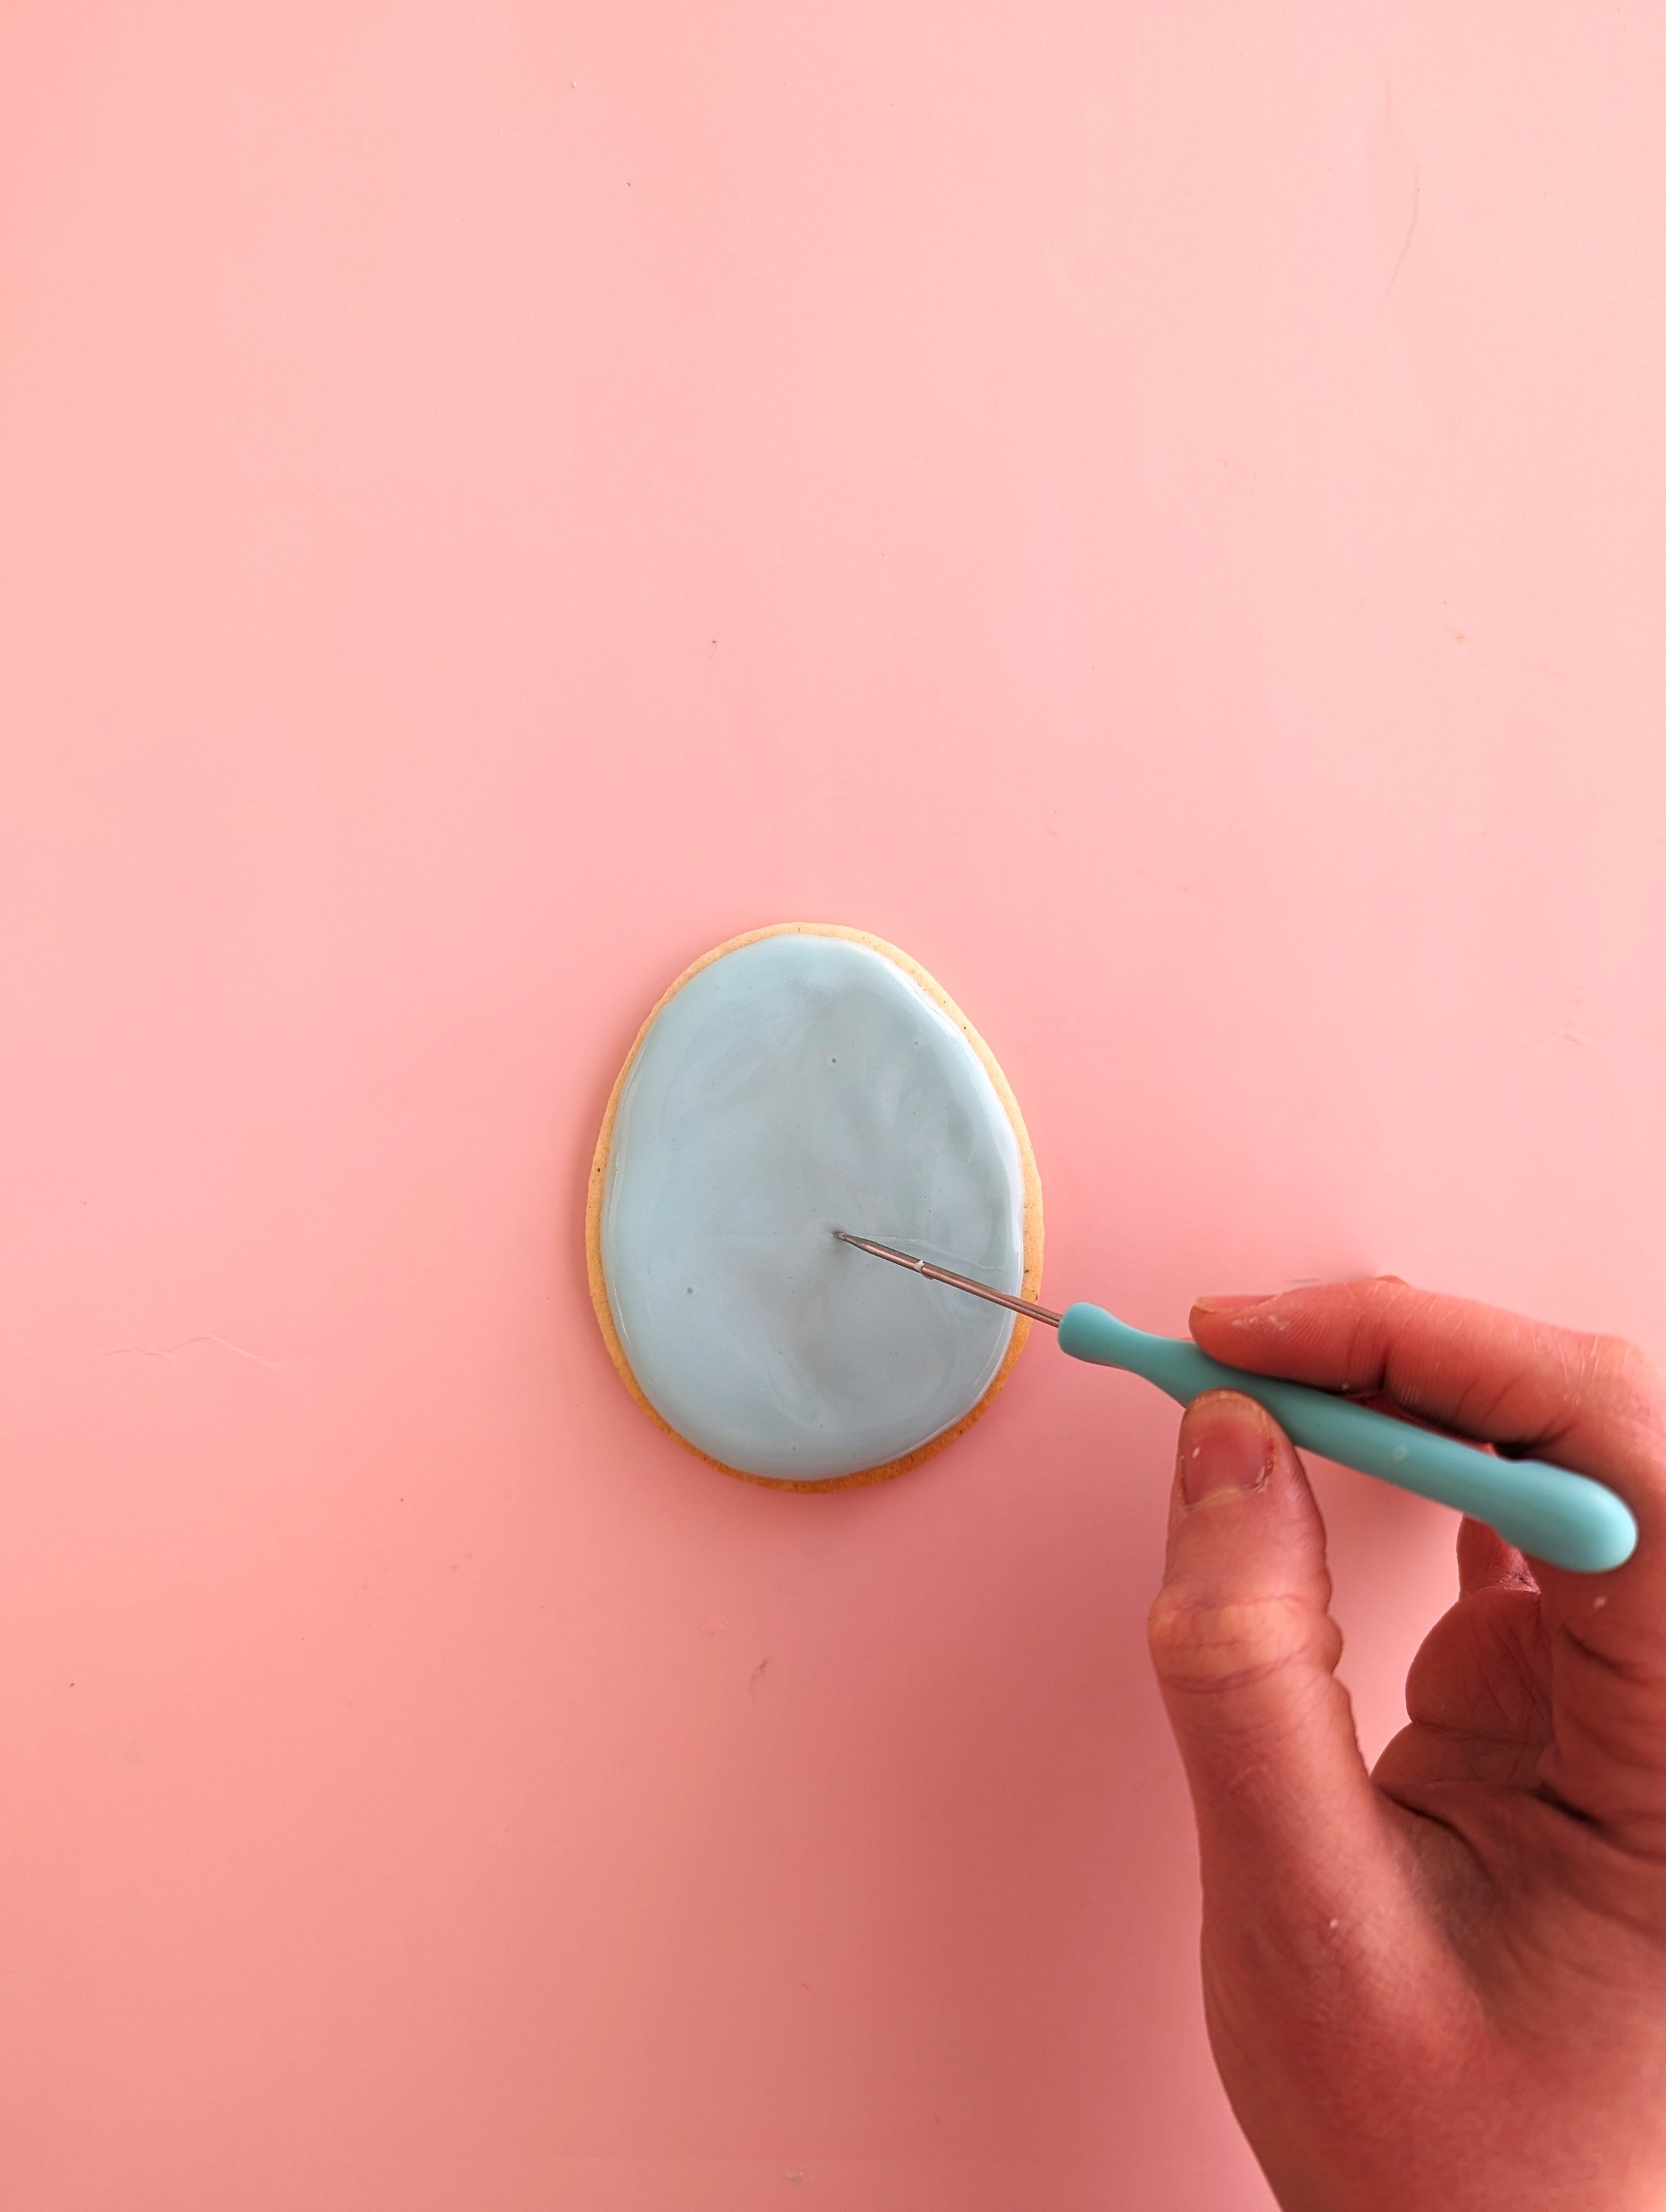
Once you’ve outlined your Easter egg cookie, put a small spoonful of thinned out icing in the middle of your cookie and spread it out using a chopstick until it covers the whole cookie. Poke out any air bubbles with a toothpick or a scribe tool.
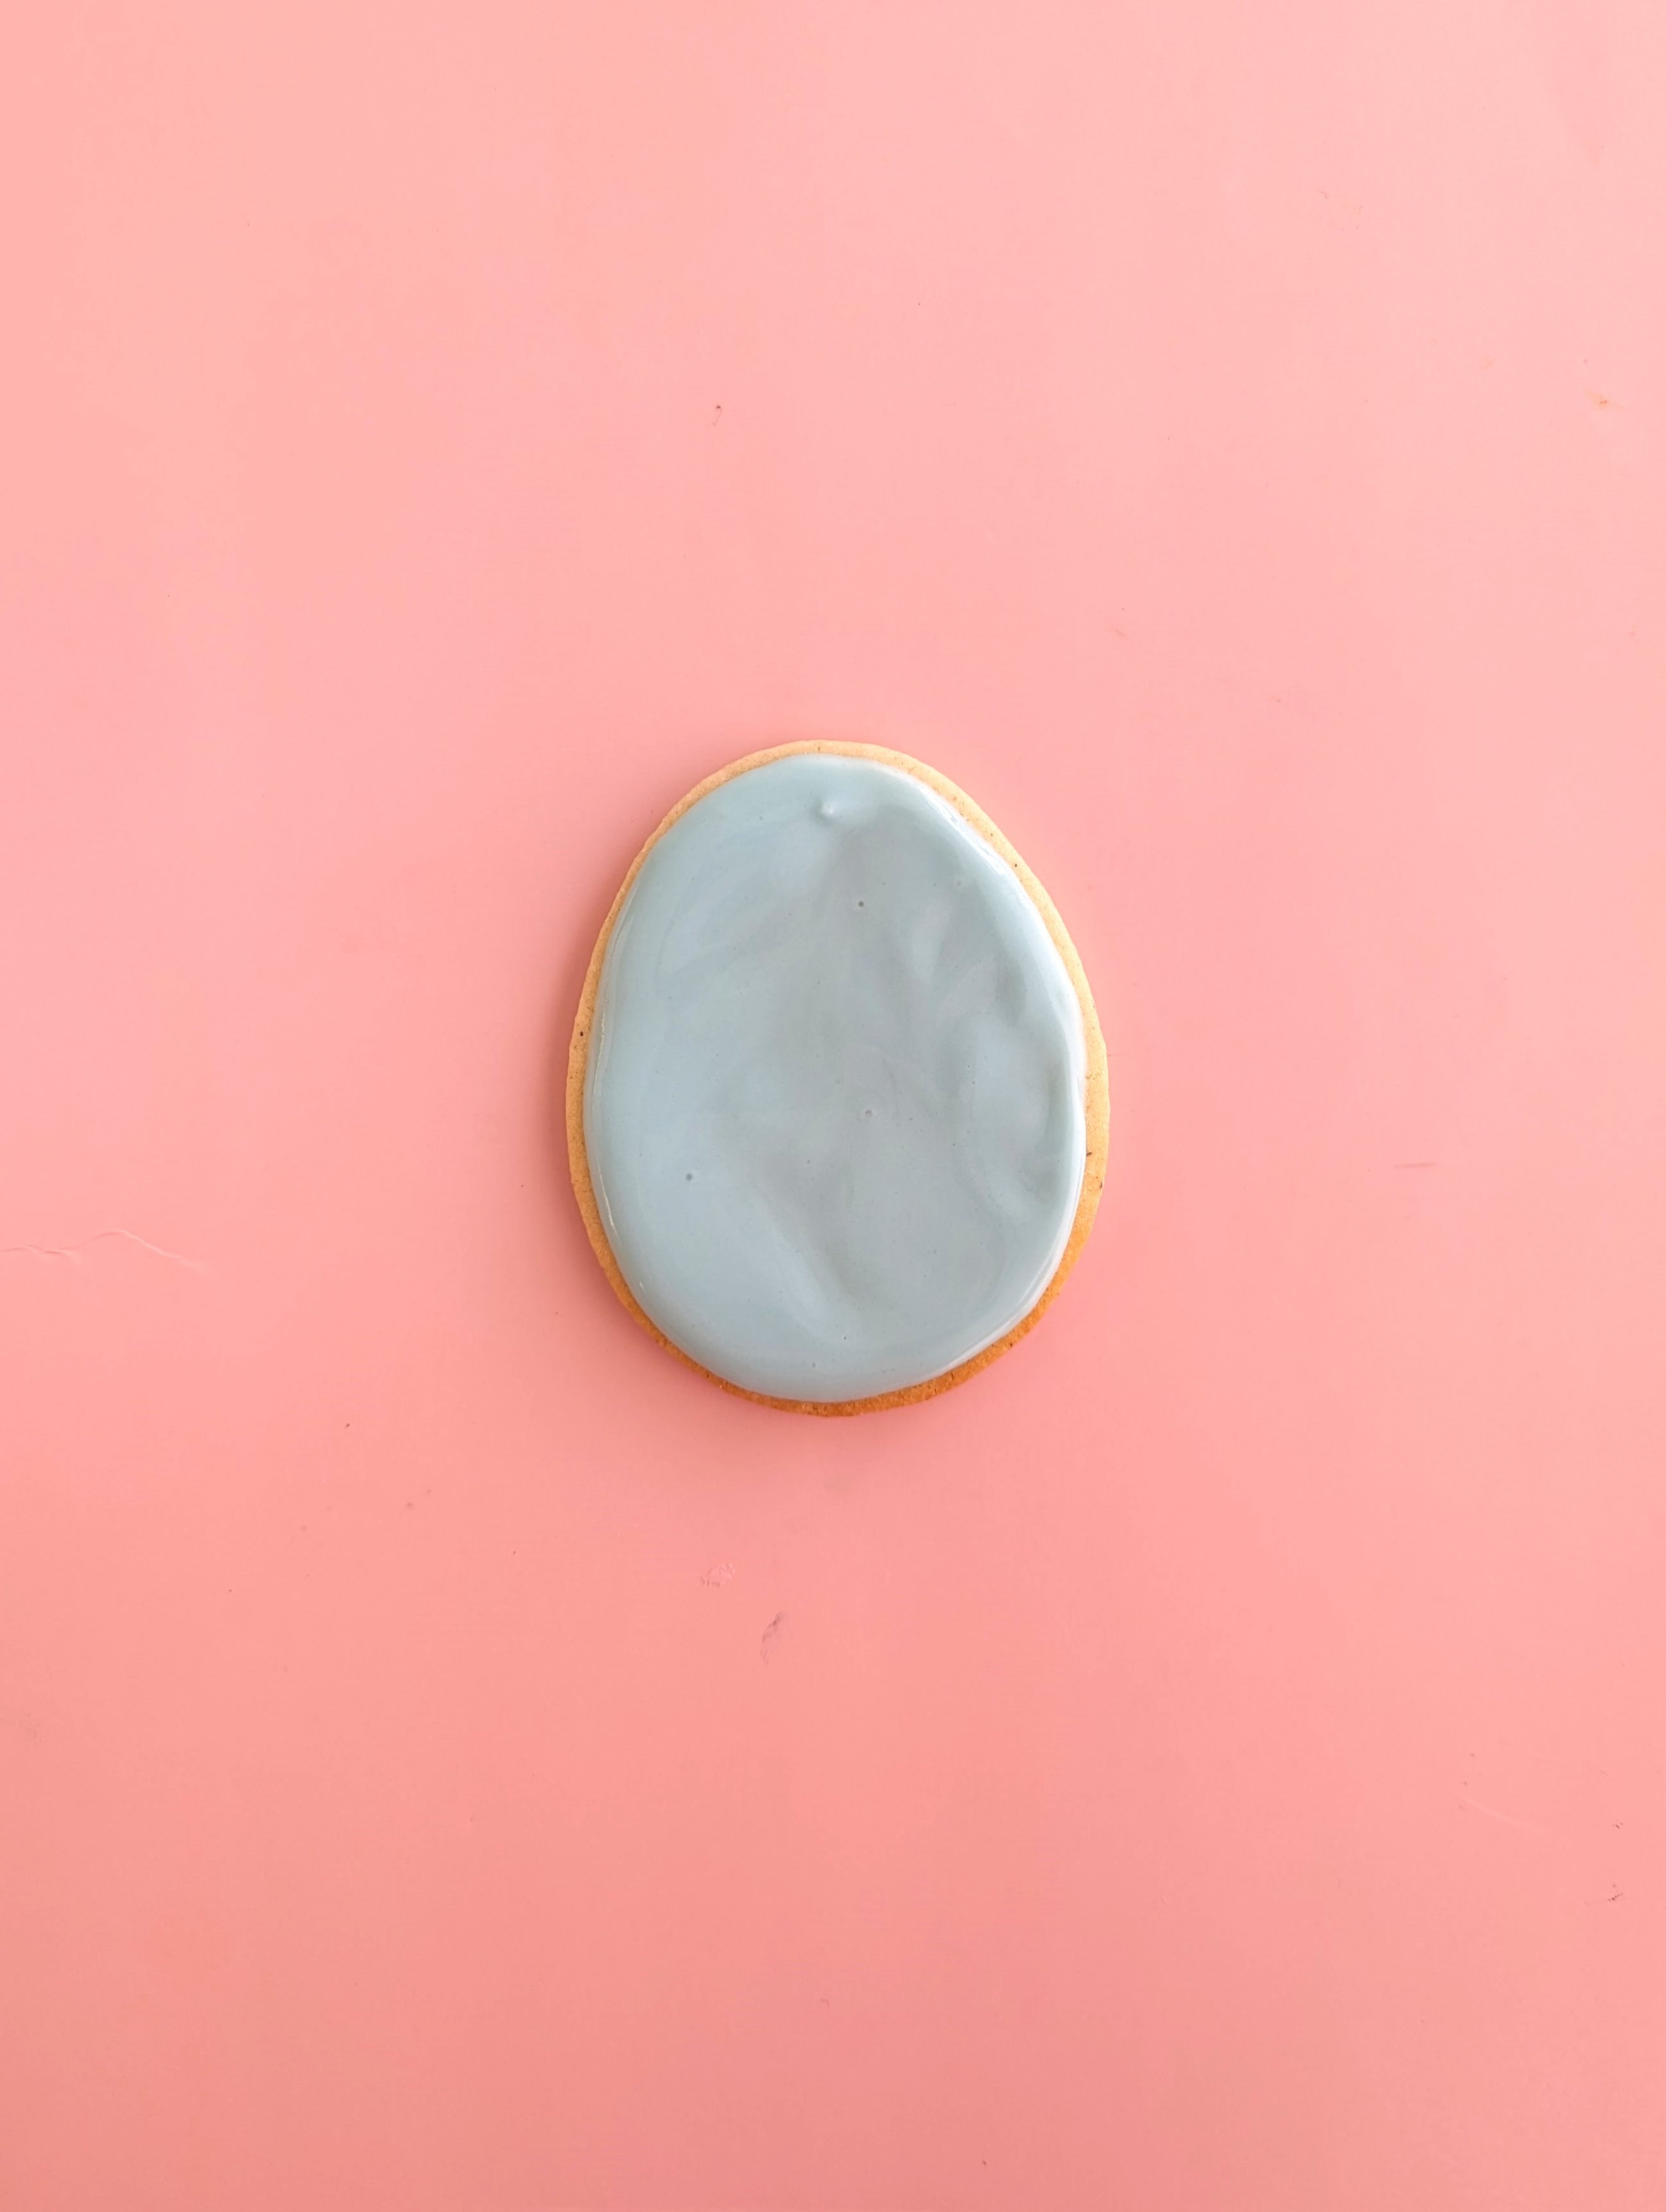
Let your cookie dry for 20 minutes or so.
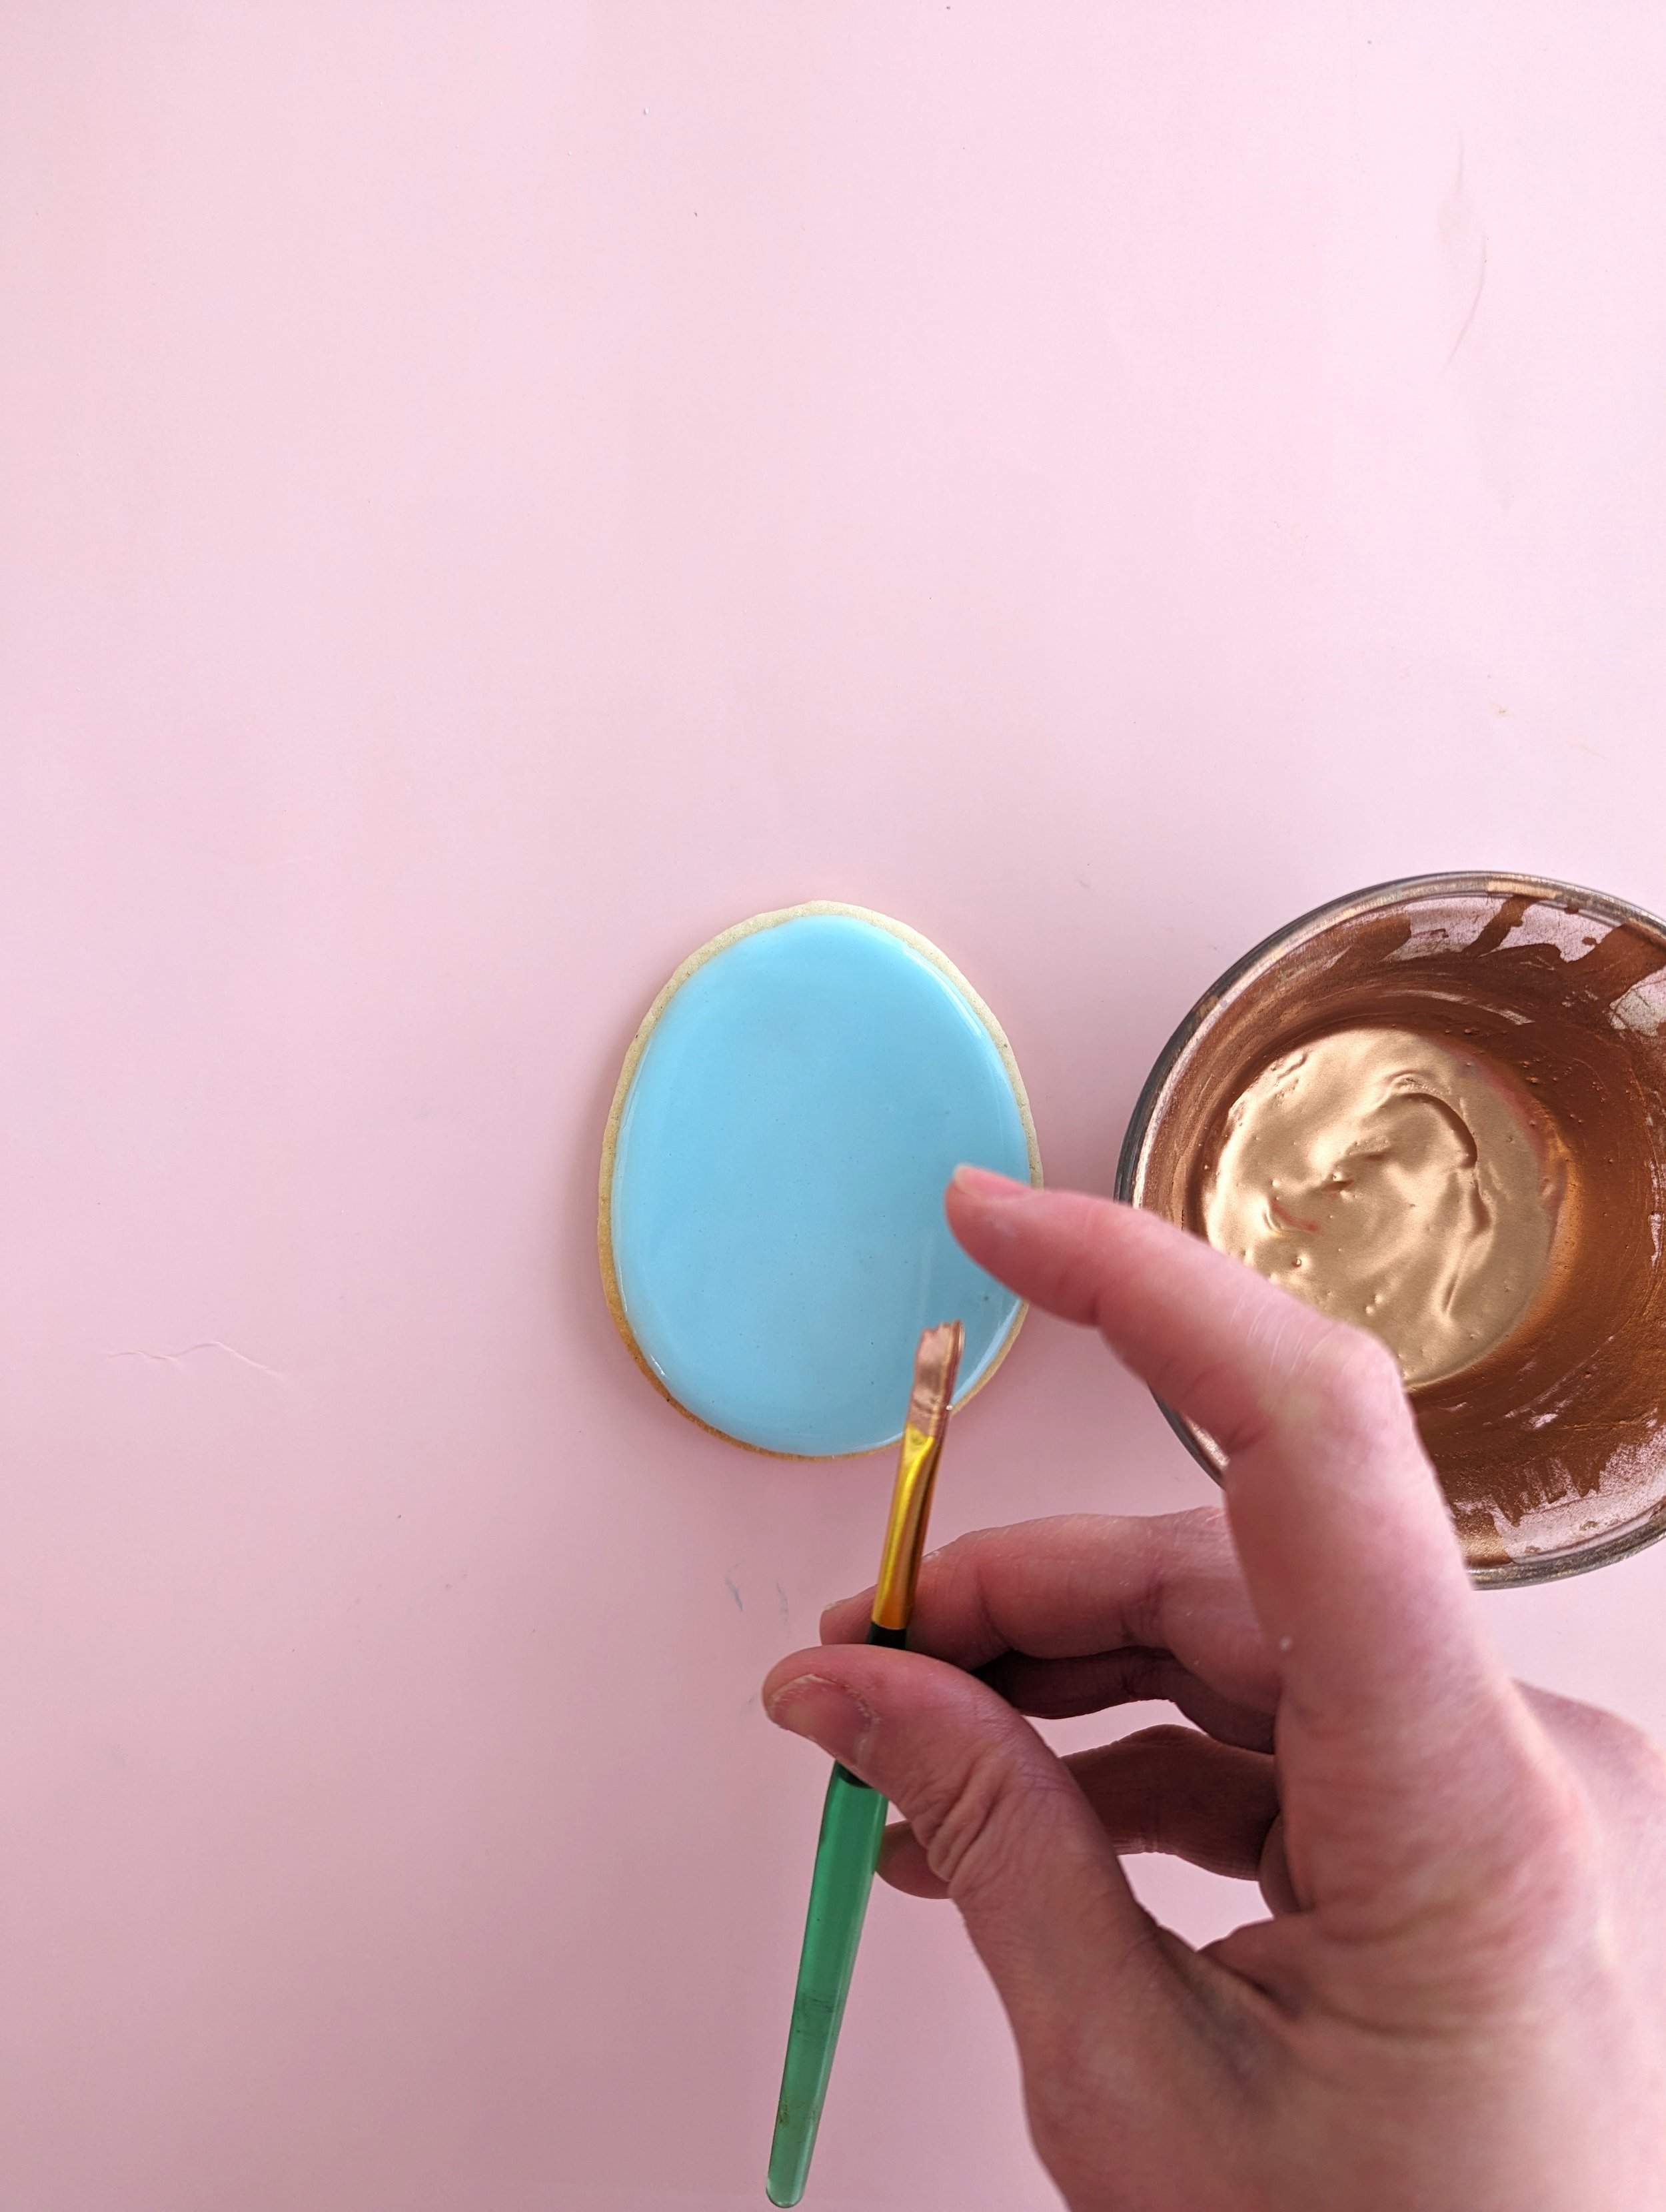
Now, take a small bowl or container and put a tiny amount (about 1/8 tsp) of lustre dust or black or brown powdered food colouring in it, then add a few drops of vodka or vanilla extract. You should have a liquid not a paste, but try not to make it too thin or your speckles will be really light.
Grab your paintbrush and dip it into your lustre dust or food colour mixture, then use the tip of your finger to flick the end of the brush near your cookie (or cookies) until you get the speckled effect you desire.
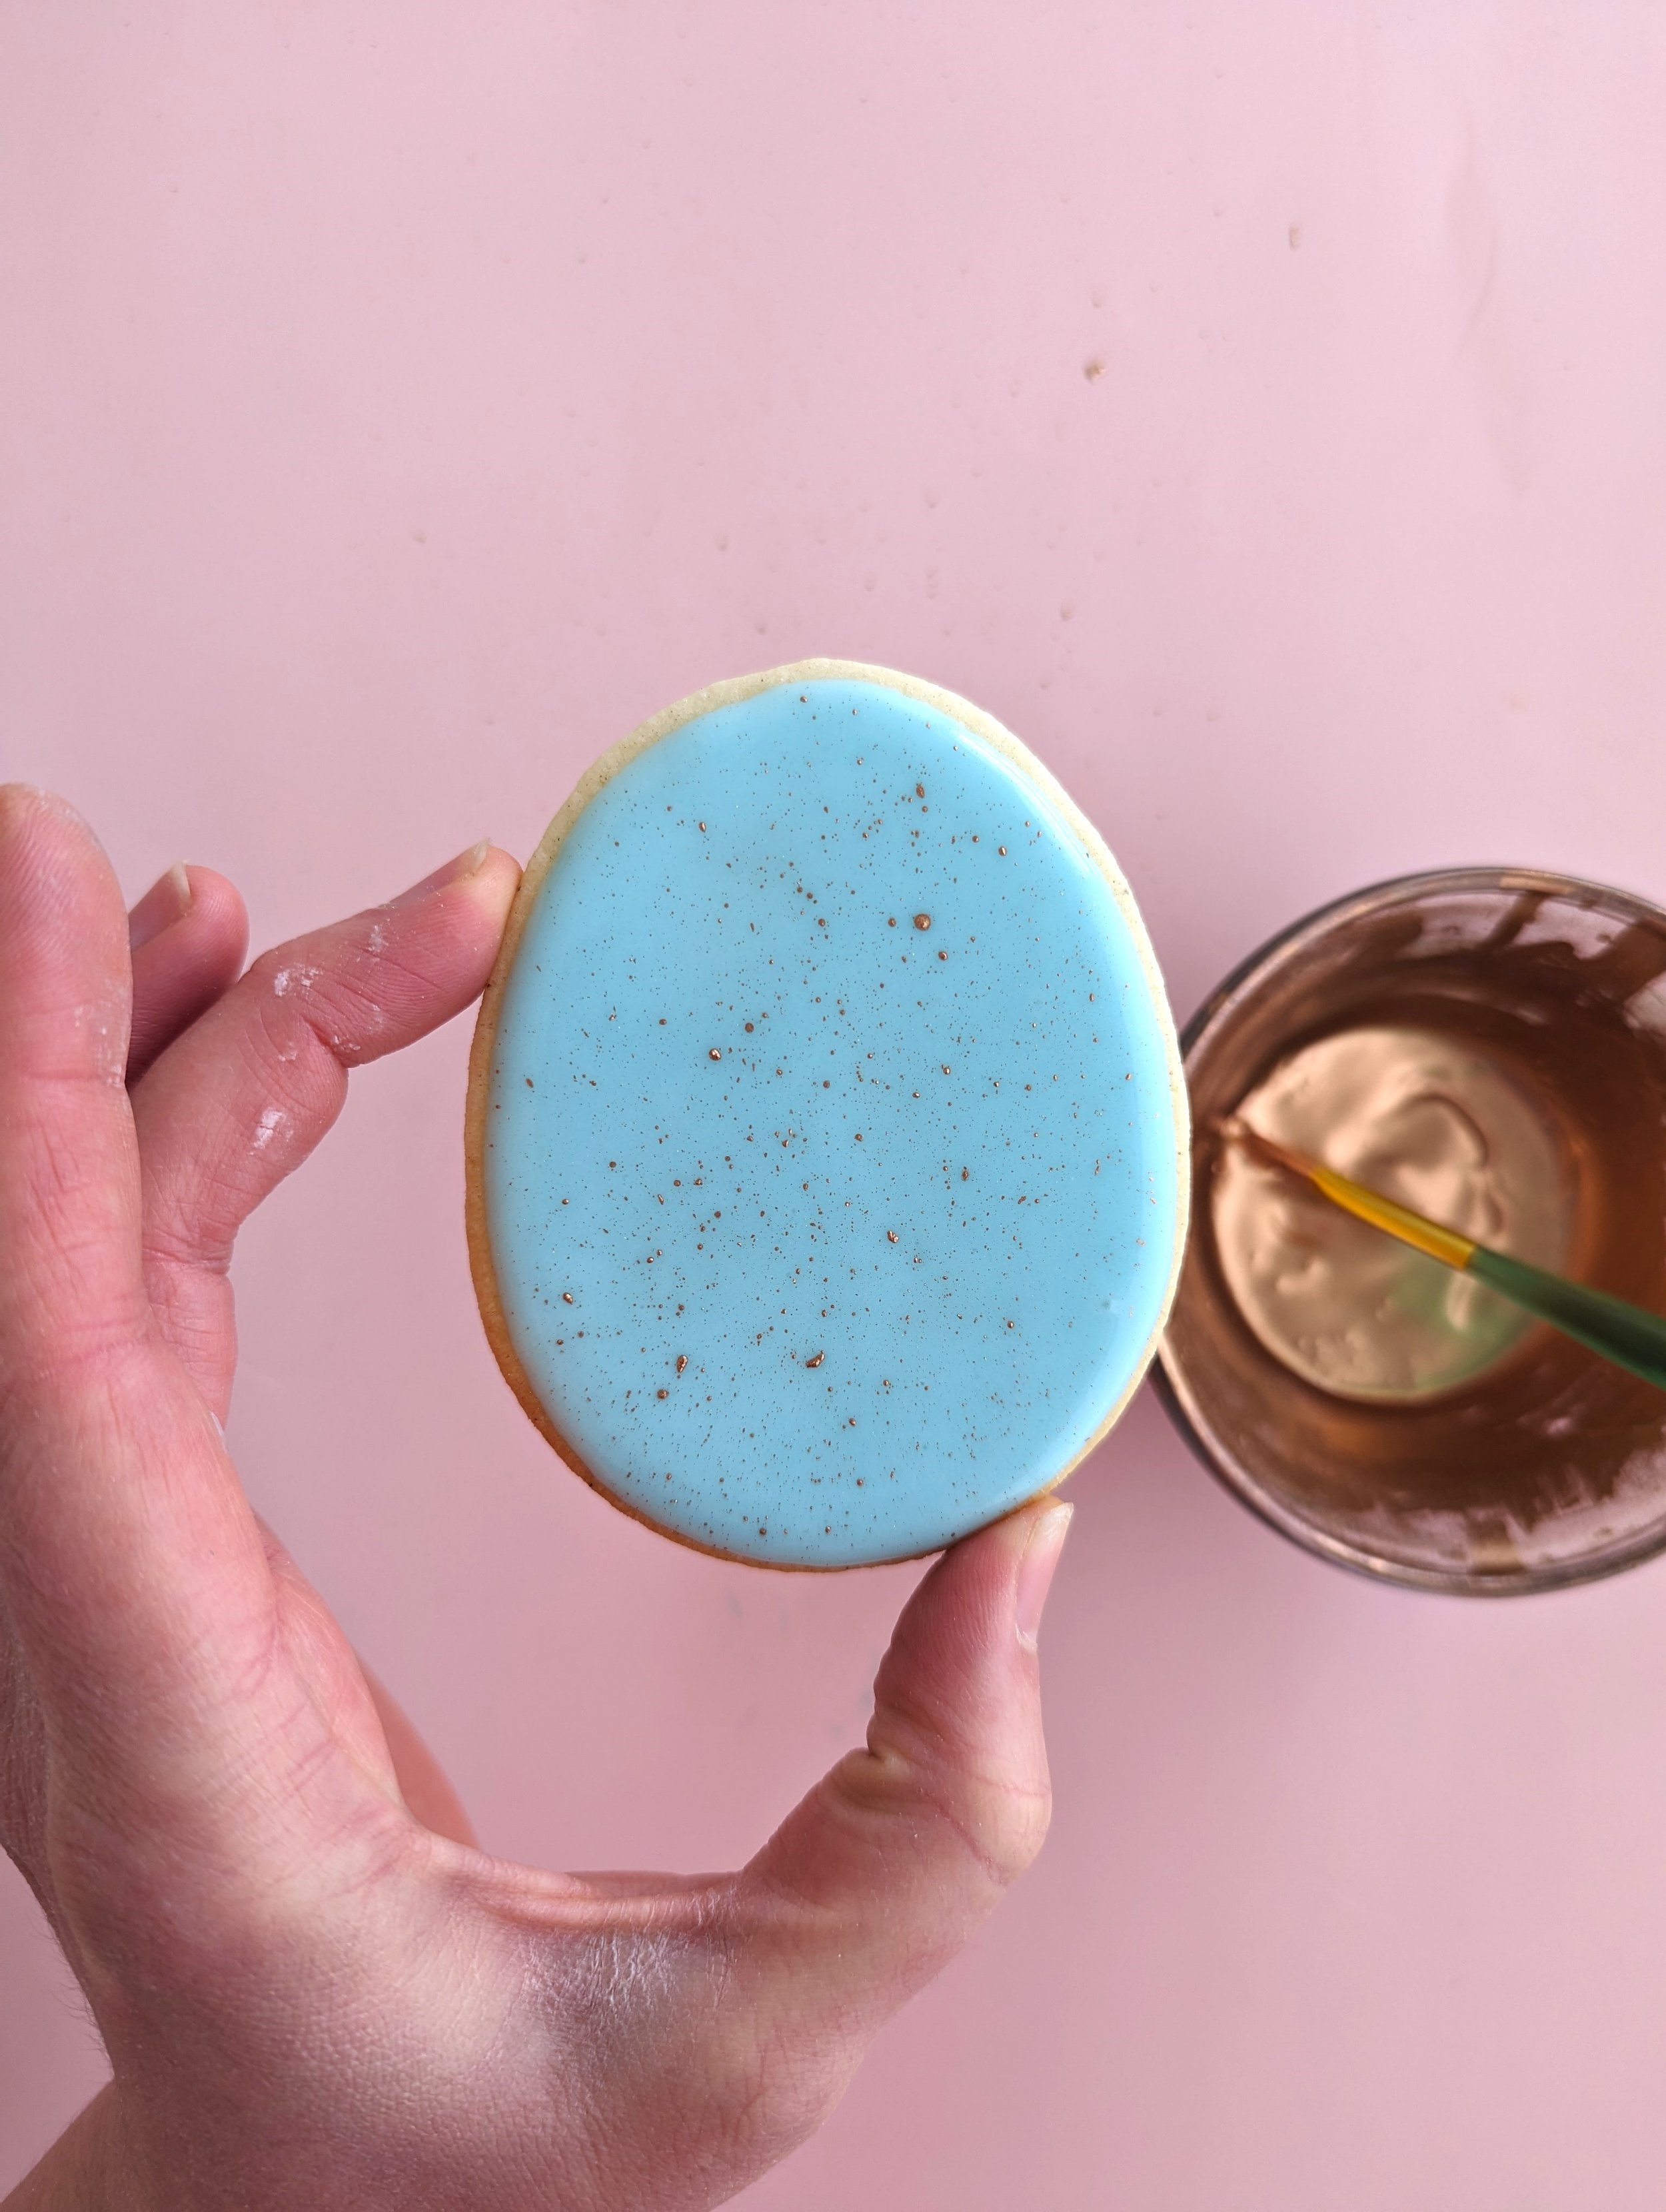
Let your Easter egg cookies dry overnight, then store them in an airtight container at room temperature for up to 3 days, or in the freezer for up to 3 months.
Ta-dah! Cute speckled eggs that you can show off at Easter dinner.
Technique #2: Sprinkle Easter Egg Cookies

This technique starts out the same as the speckled eggs.
Put a few spoonfuls of glaze in a small bowl and tint it whatever colour you’d like using your gel food colours. I used a tiny amount of Soft Pink Americolor gel to make mine a pastel pink colour.
Transfer a spoonful of your glaze to a small piping bag (use a #3 or #4 tip if using a piping bag that needs a tip, or cut off a tiiiiiiiny bit of the end of a tipless disposable piping bag) and set aside.
Thin out the rest of the icing in the bowl with a few drops of water. Don’t make it too thin! You’re aiming for about the consistency of honey. Start with about 1/4 tsp of water and add more as needed.
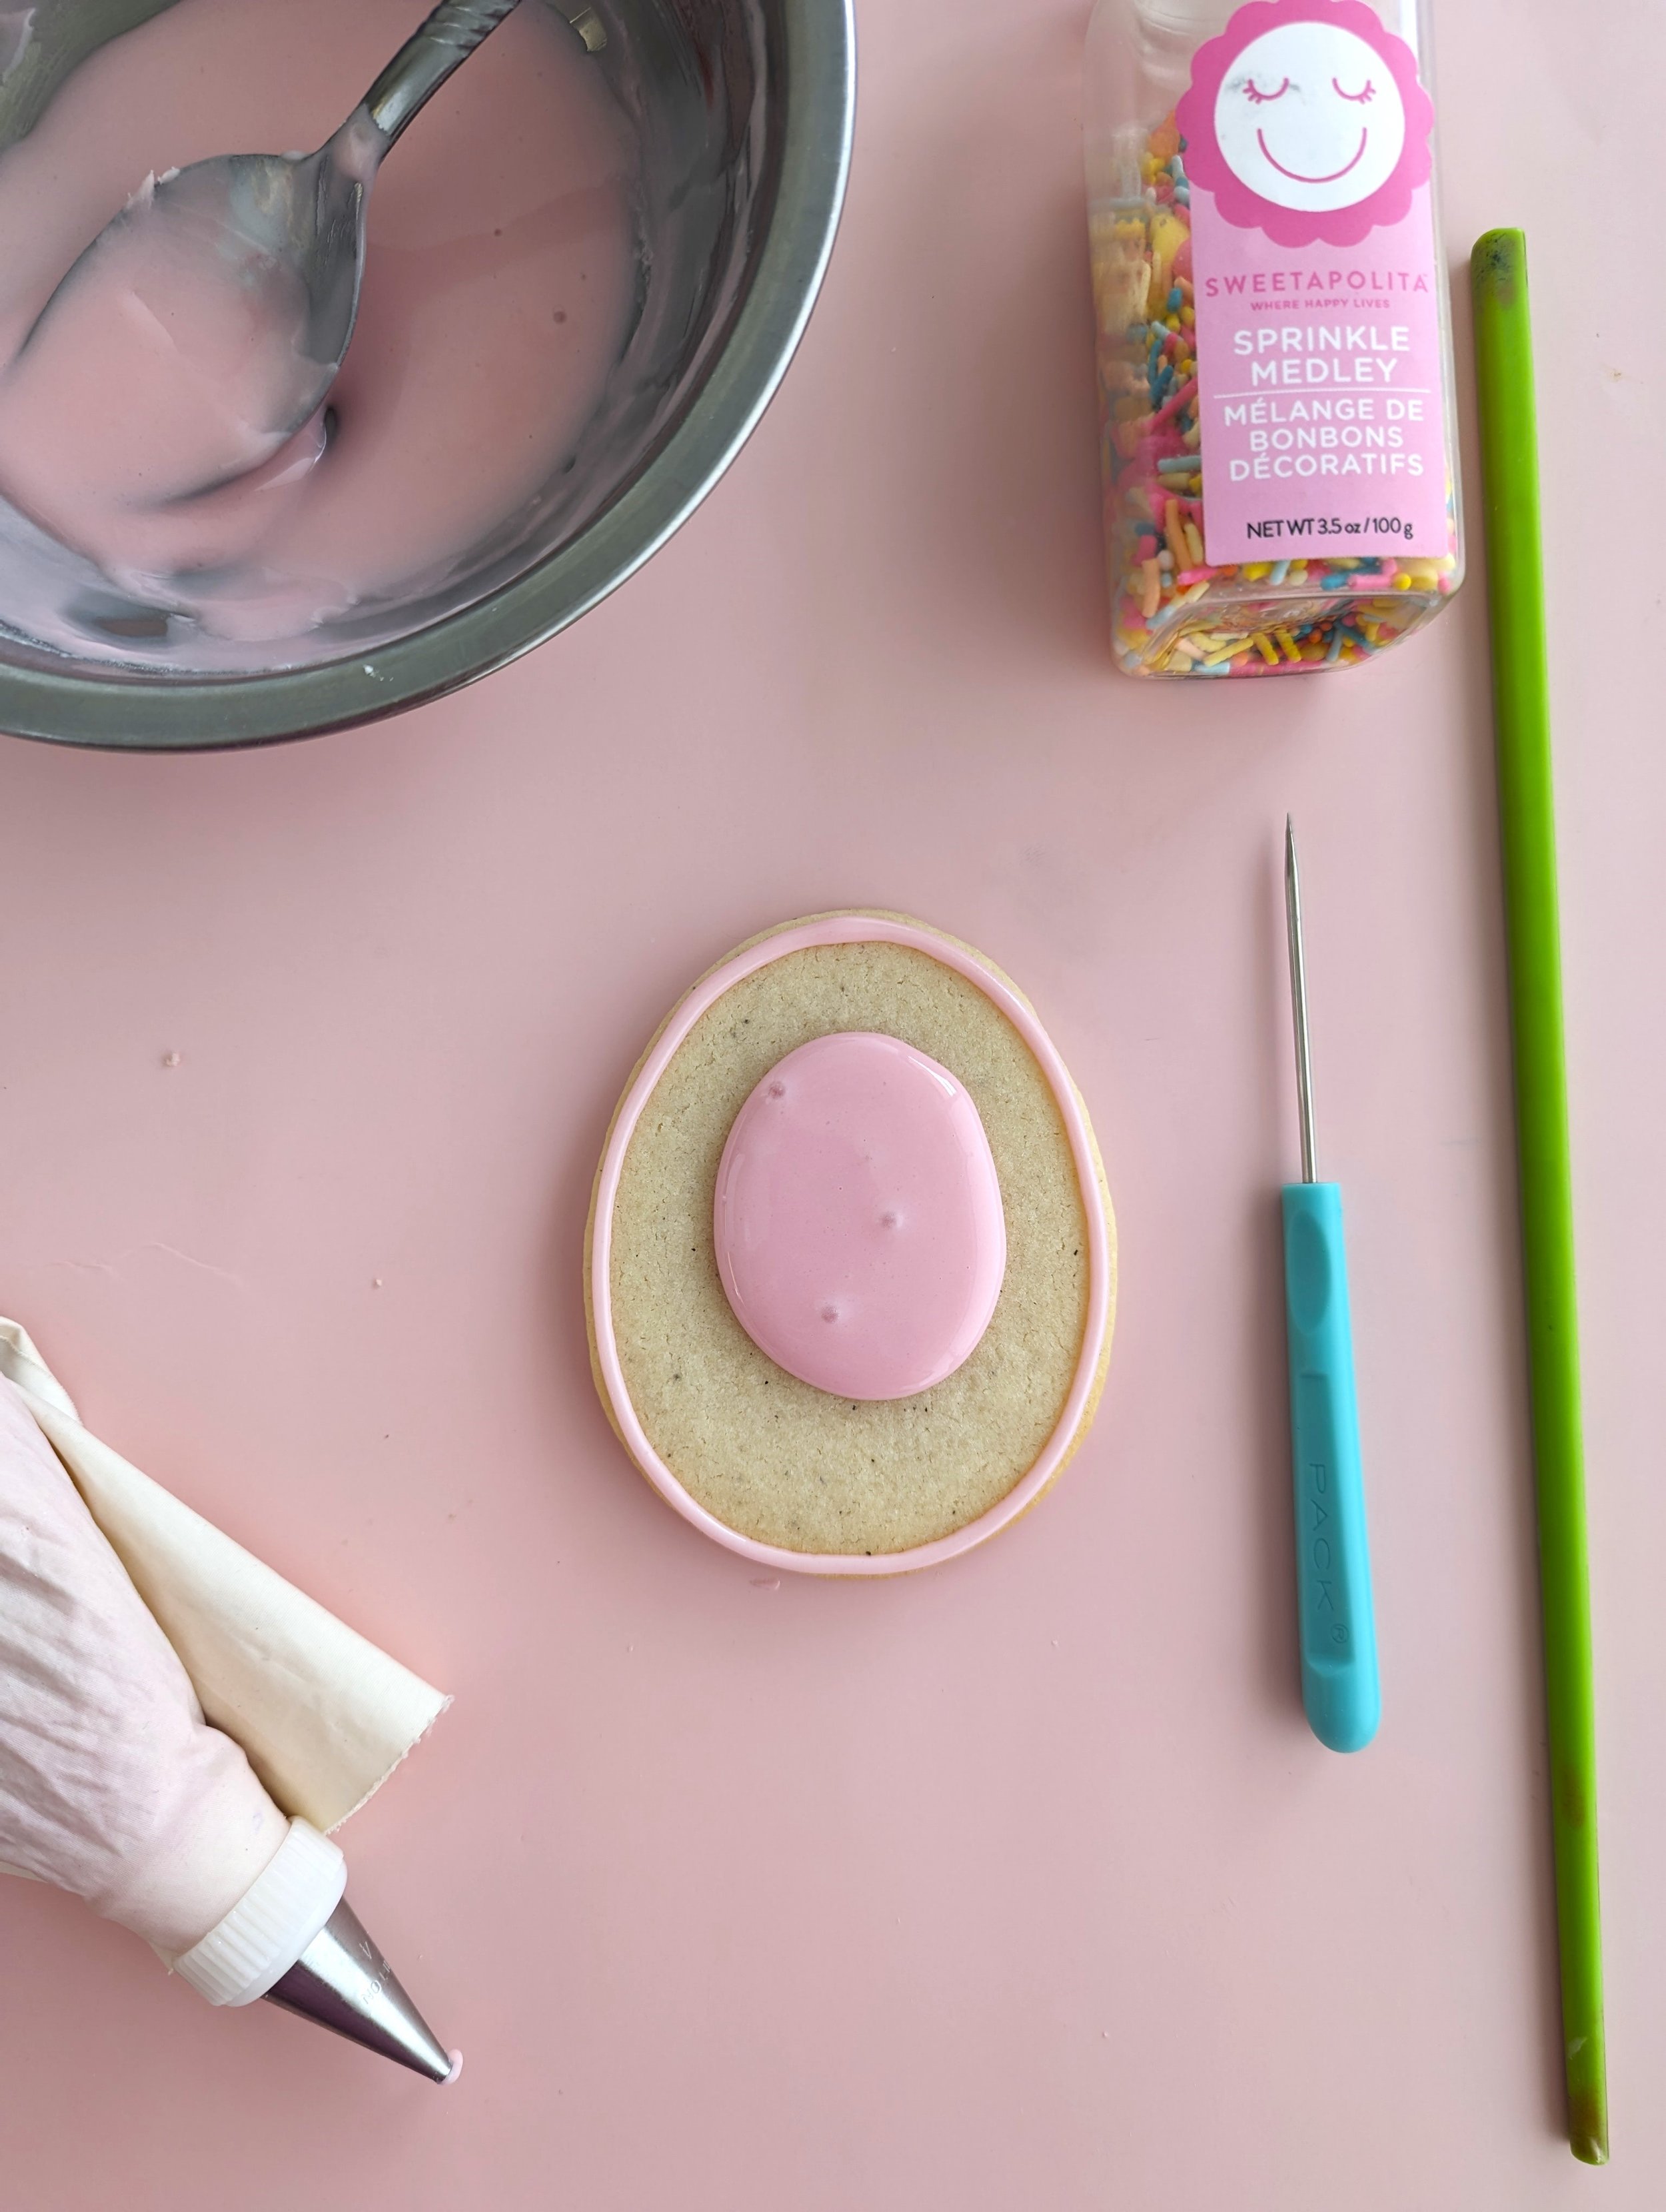
Now, take an Easter egg cookie and pipe an outline around the outside. Don’t go too close to the edge or your icing may bloop over the edge of your cookie.
Once you’ve outlined your Easter egg cookie, put a small spoonful of thinned out icing in the middle of your cookie and spread it out using a chopstick until it covers the whole cookie. Poke out any air bubbles with a toothpick or a scribe tool.
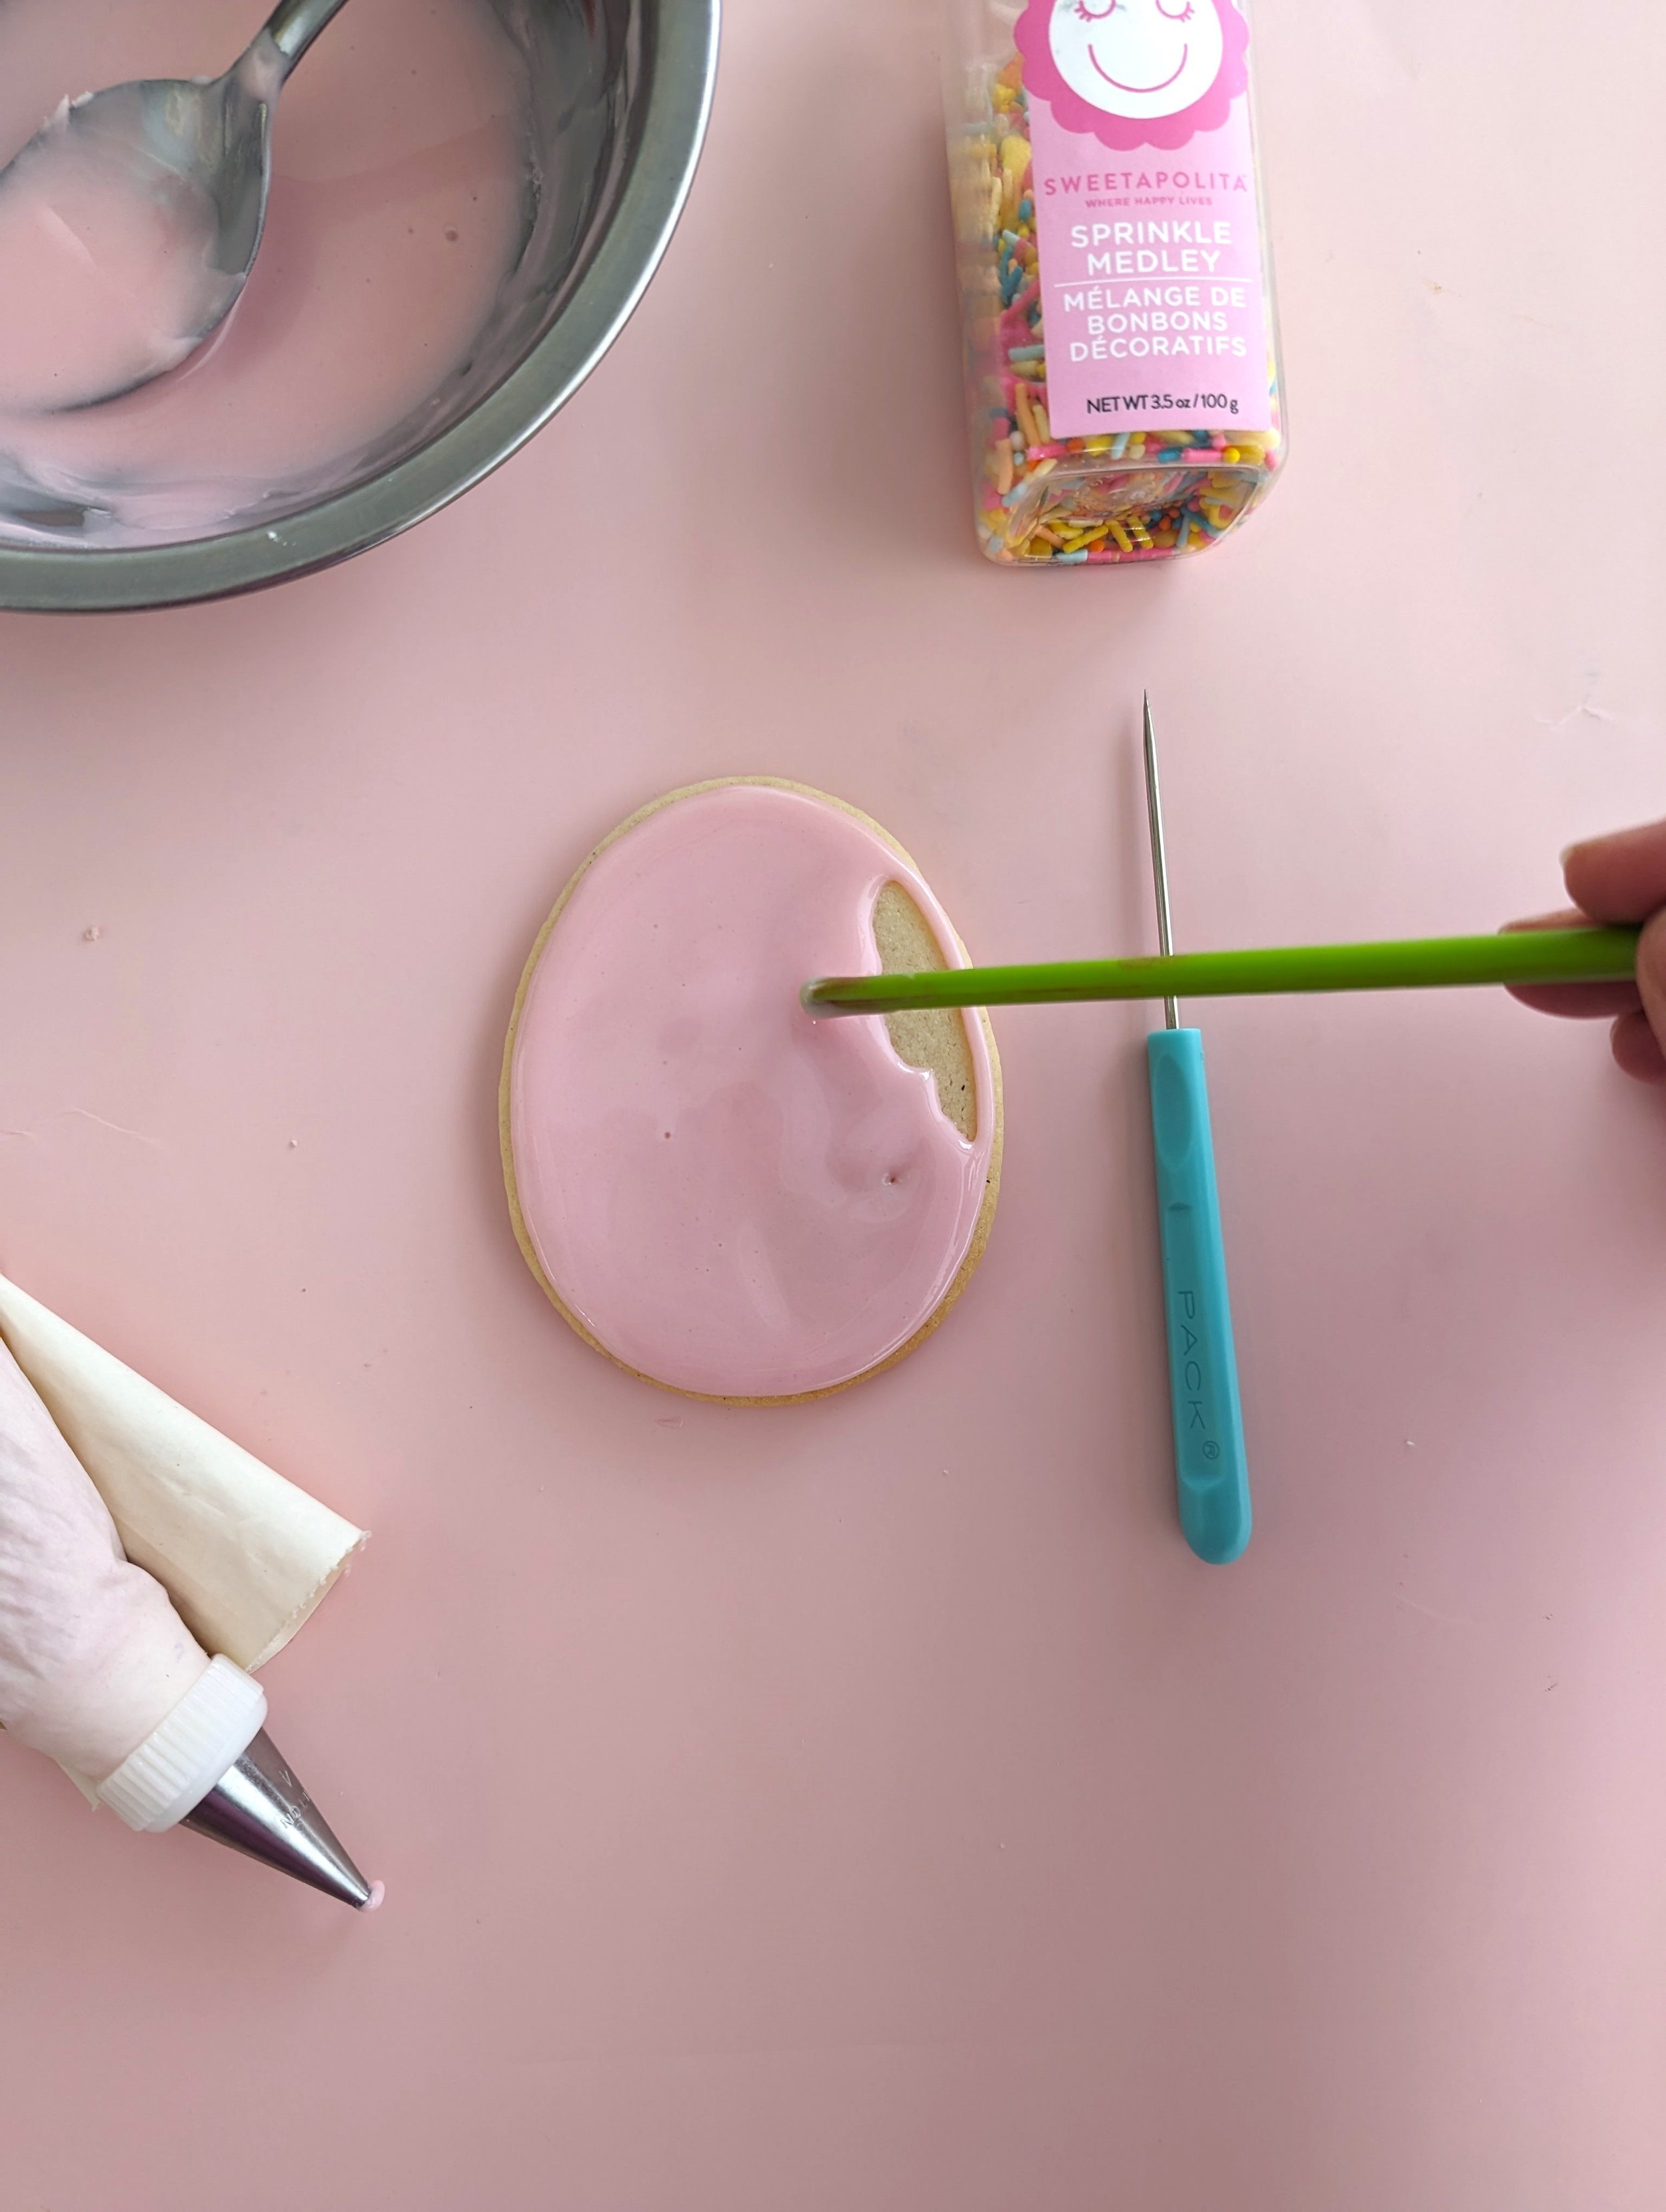
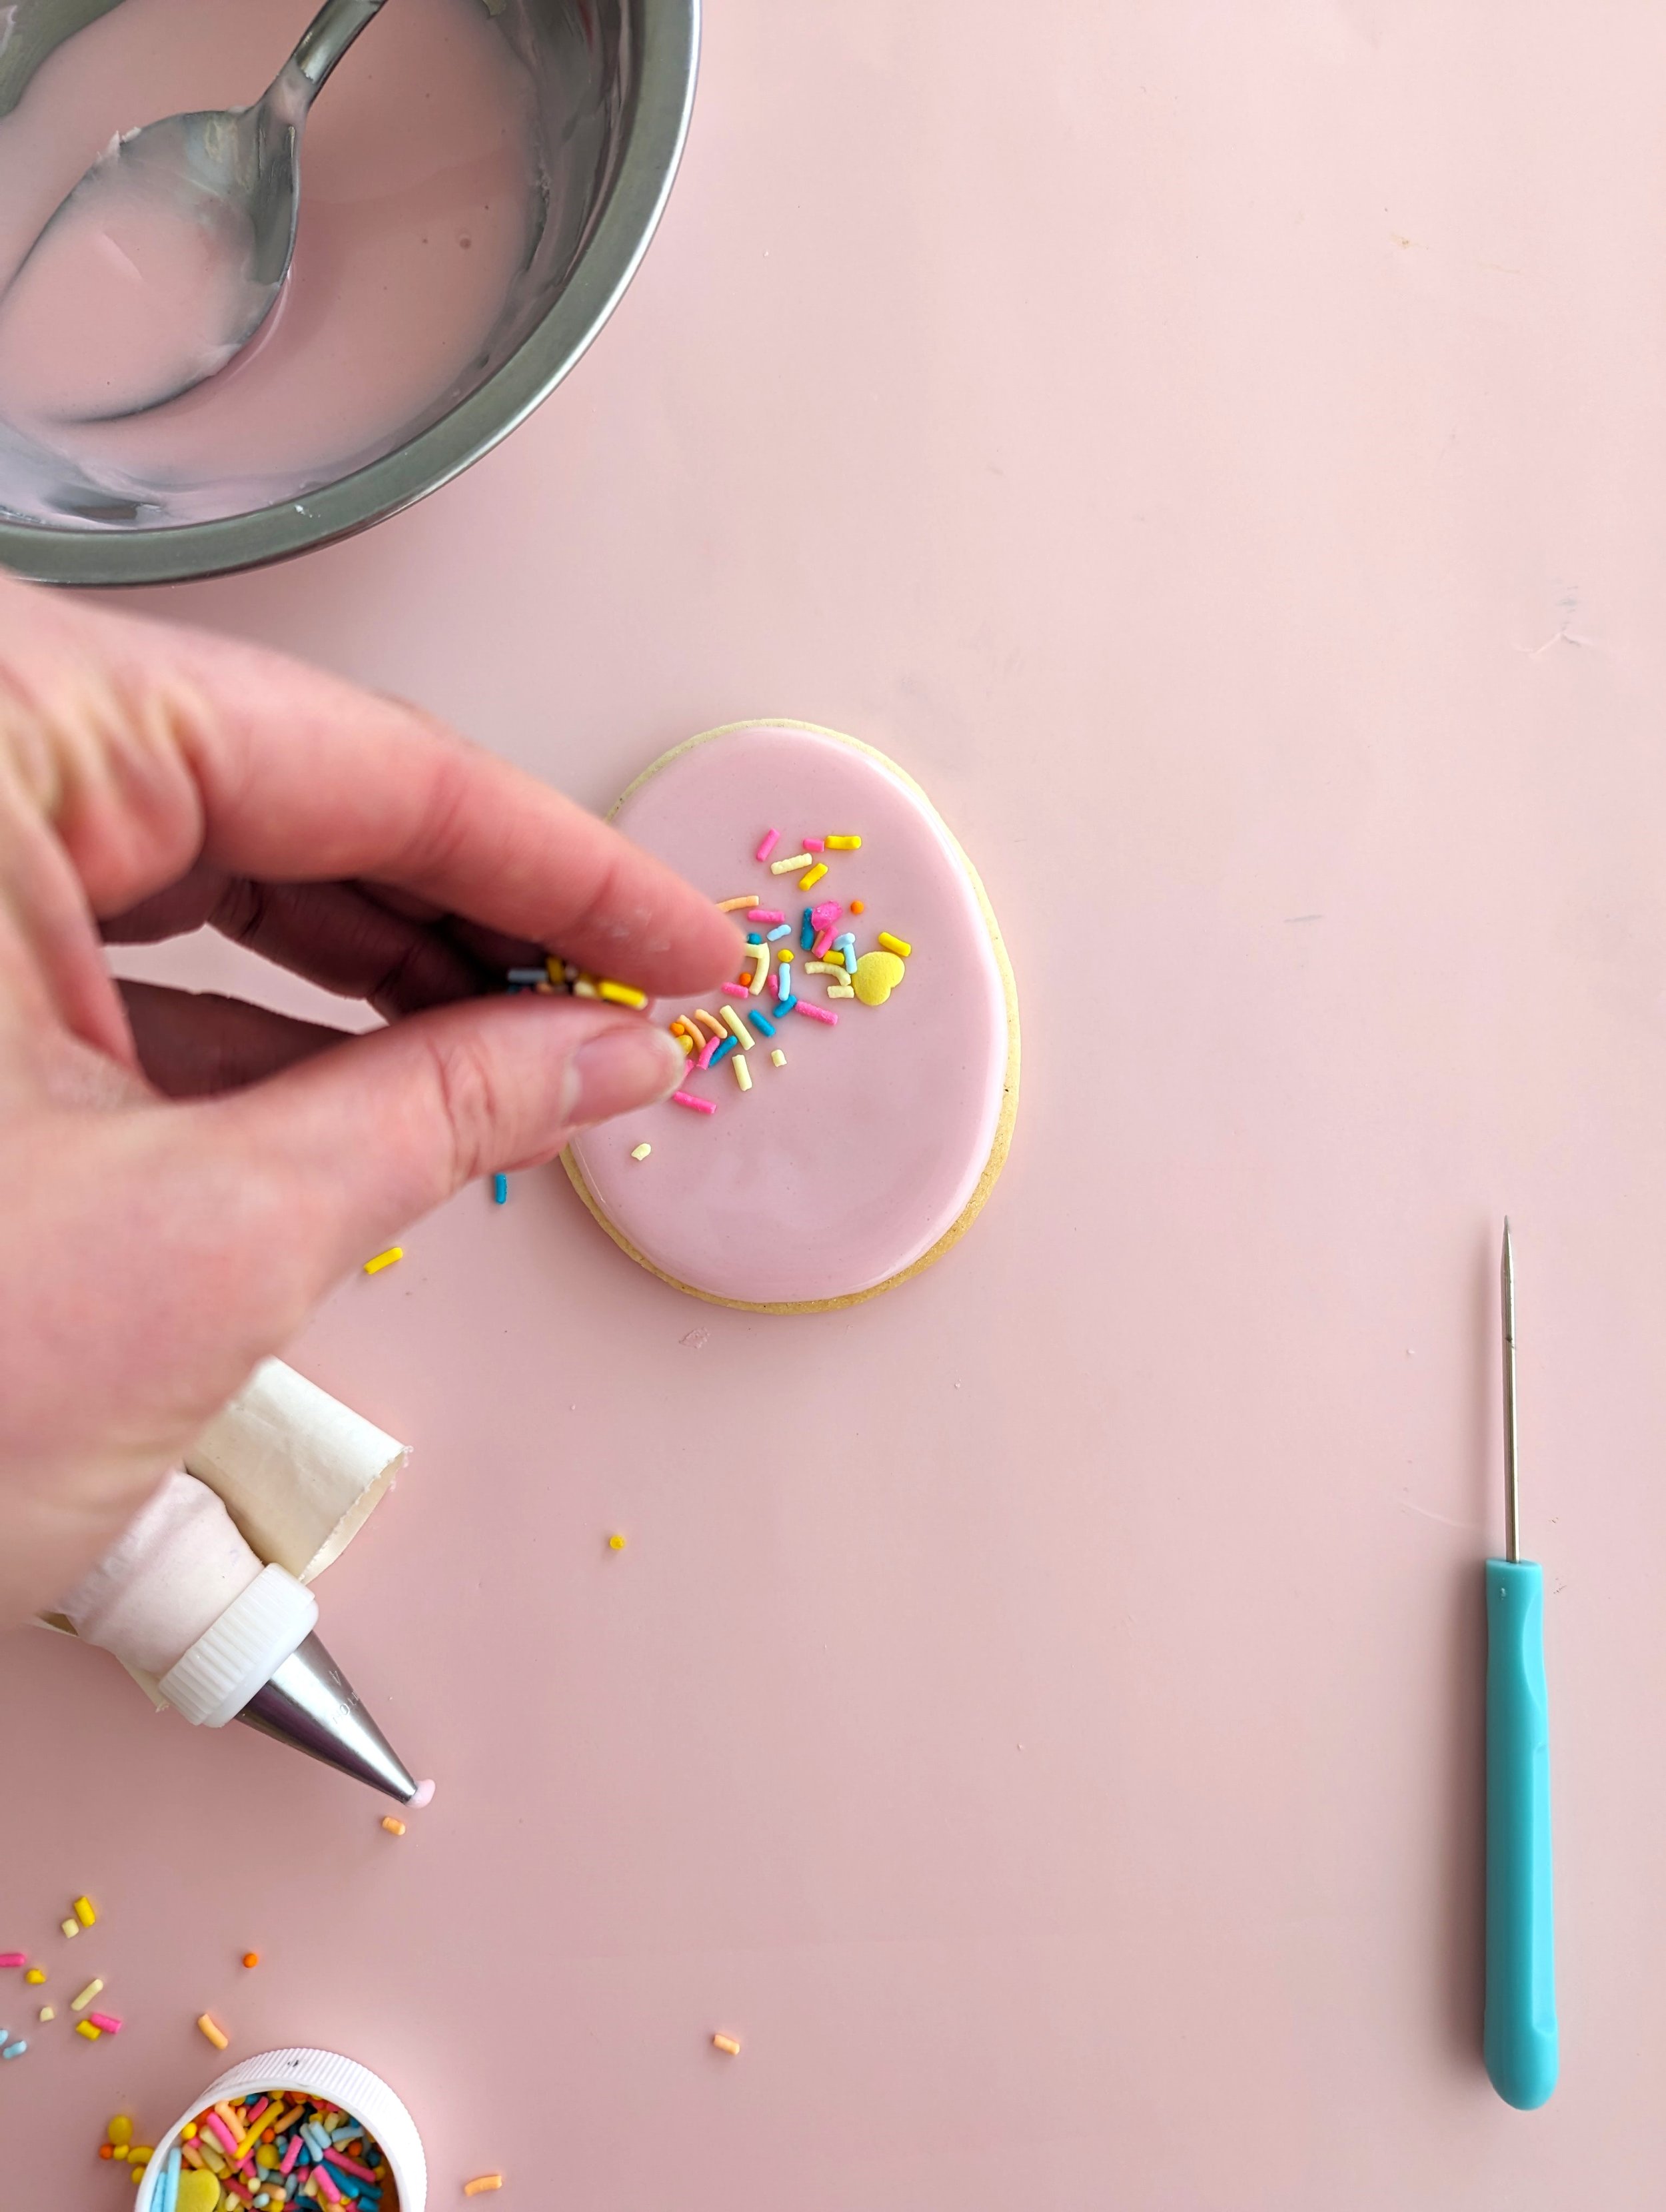
Now, grab your sprinkles (quickly, before the icing dries!) and sprinkle away. You can be minimalist or maximalist with your sprinkles, it’s totally up to you! I went maximalist.

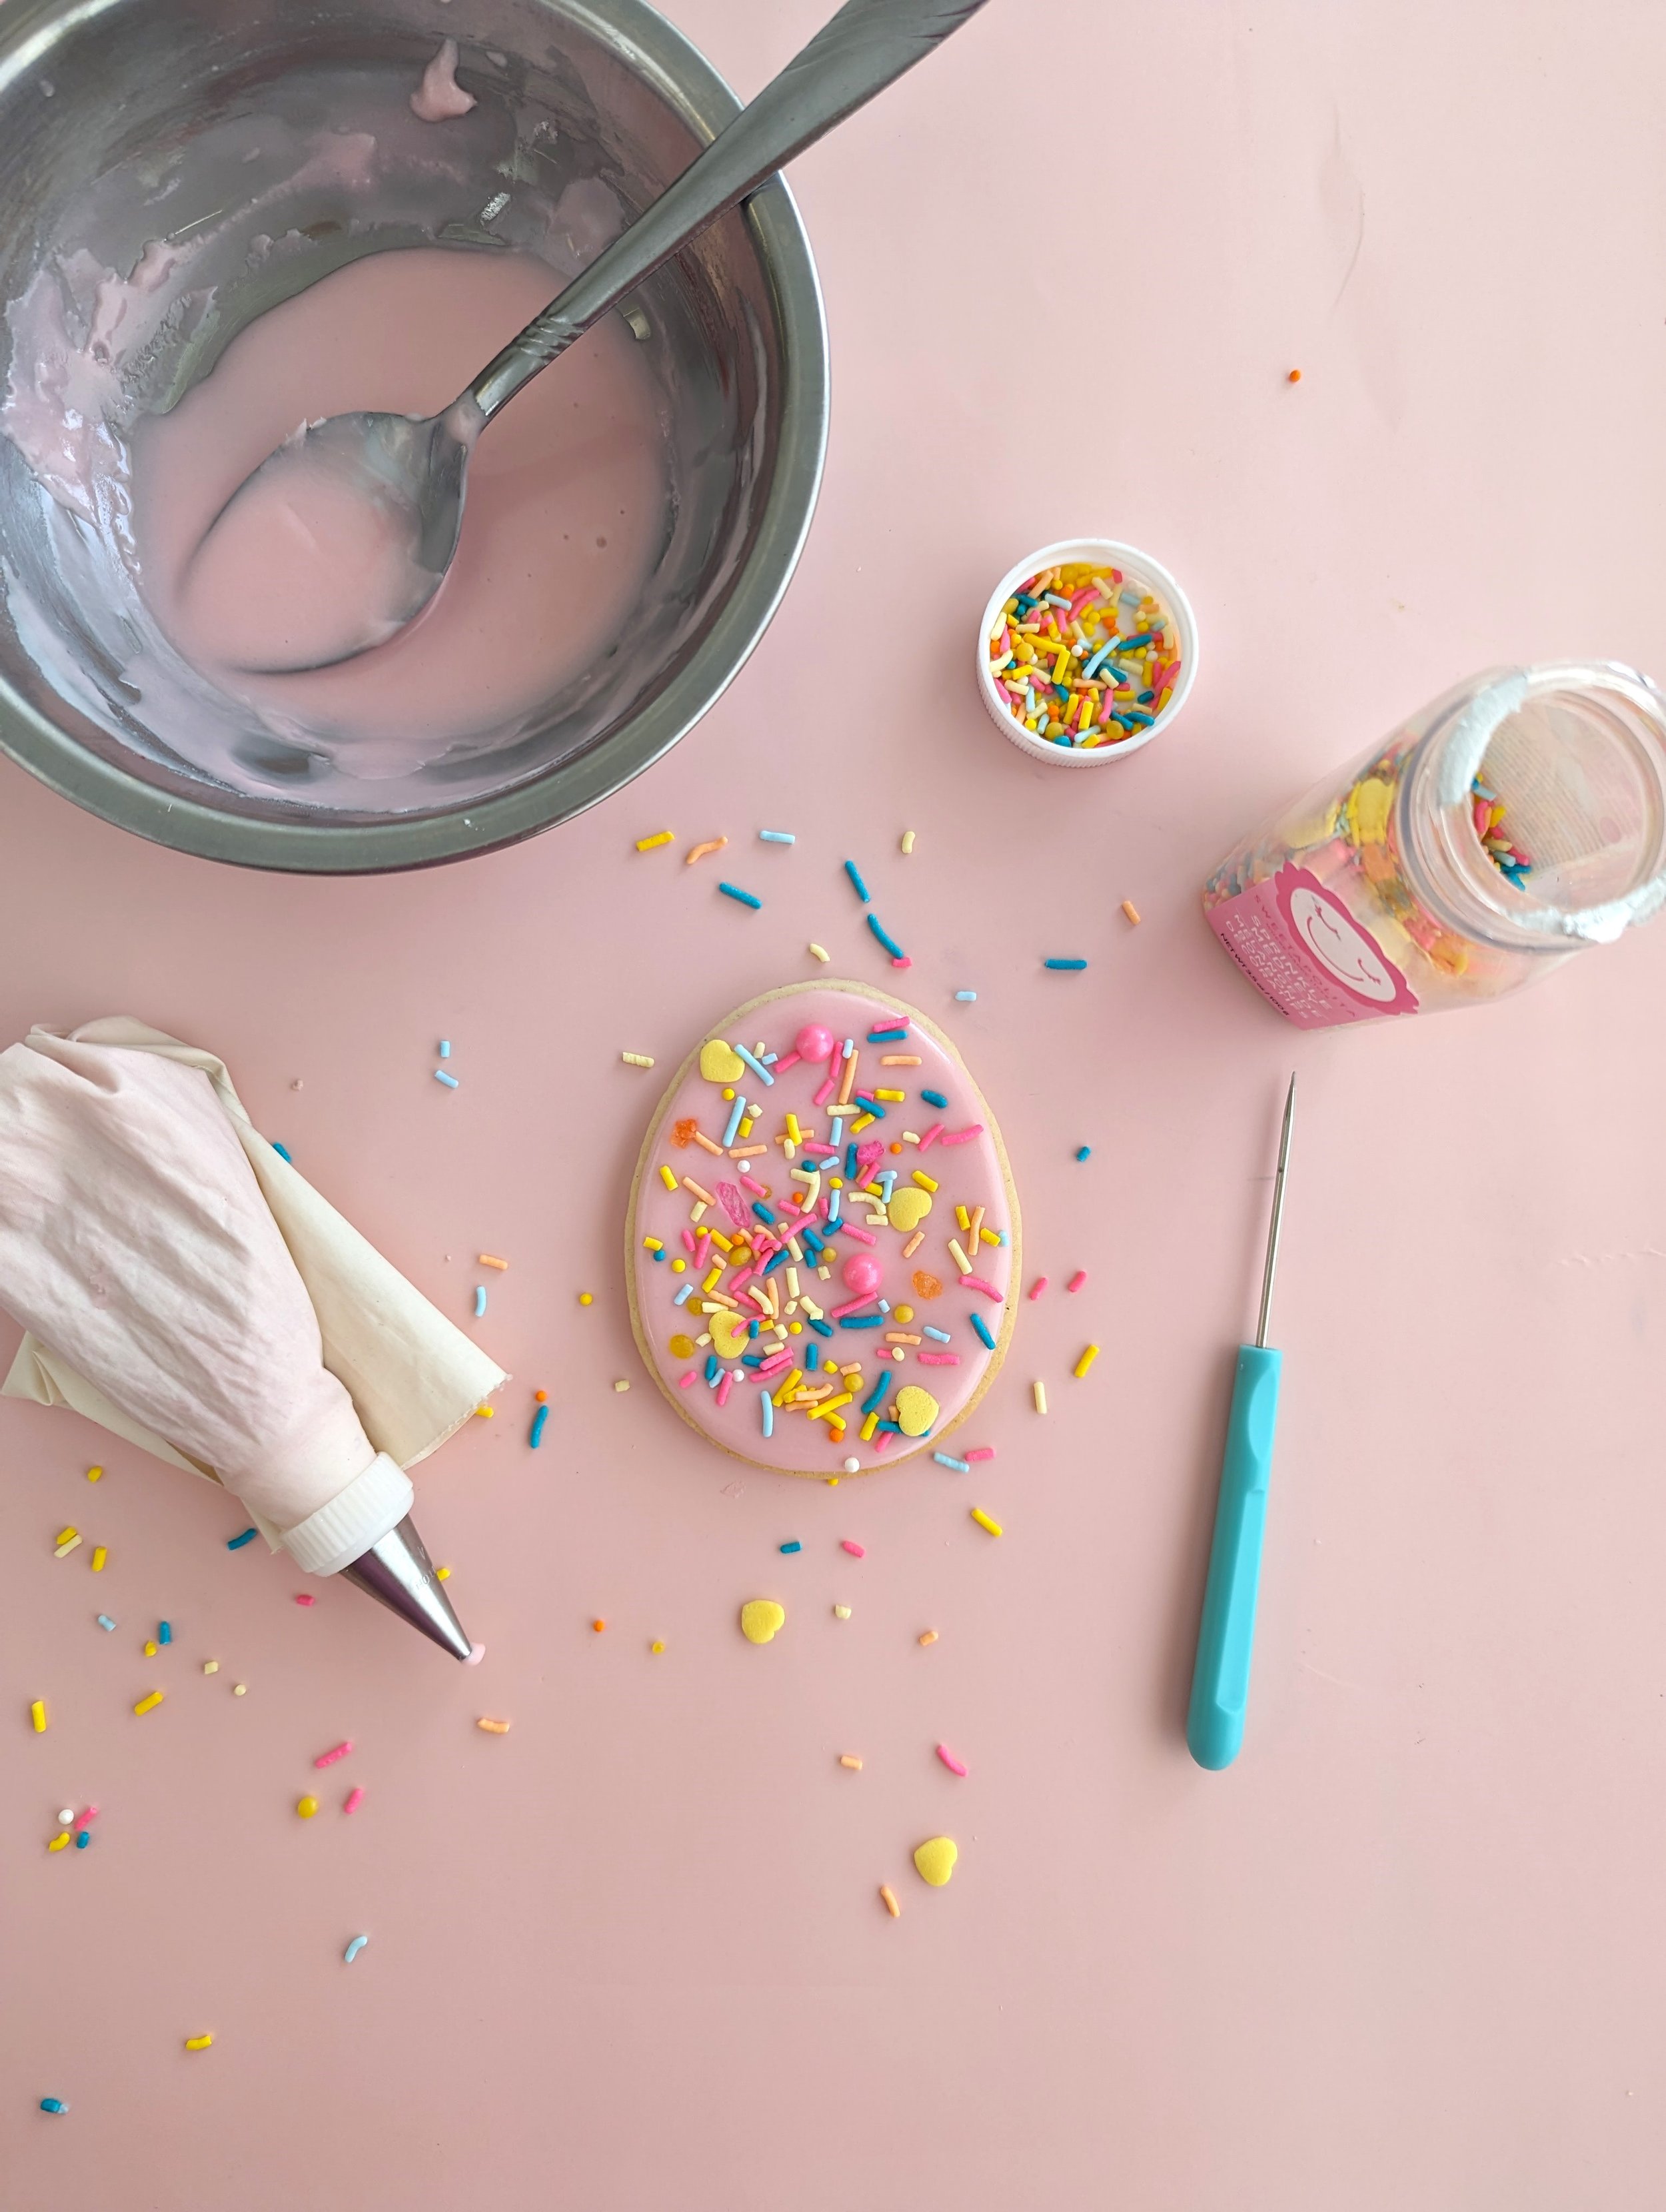
Let your Easter egg cookies dry overnight, then store them in an airtight container at room temperature for up to 3 days, or in the freezer for up to 3 months. (Note: depending on the sprinkle brand you use, your sprinkles might bleed colour a bit after coming out of the freezer if you decide to freeze your cookies)
Voila! Now go show off your cheerfully sprinkled Easter egg cookies to all your family and friends!
Technique #3: Dipped Marbled Easter Egg Cookies

For this technique, we don’t need a piping bag at all!
Get a couple spoonfuls of white glaze and put them in a bowl that is wider than your cookie.
Thin out your icing with a tiny bit of water (you want it to be a honey consistency - make sure you don’t make it too thin!)
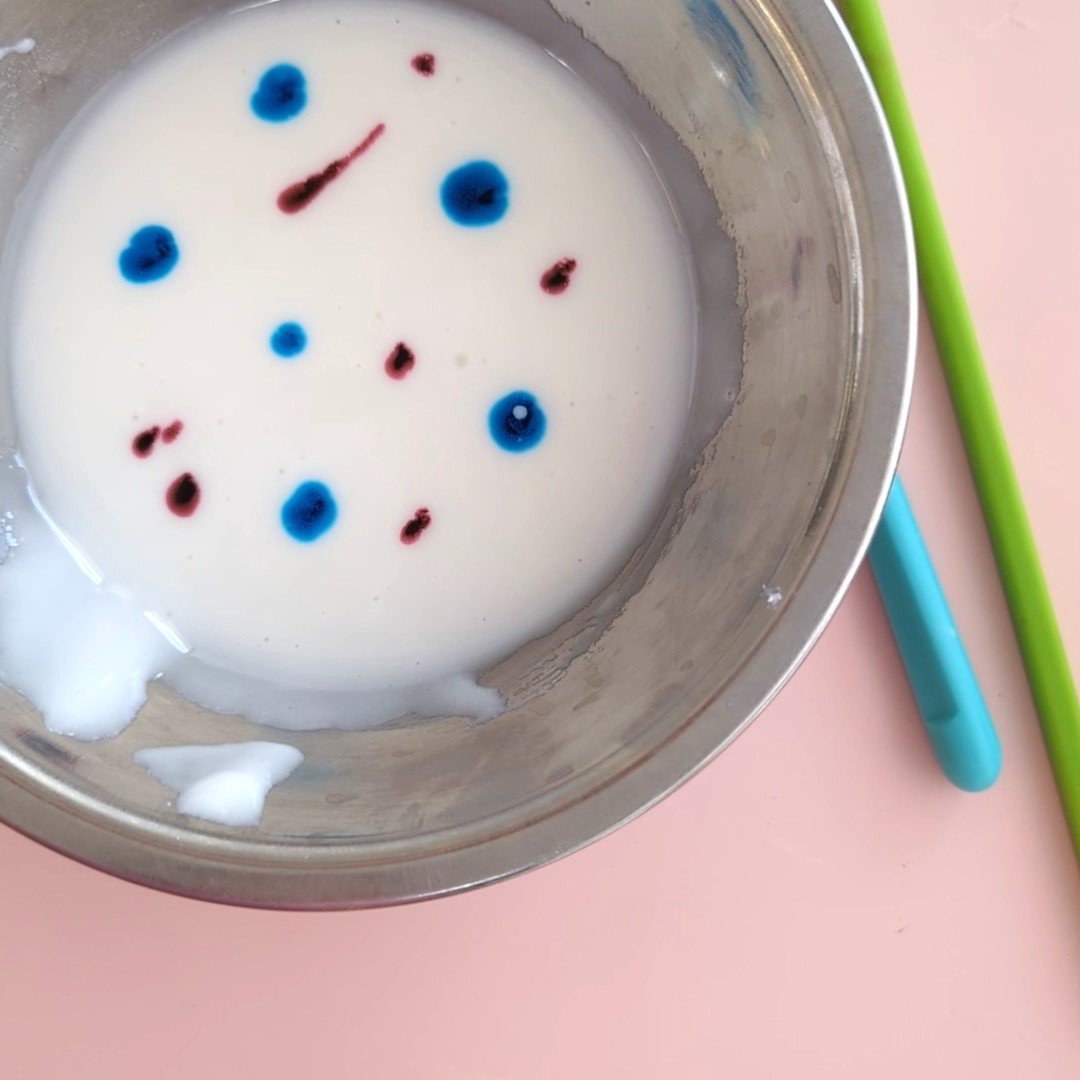
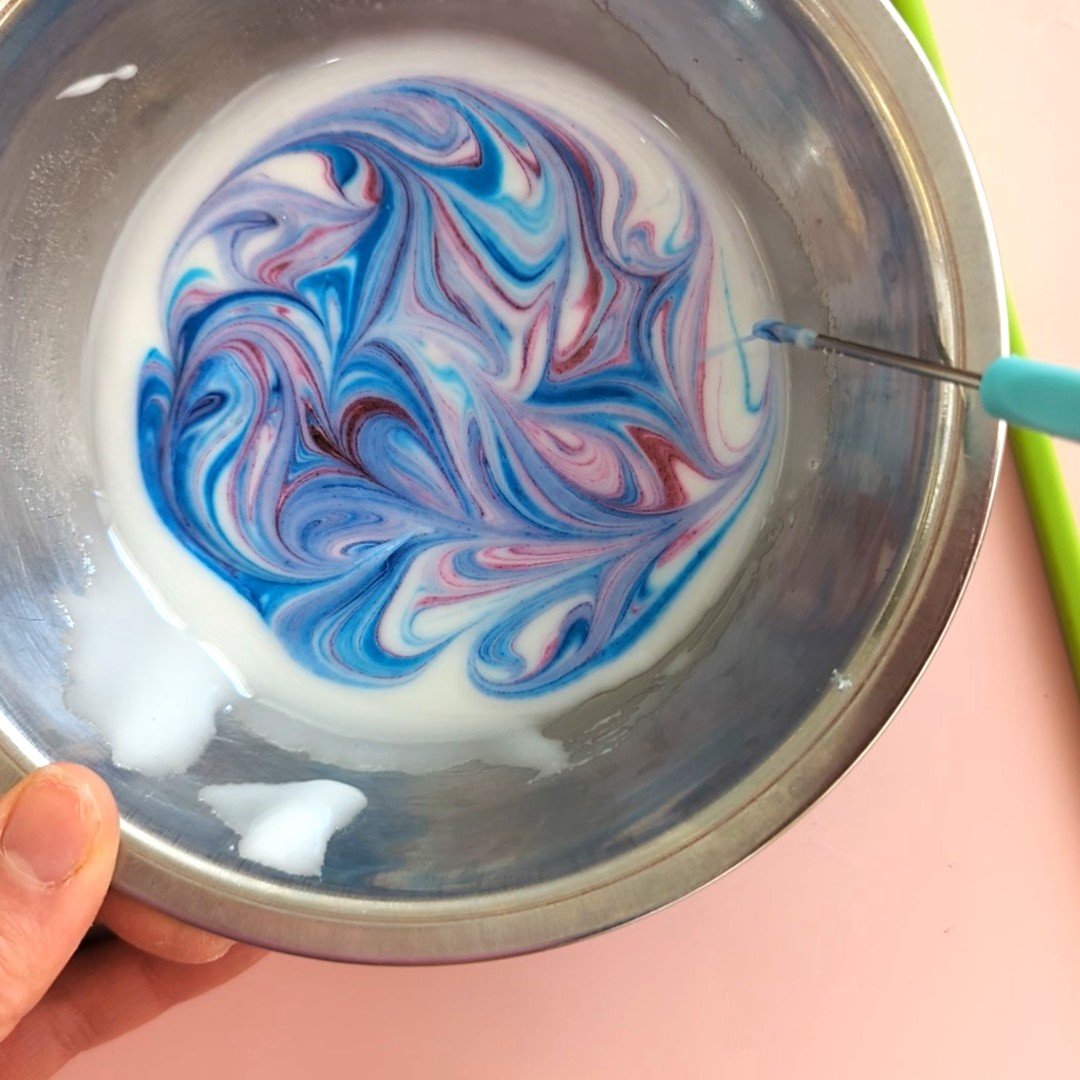
Pick 2-3 different gel food colours. I would suggest avoiding orange and green as those two colours tend to muddy up your other colours. Get some of one colour on the end of a chopstick or toothpick and make a few dots on top of your icing. Don’t go crazy - 4-6 dots of each colour, max! Now, repeat with the rest of your colours, then take your scribe tool or a toothpick and swirl the colours around until you get a marbled effect.
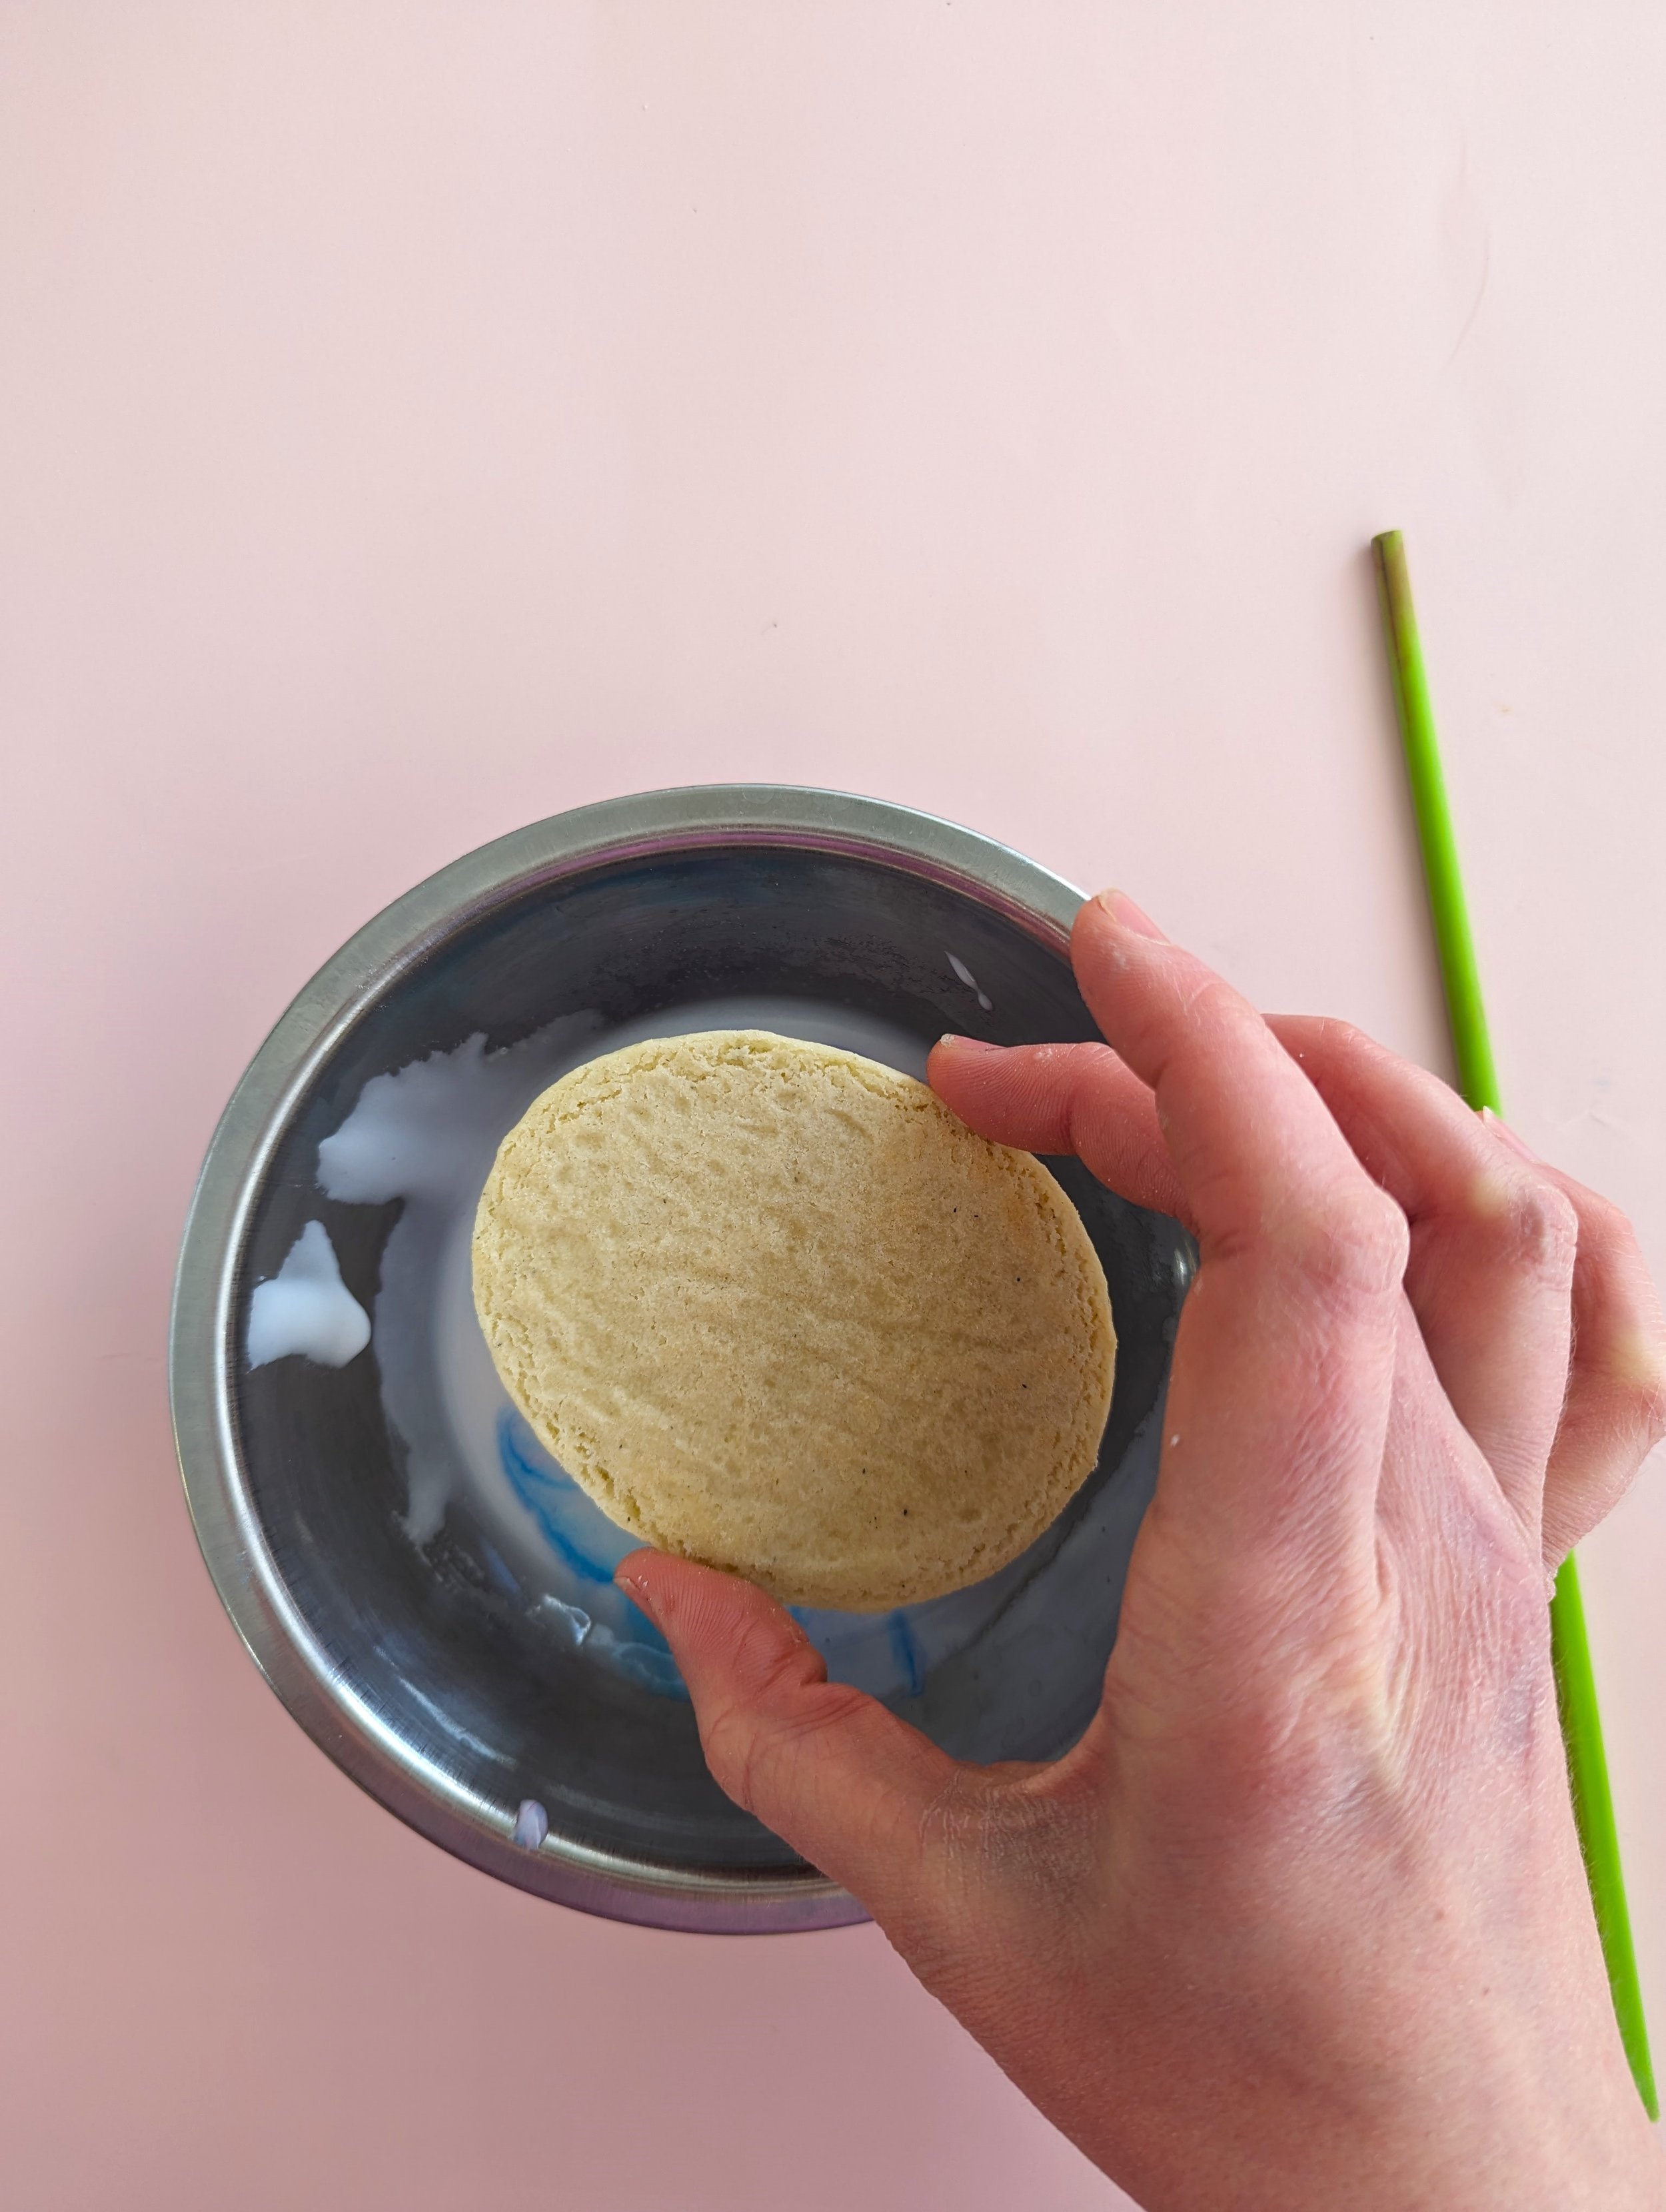
Now, take one of your Easter egg cookies and turn it upside down. Drop it gently into the bowl of icing, then pick it up, trying not to get too much icing on your fingertips. Gently shake off the excess icing, then flip your cookie right side up and use a scribe tool or a toothpick to poke out any air bubbles. You can also move around the icing a bit with your scribe or toothpick if you have any spots where the icing didn’t stick.
Add more colour to your icing after every 3-4 cookies.
Troubleshooting:
-If your icing isn’t sticking or your cookie breaks when trying to remove it from the icing, your icing might be too thick. Get a new bowl of glaze and make it a little thinner.
-If your icing is running off the edges of your cookies, it might be too thin, or you are not shaking enough of it off.
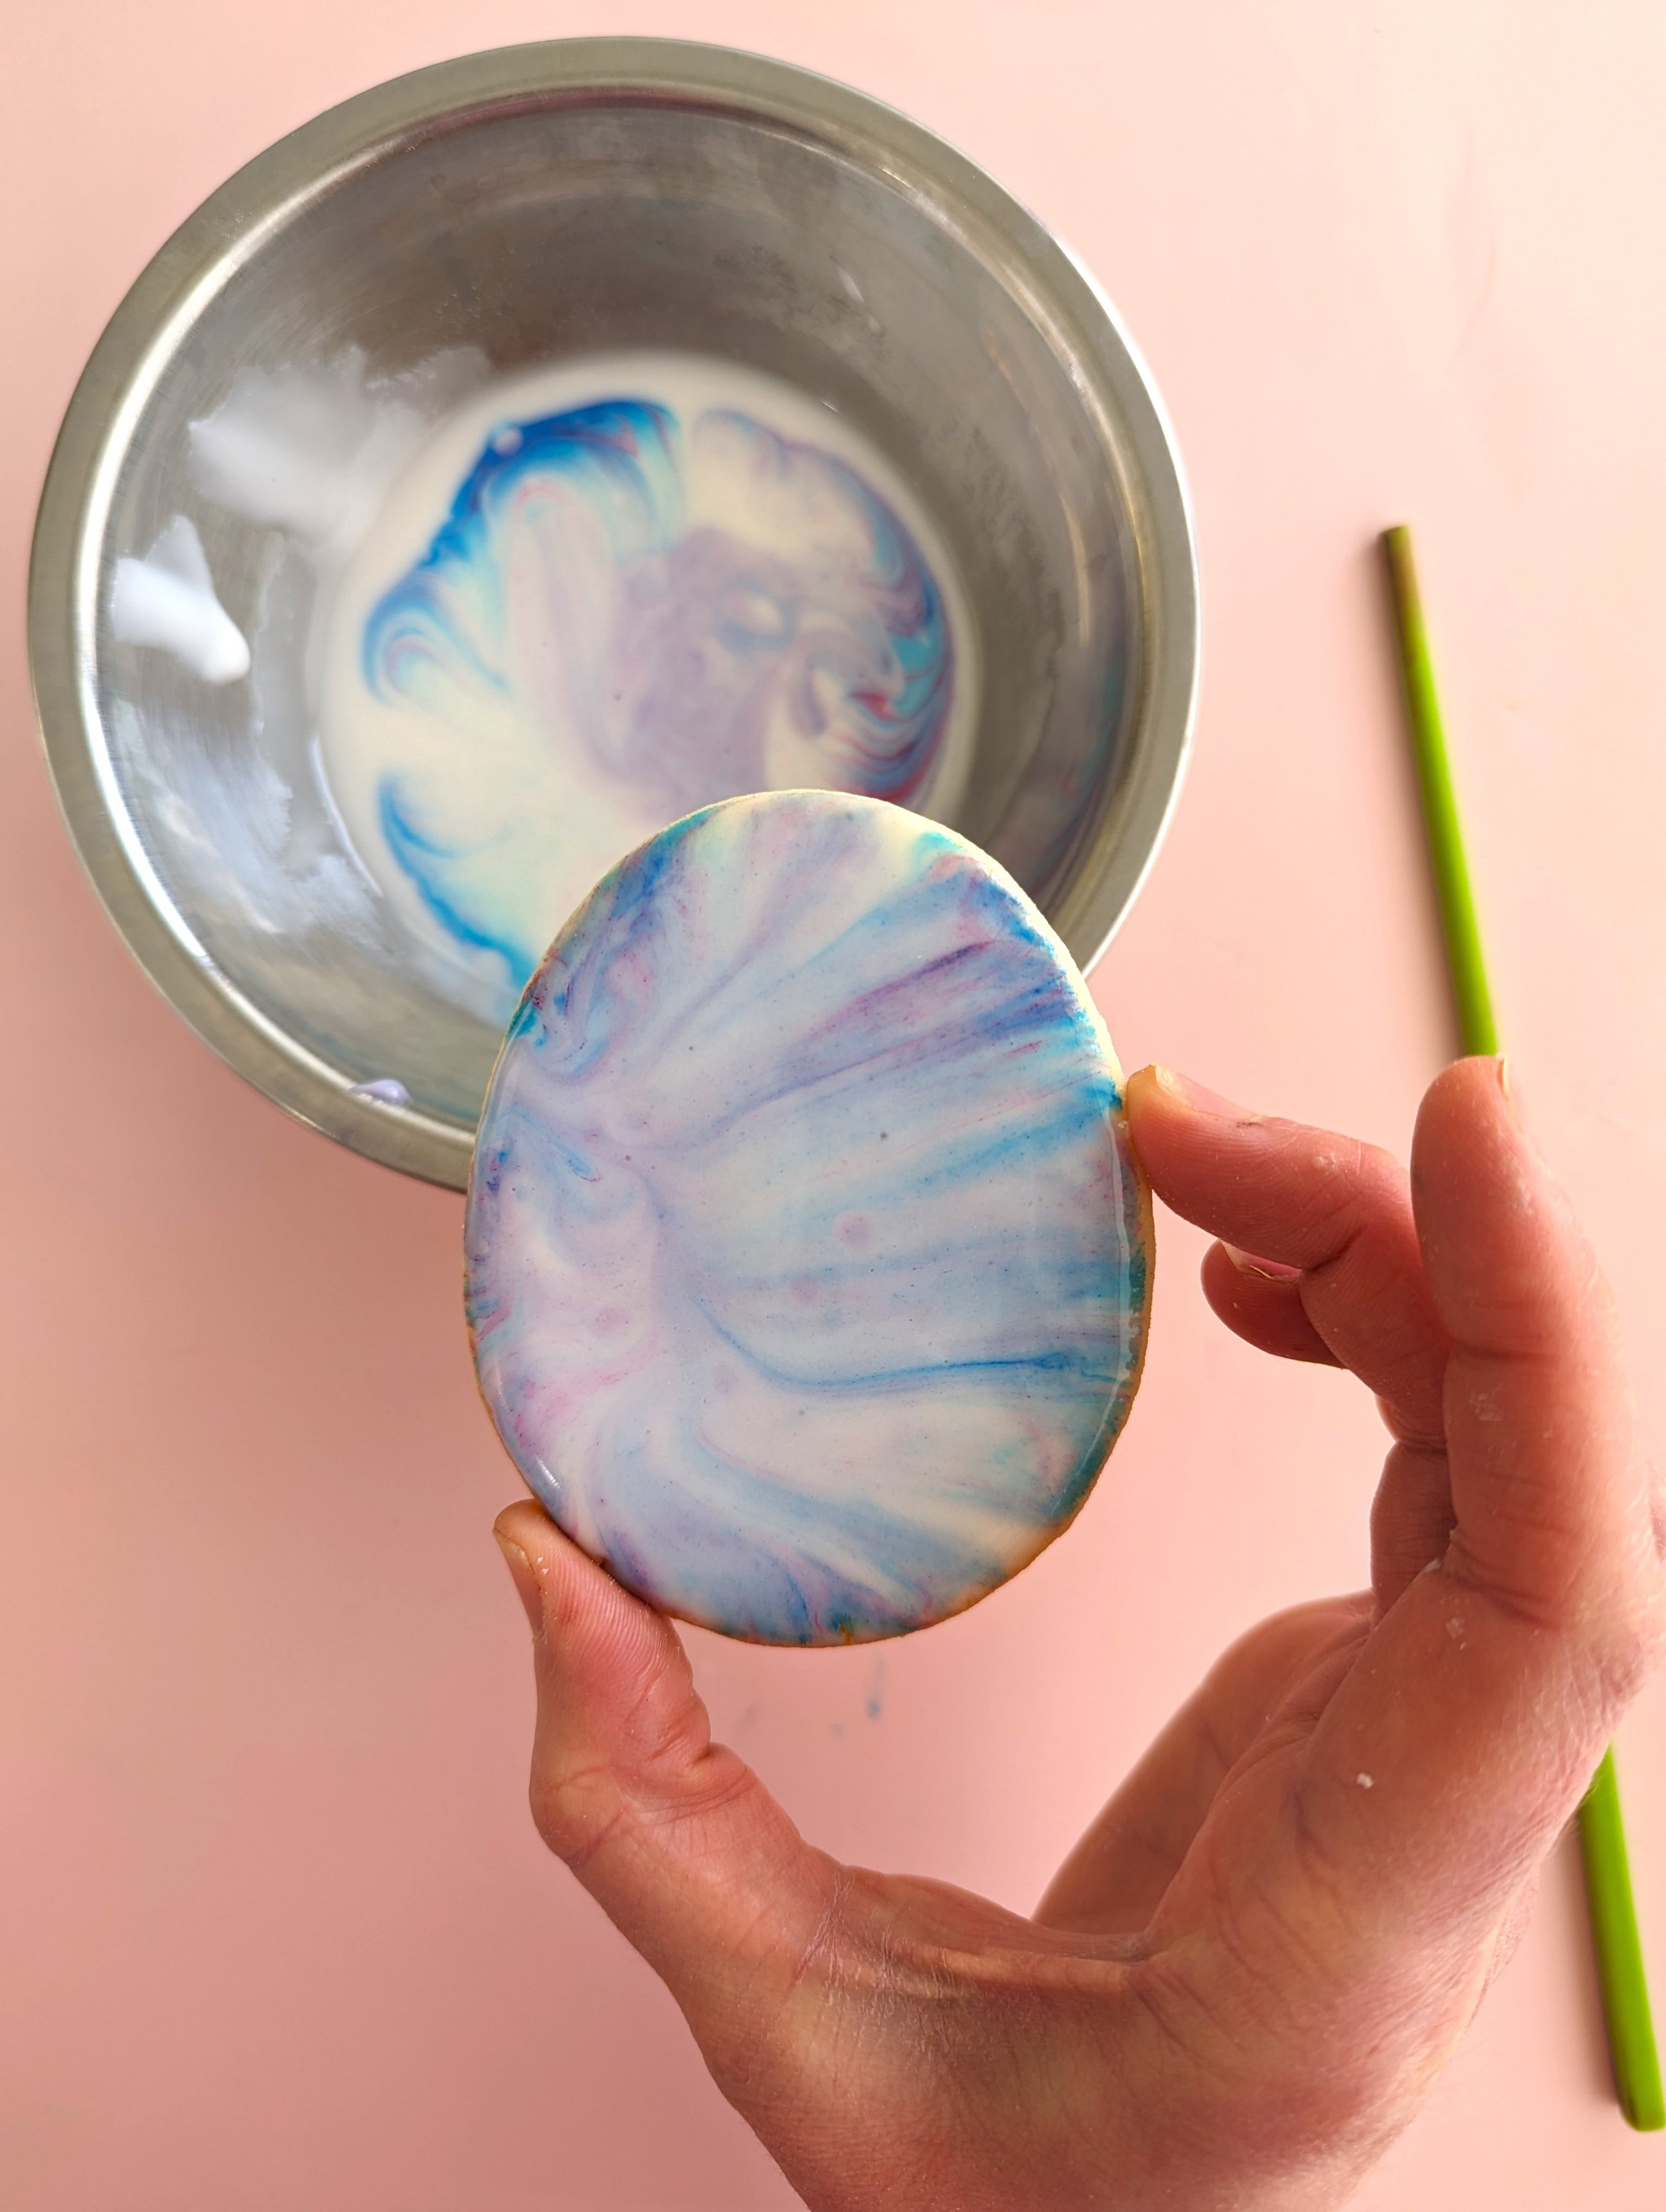
That’s it! This is probably the easiest technique of the 3 because it doesn’t even involve a piping bag.
Let me know how your cookies turn out! I would love to see some photos.